scrapy爬取图片
scrapy 爬取图片
环境准备
- python3.10
- scrapy pillow
- pycharm
简要介绍scrapy
-
Scrapy 是一个开源的 Python 爬虫框架,专为爬取网页数据和进行 Web 抓取而设计。它的主要特点包括:
-
高效的抓取性能:Scrapy 采用了异步机制,能够高效地进行大规模的网页抓取。
-
灵活的数据处理:它支持将抓取的数据导出为多种格式,如 JSON、CSV 和 XML。
-
强大的选择器:Scrapy 提供了基于 XPath 和 CSS 选择器的功能,方便用户从网页中提取数据。
-
爬虫管理:Scrapy 允许用户定义爬虫的行为(如请求的间隔、错误处理、代理设置等),并支持管理多个爬虫项目。
-
扩展性:Scrapy 支持插件,可以通过中间件扩展功能,如处理请求、响应等。
-
内置去重功能:避免重复抓取同一个网页,提高抓取效率。
Scrapy 适用于构建复杂的 Web 爬虫系统,尤其适用于大规模数据抓取和采集任务。
scrapy爬取图片数据
目标网站还是之前一篇文章中提到的药品网站
点击查看
目标:
-
将图片下载到本地

-
将详情页面的药品全称作为图片的名称

提示:
1.本文不进行其它信息的获取,不然会混淆,对学习scrapy造成困难,只简要介绍爬取思路和示例代码,以便你将来对某个类似网站中的图片进行爬取时能够有一定的思路和技巧
2.对于展示的代码,你可能不完全明白,但是你可以先学会如何用,用熟练了,想进一步钻研的,可以访问scrapy的官方文档 进行学习
接下来,马上开始
首先在你要确保你正确安装了scrapy包和pillow包,尤其是pillow,如果不正确安装你可能在运行的时候调度不了管道,下载不了图片(这个问题曾困扰我俩小时,我甚至还看了好多教程,换版本啦,改配置啦,到最后其实发现就是pillow没装好)
1 安装需要的包
pip install scrapy
pip install pillow
2 创建主文件夹
如果你对命名不感兴趣但是又纠结取什么名字,那我提议起一个scrapy就行了

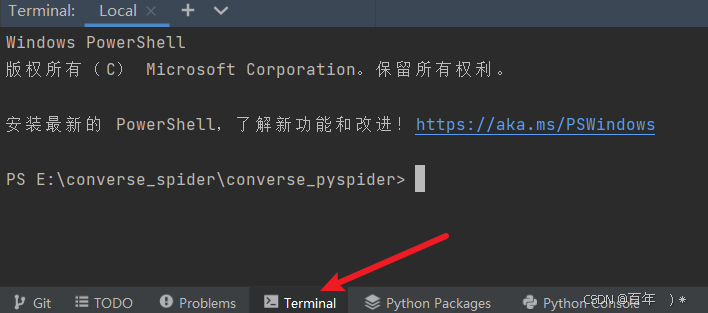
3 接下来,打开终端(Terminal)

然后利用dos命令切换到刚才我们创建的文件中 ,注意,只需要输入cd 然后按 tab键补全(当然,要按照我的步骤来就是这样的)


接下来是很重要的,作为scrapy的初学者你需要知道scrapy是一个封装好的爬虫框架,它为我们写python爬虫文件提供了很大的便利,我们只需要在终端里敲两行命令就可以准备好一切所需的文件,其余的只是我们进行修改而已
再终端中输入如下命令
scrapy startproject imgpro

这行命令运行成功后你会看到上图的提示,先别着急,我们目前最直观的可以看见文件栏里的scrapy文件夹下多了东西

它们就是刚才那行命令创造出来的,接下来我们的工作并未结束,我们需要生成spider文件,回到刚才的终端下,输入如下命令
cd .\imgpro\imgpro\spiders\

然后开始输入生成spider的命令
scrapy genspider picpro www.xxx.com

然后你就会发现spider文件夹下多了一个文件

我们主要的数据解析任务就在这里编写 ,点击打开它,我们进行爬虫程序的编写工作
首先你需要将allowed_domains注释掉,还有就是将start_urls换成我们的目标网站的url
https://ypk.39.net/pifu/p1/

修改后是这样的

接下来开始数据解析的工作,我们打开网站链接进行xpath元素定位,注意scrapy "天然"支持xpath
首先我们想要得到的是图片,那就得得到图片的链接

点击复制右边的匹配的数据的第一个图片链接新窗口打开

可以验证我们是正确的,接下来就是定位详情页面的链接了,接着定位

这样得到的是我们想要的详情页面的链接,我们可以点开看看

然后我们要做的是定位到这个详情页面的药品名称

到此为止,我们的基本工作已经结束了
接下来开始编写代码 ,我会复制编写好的完整代码来进行解释,不用看到就觉得做不到,这样不会提升你的爬取技术
首先是picpro.py文件
import scrapy

from ..items import ImgproItem #导入我们改写的items.py文件中的ImgproItem


class PicproSpider(scrapy.Spider):
    name = "picpro"
    # allowed_domains = ["www.xxx.com"]
    start_urls = ["https://ypk.39.net/pifu/p1/"]
    model_url = "https://ypk.39.net/pifu/p%d/" #设置模板链接,方便我们访问多页
    page_number = 2

#定义解析详情页的方法
    def detail_parse(self, response):
        meta = response.meta
        item = meta['item']
        title = response.xpath('//div[@class="drug-layout-r-stor"]/h1').extract_first().split('>')[1].split('<')[0]
        # print(title)
        item['title'] = title
        yield item

    def parse(self, response):
        li_lst = response.xpath('//ul[@class="drugs-ul"]/li')
        for li in li_lst:
            title = li.xpath('./a/@title').extract_first()
            img_src = li.xpath('./a/img/@src').extract_first()
            detail_url = li.xpath('./a/@href').extract_first()
            print(img_src)
            # tips:实例化item对象
            item = ImgproItem()
            item['img_src'] = img_src
            yield scrapy.Request(meta={'item': item}, url=detail_url, callback=self.detail_parse)
        if self.page_number <= 2: #注意:这里只爬取前两页看看效果
            new_url = self.model_url % self.page_number
            self.page_number += 1
            yield scrapy.Request(url=new_url, callback=self.parse)
其次是item.py文件,我们需要对想要获得的图片链接以及药品的详情页标题
# Define here the models for your scraped items
#
# See documentation in:
# https://docs.scrapy.org/en/latest/topics/items.html

import scrapy


class ImgproItem(scrapy.Item):
    # define the fields for your item here like:
    # name = scrapy.Field()
    # pass
    title = scrapy.Field()
    img_src = scrapy.Field()
然后是修改piplines.py文件
# Define your item pipelines here
#
# Don't forget to add your pipeline to the ITEM_PIPELINES setting
# See: https://docs.scrapy.org/en/latest/topics/item-pipeline.html


# useful for handling different item types with a single interface
import scrapy
from itemadapter import ItemAdapter

from scrapy.pipelines.images import ImagesPipeline
class ImgproPipeline(ImagesPipeline):

    def get_media_requests(
        self, item, info
    ):
        img_src = item['img_src']
        # important:请求传参,将item中的图片名称传递给file_path
        # important:meta会将自身传递给file_path
        yield scrapy.Request(url=img_src,meta={'title':item['title']}) #tips:用的还是请求传参
    def file_path(
        self,
        request,
        response = None,
        info = None,
        *,
        item= None,
    ):
        # tips:返回图片的名称
        # important:接收请求传参过来的数据
        title = request.meta['title']+'.jpg'
        print(f'{title}保存成功')
        return title
    def item_completed(
        self, results, item, info
    ):
        return item
重要的还有改写settings.py文件
# Scrapy settings for imgpro project
#
# For simplicity, this file contains only settings considered important or
# commonly used. You can find more settings consulting the documentation:
#
#     https://docs.scrapy.org/en/latest/topics/settings.html
#     https://docs.scrapy.org/en/latest/topics/downloader-middleware.html
#     https://docs.scrapy.org/en/latest/topics/spider-middleware.html

BOT_NAME = "imgpro"

SPIDER_MODULES = ["imgpro.spiders"]
NEWSPIDER_MODULE = "imgpro.spiders"


# Crawl responsibly by identifying yourself (and your website) on the user-agent
#USER_AGENT = "imgpro (+http://www.yourdomain.com)"
USER_AGENT = "Mozilla/5.0 (Windows NT 10.0; Win64; x64) AppleWebKit/537.36 (KHTML, like Gecko) Chrome/131.0.0.0 Safari/537.36"

# Obey robots.txt rules
ROBOTSTXT_OBEY = False
LOG_LEVEL = 'ERROR'

# important:新增图片的保存路径配置
IMAGES_STORE='./drugs'
# Configure maximum concurrent requests performed by Scrapy (default: 16)
#CONCURRENT_REQUESTS = 32

# Configure a delay for requests for the same website (default: 0)
# See https://docs.scrapy.org/en/latest/topics/settings.html#download-delay
# See also autothrottle settings and docs
#DOWNLOAD_DELAY = 3
# The download delay setting will honor only one of:
#CONCURRENT_REQUESTS_PER_DOMAIN = 16
#CONCURRENT_REQUESTS_PER_IP = 16

# Disable cookies (enabled by default)
#COOKIES_ENABLED = False

# Disable Telnet Console (enabled by default)
#TELNETCONSOLE_ENABLED = False

# Override the default request headers:
#DEFAULT_REQUEST_HEADERS = {
#    "Accept": "text/html,application/xhtml+xml,application/xml;q=0.9,*/*;q=0.8",
#    "Accept-Language": "en",
#}

# Enable or disable spider middlewares
# See https://docs.scrapy.org/en/latest/topics/spider-middleware.html
#SPIDER_MIDDLEWARES = {
#    "imgpro.middlewares.ImgproSpiderMiddleware": 543,
#}

# Enable or disable downloader middlewares
# See https://docs.scrapy.org/en/latest/topics/downloader-middleware.html
#DOWNLOADER_MIDDLEWARES = {
#    "imgpro.middlewares.ImgproDownloaderMiddleware": 543,
#}

# Enable or disable extensions
# See https://docs.scrapy.org/en/latest/topics/extensions.html
#EXTENSIONS = {
#    "scrapy.extensions.telnet.TelnetConsole": None,
#}

# Configure item pipelines
# See https://docs.scrapy.org/en/latest/topics/item-pipeline.html
ITEM_PIPELINES = {
   "imgpro.pipelines.ImgproPipeline": 300,
}

# Enable and configure the AutoThrottle extension (disabled by default)
# See https://docs.scrapy.org/en/latest/topics/autothrottle.html
#AUTOTHROTTLE_ENABLED = True
# The initial download delay
#AUTOTHROTTLE_START_DELAY = 5
# The maximum download delay to be set in case of high latencies
#AUTOTHROTTLE_MAX_DELAY = 60
# The average number of requests Scrapy should be sending in parallel to
# each remote server
#AUTOTHROTTLE_TARGET_CONCURRENCY = 1.0
# Enable showing throttling stats for every response received:
#AUTOTHROTTLE_DEBUG = False

# Enable and configure HTTP caching (disabled by default)
# See https://docs.scrapy.org/en/latest/topics/downloader-middleware.html#httpcache-middleware-settings
#HTTPCACHE_ENABLED = True
#HTTPCACHE_EXPIRATION_SECS = 0
#HTTPCACHE_DIR = "httpcache"
#HTTPCACHE_IGNORE_HTTP_CODES = []
#HTTPCACHE_STORAGE = "scrapy.extensions.httpcache.FilesystemCacheStorage"

# Set settings whose default value is deprecated to a future-proof value
TWISTED_REACTOR = "twisted.internet.asyncioreactor.AsyncioSelectorReactor"
FEED_EXPORT_ENCODING = "utf-8"
以上的都结束后我们便可以开始,你直接复制也是可以的
回到终端下,输入
scrapy crawl imgpro

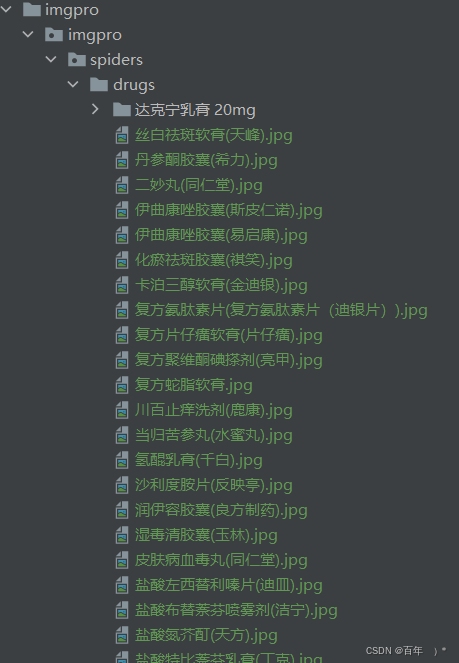
接下来等程序跑完,我们就可以看到多出来了我们定义的保存路径以及图片

随便点开几个看看,发现都是成功的

scrapy 爬取图片的大致流程就是如此,其天然支持xpath,且作为一个框架极大简化了爬虫流程,并且其本质是多线程的,爬取速度非常之快,它可以做的不至于此,本案例只是作为其爬取图片的演示,希望能对你学习有所帮助。

原文地址:https://blog.csdn.net/weixin_45938063/article/details/145066481
免责声明:本站文章内容转载自网络资源,如本站内容侵犯了原著者的合法权益,可联系本站删除。更多内容请关注自学内容网(zxcms.com)!
