微信小程序版小米商城的搭建流程详解!
很多初学微信小程序语法的同学,可能不知道如何布局和搭建一个项目,下面我将讲解初学者如何搭建项目和注意事项。
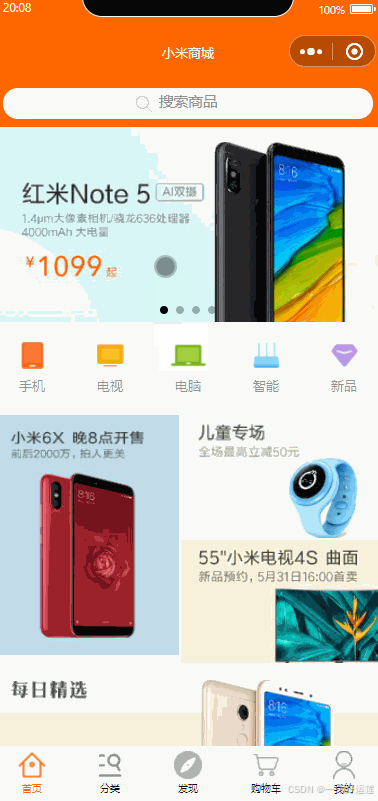
一、 app.json的配置
{
  "pages": [
    "pages/index/index",
    "pages/classification/classification",
    "pages/find/find",
    "pages/shoppingcart/shoppingcart",
    "pages/mine/mine"
  ],
  "window": {
    "navigationBarTextStyle": "black",
    "navigationBarTitleText": "心理健康服务平台",
    "navigationBarBackgroundColor": "#ffffff",
    "homeButton": true,
    "navigationStyle": "default",
    "backgroundColor": "#999999",
    "backgroundTextStyle": "dark",
    "backgroundColorTop": "#f1f1f1"
  },
  "style": "v2",
  "sitemapLocation": "sitemap.json",
  "lazyCodeLoading": "requiredComponents",
  "tabBar": {
    "selectedColor": "#fa6722",
    "borderStyle": "white",
    "list": [
      {
        "pagePath": "pages/index/index",
        "text": "首页",
        "iconPath": "assets/icons/home.png",
        "selectedIconPath": "/assets/icons/home_active.png"
      },
      {
        "pagePath": "pages/classification/classification",
        "text": "分类",
        "iconPath": "assets/icons/category.png",
        "selectedIconPath": "assets/icons/category_active.png"
      },
      {
        "pagePath": "pages/find/find",
        "text": "发现",
        "iconPath": "assets/icons/discovery.png",
        "selectedIconPath": "assets/icons/discovery_active.png"
      },
      {
        "pagePath": "pages/shoppingcart/shoppingcart",
        "text": "购物车",
        "iconPath": "assets/icons/cart.png",
        "selectedIconPath": "assets/icons/cart_active.png"
      },
      {
        "pagePath": "pages/mine/mine",
        "text": "我的",
        "iconPath": "assets/icons/mine.png",
        "selectedIconPath": "assets/icons/mine_active.png"
      }
    ]
  }
}
1. navigationBarTextStyle
-
作用:设置导航栏文本的颜色。
-
取值:
"black":文本为黑色。"white":文本为白色。
2. navigationBarTitleText
-
作用:设置导航栏的标题文本。
3. navigationBarBackgroundColor
-
作用:设置导航栏的背景颜色。
4. homeButton
-
作用:是否显示系统的“主页”按钮。对于iOS设备,系统会自动显示一个主页按钮。
5. navigationStyle
-
作用:设置导航栏的样式。
-
取值:
"default":使用默认样式。"custom":自定义样式(通过navigation组件进行设置)。
6. backgroundColor
-
作用:设置整个页面的背景颜色。
-
取值:一个十六进制的颜色值。
这里设置为
"#999999",即页面的背景颜色为浅灰色。
7. backgroundTextStyle
-
作用:设置下拉刷新时的背景文本样式。
-
取值:
"light":文本为浅色。"dark":文本为深色。
8. backgroundColorTop
-
作用:设置下拉刷新时顶部背景的颜色。
-
取值:一个十六进制的颜色值。
这里设置为
"#f1f1f1",意味着下拉刷新时,顶部背景的颜色为浅灰色。
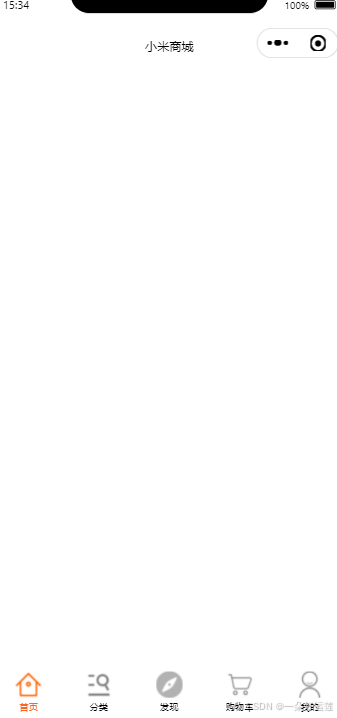
一个微信小程序的框架就完成了
二、引入vant
vant-weapp官方文档: https://vant.pro/vant-weapp/#/home
1、安装
# 通过 npm 安装
npm i @vant/weapp -S --production
2、 修改 app.json
将 app.json 中的 "style": "v2" 去除,小程序的新版基础组件强行加上了许多样式,难以覆盖,不关闭将造成部分组件样式混乱。
3、构建 npm 包
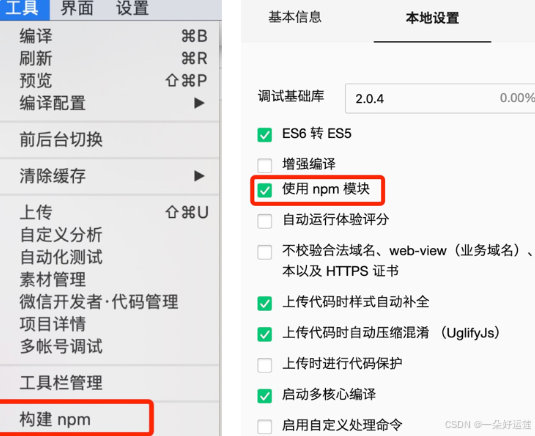
如果这一步失败了请:
npm init4、引入组件
以 Button 组件为例,只需要在app.json或index.json中配置 Button 对应的路径即可。
// 通过 npm 安装
// app.json
"usingComponents": {
  "van-button": "@vant/weapp/button/index"
}
5、使用
<van-button type="primary">按钮</van-button>
三、主页banner携带参数跳转
1、渲染并绑定事件
点击banner图标会跳转到channel页面

<!-- banner -->
<view class="banner">
  <view class="item" wx:for="{{nav}}" wx:key="nav_img" wx:for-index="index">
    <image src="{{item.nav_img}}" bindtap="onImageTap" data-index="{{index}}" mode="" />
    <text>{{item.nav_title}}</text>
  </view>
</view>
wx:for-index="index" 是小程序模板语法中的一种用法,允许在 wx:for 中获取当前循环项的索引。
bindtap="onImageTap" 表示绑定一个点击事件到 onImageTap 函数。
data-index="{{index}}" 将当前项的索引(index)传递到事件处理函数中。
2、接收参数
在channel页面的onLoad函数中:
  // 在channel页面的onLoad函数中
  onLoad: function (options) {
    // 获取传递过来的id
    const index = options.index;
    this.setData({
      activeIndex: index
    })
    console.log('activeIndex:', this.data.activeIndex);
    this.getChannelData(index)
  }
打印结果如下:
![]()
3、分情况渲染页面
手机和电视频道的页面结构:
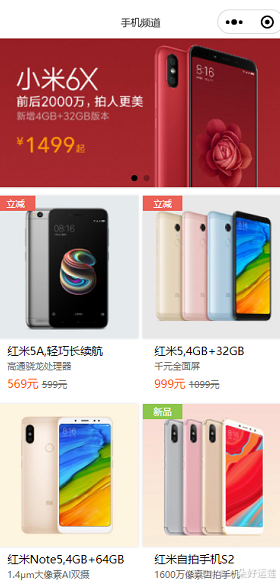
电脑频道的页面结构:
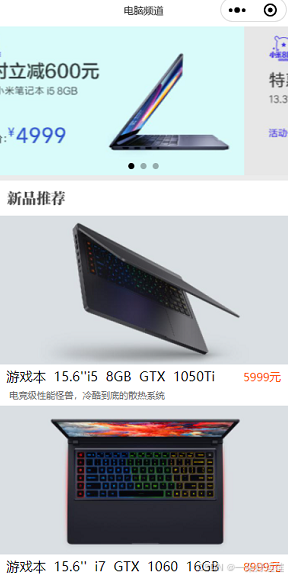
可以看出他们除了轮播区域,其他的部分结构不一样
于是我们可以通过this.data.activeIndex来区分页面,wx:if不同情况不同渲染
<!-- shoping list -->
<view class="shoplist">
  <!-- 手机电视 -->
  <view class="shopping-item" wx:if="{{activeIndex<2}}" wx:for="{{channelData.goods_list}}" wx:key="id" bindtap="onItemClick" data-id="{{item.id}}">
    <image src="{{item.goods_cover}}" mode="aspectFill" />
    <text>{{item.header}}</text>
    <text>{{item.description}}</text>
    <view class="item-text">
      <text>{{item.meta}}</text>
      <text>{{item.discount}}</text>
    </view>
  </view>

  <!-- 电脑 -->
  <view class="title" wx:if="{{activeIndex==2}}">
    <image src="/assets/icons/xin.jpg" mode="" />
  </view>
  <view class="shopping-item-pc" wx:if="{{activeIndex==2}}" wx:for="{{channelData.goods_list}}" bindtap="onItemClick" data-id="{{item.id}}">
    <image src="{{item.goods_cover}}" mode="aspectFill" />
    <view class="pc-text">
      <text>
        {{item.header}}
      </text>
      <text class="orange">
        {{item.meta}}
      </text>
    </view>

    <text class="description">
      {{item.description}}
    </text>
  </view>
</view>
四、点击商品项跳转详情页
给每个shop-item添加了
bindtap="onItemClick" data-id="{{item.id}}"并设置事件,携带了参数id过去:
 onItemClick: function (e) {
    const itemId = e.currentTarget.dataset.id;
    console.log('itemId', itemId);
    wx.navigateTo({
      url: `/pages/goodDetail/goodDetail?id=${itemId}`
    });
  },
在goodDetail接收参数:
onLoad: function (options) {
    const {id } = options; // 获取传递的 id
    this.getItemDetail(id); // 根据 id 获取商品详情
    this.setData({
      currentImage: this.data.currentItem.intro_img
    });
  },
原文地址:https://blog.csdn.net/xiaolouuuu/article/details/144183310
免责声明:本站文章内容转载自网络资源,如本站内容侵犯了原著者的合法权益,可联系本站删除。更多内容请关注自学内容网(zxcms.com)!
