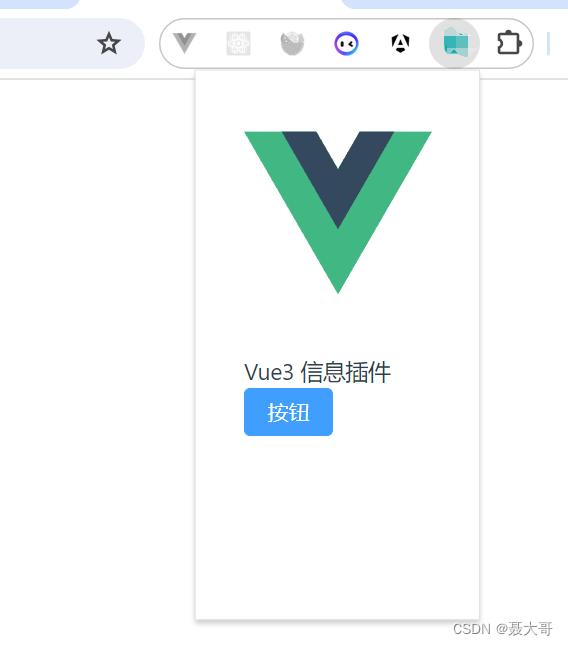
Vite项目构建chrome extension,实现多入口
本项目使用Vite5 + Vue3进行构建。
要使用vite工程构建浏览器插件,无非就是要实现popup页面和options页面。这就需要在项目中用到多入口打包(生成多个html文件)。
实现思路:
- 通过配置vite工程,使得项目打包后有两个html文件。
- 同时打包入口打包background.js。
- 在manifest.json文件中配置popup、options、background等内容。
- 将项目中的manifest.json文件打包至dist目录下。
第一步、创建Vue3项目并调整目录结构
npm create vue@latest
通过此命令创建项目,创建后调整项目目录结构,由下图所示:

项目根目录的index.html打包后配置为popup,options.html配置为options。
将manifest.json放在src目录下,当然也可以放在public目录下(打包时vite自动将静态资源打包至dist目录下)。放在src目录下更符合个人的开发模式。
第二步、编写index.html和options.html
由于index.html打包后配置为popup页面,所以应该这样写:
<!DOCTYPE html>
<html lang="en">
  <head>
    <meta charset="UTF-8">
    <link rel="icon" href="/favicon.ico">
    <meta name="viewport" content="width=device-width, initial-scale=1.0">
    <title>Vite App</title>
  </head>
  <body>
    <div id="app"></div>
    <!--    引入popup的入口ts-->
    <script type="module" src="src/popup/main.ts"></script>
  </body>
</html>
同样options.html应引入src/options/main.ts
第三步、编写popup/main.ts和options/main.ts
两者的内容基本相同:
import '../assets/main.css'

import { createApp } from 'vue'
import elementPlus from 'element-plus'
import 'element-plus/dist/index.css'
// popup页面引入Popup组件,options页面引入Options组件
import Popup from './Popup.vue'

const app = createApp(Popup)
app.use(elementPlus)
app.mount('#app')
第四步、编写vite配置文件
此文件主要实现两部分内容,其他实现读者可自行添加。
- 将src目录下的manifest.json打包构建时移到dist目录下。
- 配置多入口文件。
import { fileURLToPath, URL } from 'node:url'

import { defineConfig } from 'vite'
import vue from '@vitejs/plugin-vue'
import { viteStaticCopy } from 'vite-plugin-static-copy'
import { resolve } from 'path'

// https://vitejs.dev/config/
export default defineConfig({
  plugins: [
    vue(),
    viteStaticCopy({
      targets: [
          { src: 'src/*.json', dest: './' },
      ]
    })
  ],
  build: {
    rollupOptions: {
      input: {
        index: resolve(__dirname, 'index.html'),
        options: resolve(__dirname, 'options.html'),
        background: resolve(__dirname, 'src/background.ts'),
      },
      output: {
        entryFileNames: `[name].js`,
      }
    },
    outDir: 'dist',
  },
  resolve: {
    alias: {
      '@': fileURLToPath(new URL('./src', import.meta.url))
    }
  }
})
第五步、编写manifest.json文件
{
  "name": "xxx",
  "version": "1.0",
  "description": "xxx",
  "homepage_url": "https://xxx.com",
  "manifest_version": 3,
  "icons": {
    "16": "logo.png",
    "48": "logo.png",
    "64": "logo.png",
    "128": "logo.png"
  },
  "commands": {
    "reload_extension": {
      "suggested_key": {
        "default": "Ctrl+Shift+K",
        "mac": "Command+Shift+K"
      },
      "global": true,
      "description": "Toggle My Extension"
    }
  },
  "action": {
    "default_icon": "logo.png",
    "default_popup": "index.html"
  },
  "options_page": "options.html",
  "background": {
    "service_worker": "background.js",
    "type": "module"
  },
  "permissions": [
    "management",
    "scripting",
    "notifications",
    "contextMenus",
    "webRequest",
    "storage",
    "tabs",
    "activeTab",
    "nativeMessaging"
  ]
}
通过以上的几个步骤,即可实现浏览器插件使用vue项目开发,同时支持popup页面和options页面,以及background.js。


原文地址:https://blog.csdn.net/weixin_43729943/article/details/139357939
免责声明:本站文章内容转载自网络资源,如本站内容侵犯了原著者的合法权益,可联系本站删除。更多内容请关注自学内容网(zxcms.com)!
