深入理解linux文件系统与日志分析
深入理解linux文件系统与日志分析
linux文件系统:
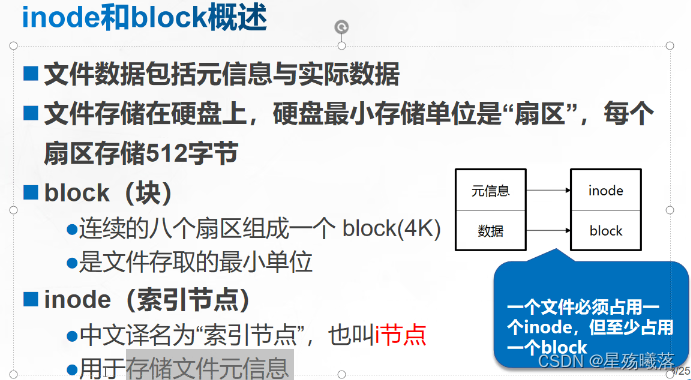
文件是存储在硬盘上的,硬盘上的最小存储单位是扇区,每个扇区的大小是512字节。

inode:元信息(文件的属性 权限,创建者,创建日期等等)
block:块,连续的八个扇区组成一个块,一个块的大小是4k,创建一个文件,最小也要占4k。
操作系统读取硬盘,是一次性读取多个扇区,一个块一个块的读取数据。
创建文件:第一个是实际空间大小的要占,第二个就是元信息。元信息和实际数据都保存在硬盘上。元信息(inode)占128字节或者256字节。
一个文件必须占用一个inode(只要创建文件必须有一个inode号)
至少占用一个block(空文件,也要一个块。)
时间戳:
atime:只要读取文件就会更新这个时间
mtime:修改文件数据,更改文件的属性,都会更新这个时间
ctime:修改文件的权限也会更新这个时间。
inode的内容:

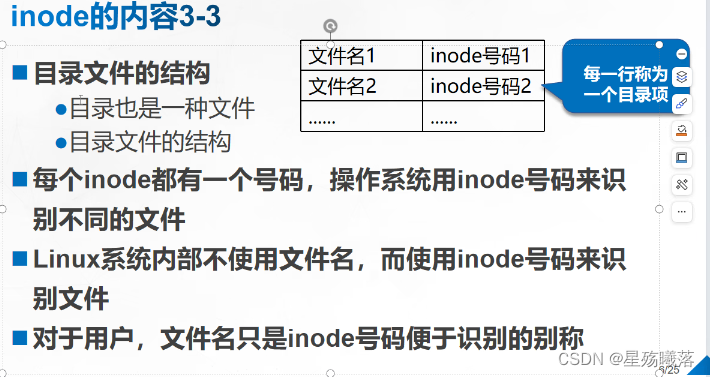
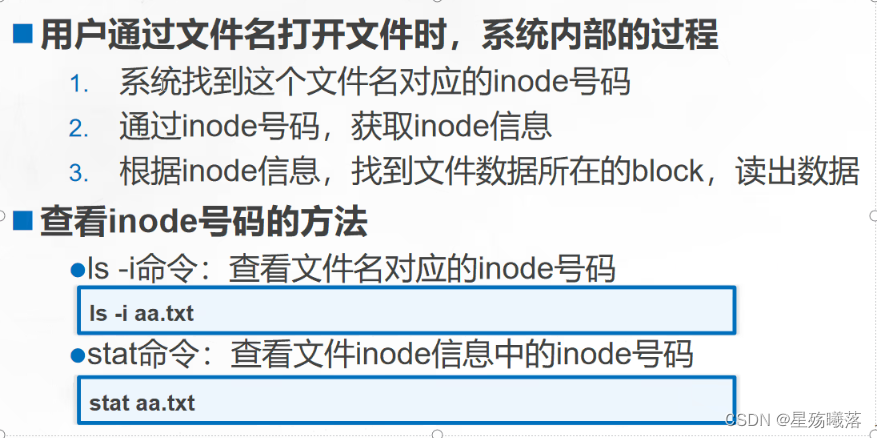
inode号:linux系统都是识别文件的inode号


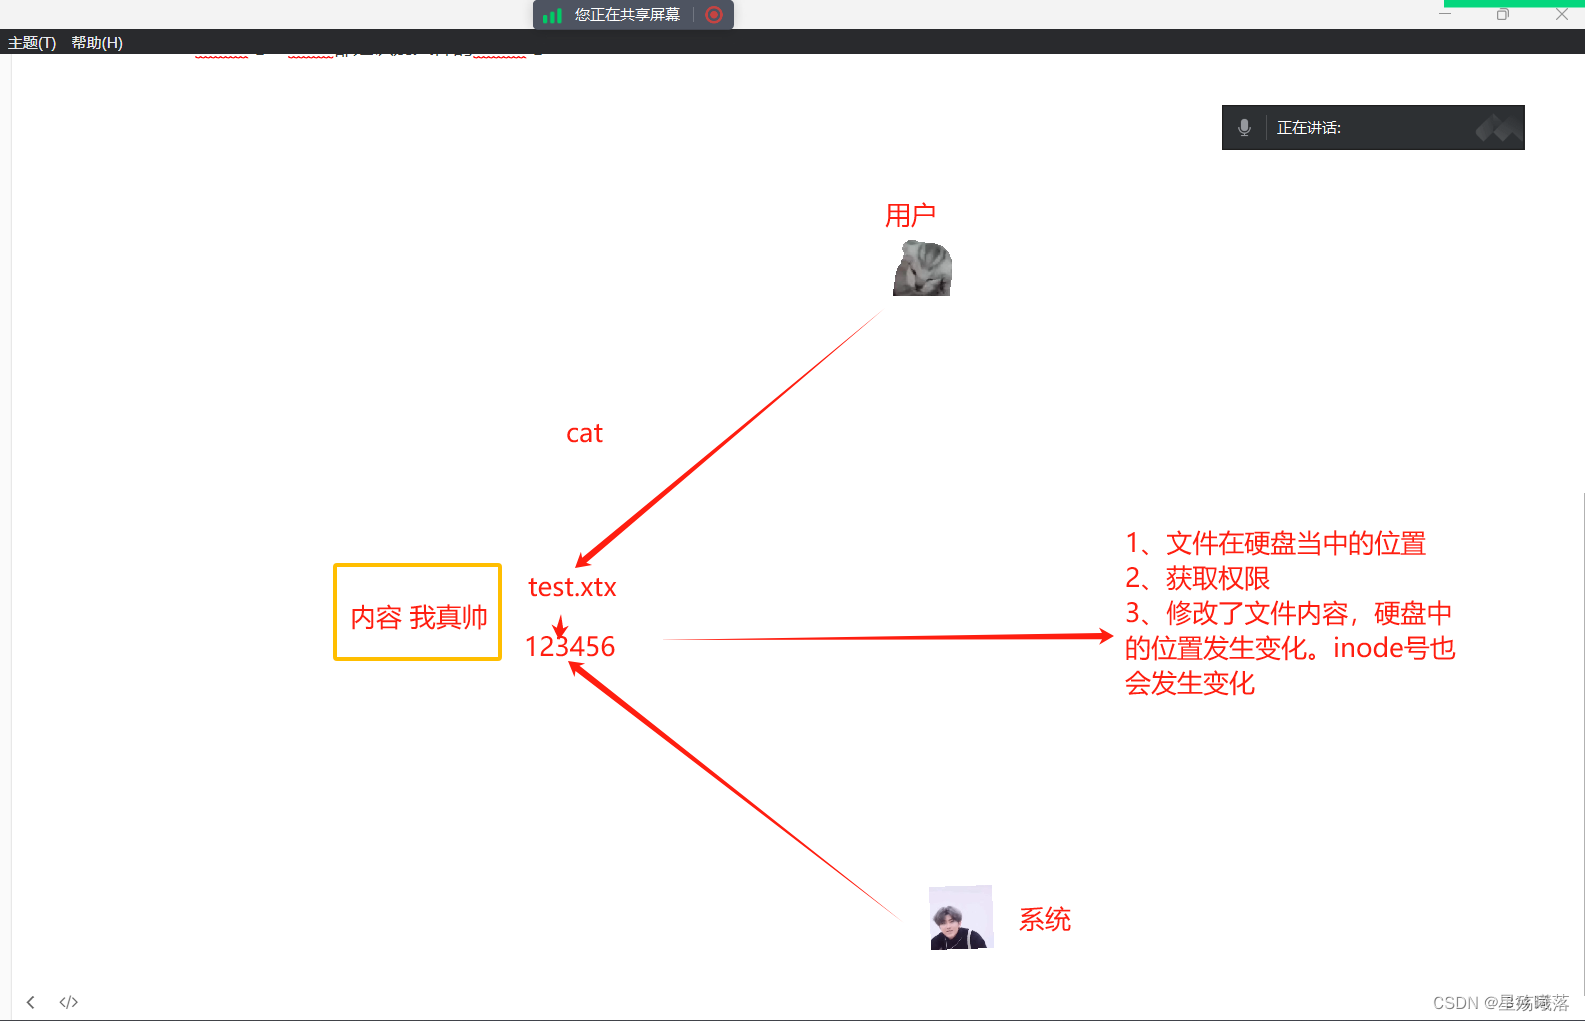
元信息发生了变化,inode号也会随之改变
inode号的总数?
磁盘大小 磁盘越大inode号越多,磁盘越小inode号越少。
inode号和文件名分离,二者只是映射关系,linux系统的特有现象:
1、文件名包含特殊字符,rm可能无法正常删除,可以直接删除inode号
2、移动文件,重命名,inode是不变的
3、一旦开始对文件操作,后续所有的认证和识别都是通过inode来的,不再考虑文件名
4、元信息发生变化,inode也会发生变化
实验:
1、exit4
2、xfs 要有结论 20M 模拟把inode号耗尽,看看还能不能继续写入?能写入的话,能写入多少呢?
可以继续写入,第一次能多写61个,第二次能行134个
如果inode号满了,exit4和xfs之间有什么区别?
exit4不能继续创建文件了,但xfs还可以继续创建文件
xfs文件系统,如何能够实现备份和恢复?
centos7默认使用的文件系统就是xfs。
xfsdump 备份
xfsrestore 恢复
xfsdump 命令的选项:
-f 指定需要备份的硬盘分区(硬件设备的挂载点也可以)
-L 指定标签
-M 指定设备标签
-s 备份单个文件,-s后面不能之间跟路径
xfsdump使用限制:
1、只能备份xfs文件系统
2、只能备份已经挂载的文件系统
3、只有root权限才能进行操作
4、备份之后的数据要恢复,只能使用xfsrestore解析恢复
5、如果两个设备的uuid相同,不能备份(这种情况几乎不会有)
备份完之后,恢复文件,inode号是否会发生变化?
[root@localhost ~]# xfsdump -f /opt/backup /dev/sdb2 [-L backup -M sdb2]
-f 执行文件
/opt/backup 必须是个文件,必须是个不存在的文件。不能是目录。如果已经存在,必须是个空文件。
/dev/sdb2 设备
[-L 文件标签(备份文件的标签)]
[-M 设备标签(要备份的硬盘分区)]
备份的级别:全量备份和增量备份
0也是默认 也就是全量备份
1-9是增量备份,一般不用
xfsrestore -f /opt/backup /data1/
前一个是备份的问价
后一个是恢复到指定的目录。
具体操作:
[root@localhost opt]# xfsdump -f /opt/backup /dev/sdb3 [-L backup -M sdb3] #将data3目录下的内容进行备份 [root@localhost opt]# cd /data3 #进入data3目录下 [root@localhost data3]# ls #查看现有的文件 123.txt qwe.txt [root@localhost data3]# ls -i #查看现有文件的inode号 68 123.txt 69 qwe.txt [root@localhost data3]# rm -rf * #删除现有文件 [root@localhost /]# xfsrestore -f /opt/backup /data3/ #将文件恢复 [root@localhost /]# cd /data3 [root@localhost data3]# ls #被删的文件恢复了 123.txt qwe.txt [root@localhost data3]# ls -i #inode号改变了 74 123.txt 75 qwe.txt
EXT类型备份和恢复:
ext4只能在centos6
ext3格式:需要extundelete进行恢复
日志分析:
系统的日志类型以及日志如何分析
linux系统本身的日志和大部分的服务器程序的日志都在/var/log/
/var/log/massages 记录了linux的内核消息,各种应用程序的公共日志消息。
应用程序公共日志:开、关、重启、网络错误、程序故障这些都属于公共日志。
访问日志和一些自由业务日志不包含其中。
/var/log/cron: 记录的是定时任务的日志
/var/log/dmesg: 引导过程中的日志信息
/var/log/maillog: 记录进入或者发出的系统电子邮件信息
/var/log/secure: 用户认证的相关消息
linux的日志级别:

日志消息的级别:数字越小,优先级越高,消息越重要。
| 级号 | 消息 | 级别 | 说明 |
|---|---|---|---|
| 0 | EMERG | 紧急 | 会导致主机系统不可用,系统崩溃。磁盘满了(EMERG) |
| 1 | ALERT | 警告 | 必须要马上采取措施解决的问题,密码到期,数据库崩溃。 |
| 2 | CRIT | 严重 | 比较严重的情况,磁盘读写出了故障,有些程序的功能无法启动。 |
| 3 | ERR error | 错误 | 运行出现错误,程序启动失败,端口被占用等等,见的最多的情况,出现了也是要尽快解决的。 |
| 4 | WARNING | 提醒 | 可能会影响功能,需要提醒用户的重要事件,但是不是报错。磁盘使用率到了85%。 |
| 5 | NOTICE | 注意 | 也是需要用户注意的,无需处理。 |
| 6 | INFO | 信息 | 一般信息,系统或者应用程序在工作中产生的正常消息 |
| 7 | DEBUG | 调试 | 程序在开发阶段,调试程序时的信息。 |
| NONE | 没有优先级,不记录任何日志信息 |
日志级别怎么定义:
*.info *:表示所有,表示系统当中的设备,或者程序。
info:包含info以及info级别以上的日志。
auth 用户认证产生的体制
authpriv: SSh,FTP登录验证的信息
news: 网络传输产生的消息
syslog:系统的相关日志
kern:系统的内核日志
user:用户进程日志
local-local7:自定义程序的日志
uucp:unix-to-unix copy 两个linux系统之间的通信
mail.info /var/log/mail.log:记录邮件的信息,包含info和info以上的,记录到/var/log/mail.log
mail.=info /var/log/mail.log: 只记录日志级别是info的
mail.!info /var/log/mail.log: 除了info的不记录,其他的都记
May 31 13:46:02 test1 systemd: Starting The Apache HTTp Server...
May 31 13:46:02:表示当前日志发生的时间
test1:表示发生的主机名
systemd:哪个系统产生了这个日志
Starting The Apache HTTp Server...:日志的具体内容
第一个实验:
ssh的日志单独的列出来,作为一个独立的日志文件。
1、关闭防火墙和安全机制
[root@test2 opt]# systemctl stop firewalld
[root@test2 opt]# setenforce 0
2、打开系统管理日志
[root@test2 opt]# vim /etc/rsyslog.conf
73 local7.*                                                /var/log/boot.log
74 local6.*                                                /var/log/ssh.log     #在74行加一个自定义的日志
3、配置sshd_config文件
[root@test2 etc]# vim /etc/ssh/sshd_config          #进入sshd_config文件内
 32 #SyslogFacility AUTHPRIV                            #将32行注释掉
 33 SyslogFacility LOCAL6                               #将ssh日志保存到我们之前自定义的日志中去
4、将两个服务重启一下
[root@test2 etc]# systemctl restart rsyslog.service
[root@test2 etc]# systemctl restart sshd
5、打开ssh.log的日志
[root@test2 log]# tail -f ssh.log
May 31 16:11:03 localhost sshd[15025]: Server listening on 0.0.0.0 port 22.
May 31 16:11:03 localhost sshd[15025]: Server listening on :: port 22.
May 31 16:11:47 localhost sshd[15037]: Accepted password for root from 192.168.60.1 port 49991 ssh2
6、用另一个主机test3访问主机test2
[root@test3 ~]# ssh root@192.168.60.20
The authenticity of host '192.168.60.20 (192.168.60.20)' can't be established.
ECDSA key fingerprint is SHA256:exDKRdJYt8I/epk5vy8tx4NIWpdeTgKktVBWDTq1jmU.
ECDSA key fingerprint is MD5:ae:80:df:32:41:cb:64:3b:6c:ad:1d:92:e1:77:40:04.
Are you sure you want to continue connecting (yes/no)? yes
Warning: Permanently added '192.168.60.20' (ECDSA) to the list of known hosts.
root@192.168.60.20's password:
Last login: Fri May 31 16:18:20 2024
7、主机test2显示test3访问test2的ssh日志
[root@test2 log]# tail -f ssh.log
May 31 16:11:03 localhost sshd[15025]: Server listening on 0.0.0.0 port 22.
May 31 16:11:03 localhost sshd[15025]: Server listening on :: port 22.
May 31 16:11:47 localhost sshd[15037]: Accepted password for root from 192.168.60.1 port 49991 ssh2
May 31 16:15:54 localhost sshd[15130]: Accepted password for root from 192.168.60.30 port 44106 ssh2
第二个实验:
配置一个日志服务器,来进行日志收集。
test2 192.168.60.20 日志收集服务器
test3 192.168.60.30 20上面产生的日志,都会发到20上,30自己不再记录日志
操作:
1、在主机test3里更改rsyslog.conf文件
[root@test3 ~]# vim /etc/rsyslog.conf
 19 $ModLoad imtcp                  #将19行和20行的注释去掉
 20 $InputTCPServerRun 514
 54 #*.info;mail.none;authpriv.none;cron.none                /var/log/messages          #将54行注释
 55 *.info;mail.none;authpriv.none;cron.none               @@192.168.60.20          #加一个55行,将test3的系统日志放到test2内的系统日志
2、在主机test2里更改rsyslog.conf文件
[root@test3 ~]# vim /etc/rsyslog.conf
 19 $ModLoad imtcp                  #将19行和20行的注释去掉
 20 $InputTCPServerRun 514
3、在test3里重启一下rsyslog.service文件
[root@test3 ~]# systemctl restart rsyslog.service           #重启rsyslog.service文件
[root@test3 ~]# netstat -antp | grep 514
tcp        0      0 0.0.0.0:514             0.0.0.0:*               LISTEN      16771/rsyslogd
tcp6       0      0 :::514                  :::*                    LISTEN      16771/rsyslogd
4、在test2里重启一下rsyslog.service文件
[root@test2 log]# systemctl restart rsyslog.service #重启rsyslog.service文件
5、在test2里打开系统日志
[root@test2 log]# tail -f /var/log/messages
May 31 16:50:01 localhost systemd: Started Session 60 of user root.
May 31 17:00:01 localhost systemd: Started Session 61 of user root.
May 31 17:01:01 localhost systemd: Started Session 62 of user root.
May 31 17:10:01 localhost systemd: Started Session 63 of user root.
May 31 17:10:54 test2 systemd: Stopping System Logging Service...
May 31 17:10:54 test2 rsyslogd: [origin software="rsyslogd" swVersion="8.24.0-34.el7" x-pid="14958" x-info="http://www.rsyslog.com"] exiting on signal 15.
May 31 17:10:54 test2 systemd: Stopped System Logging Service.
May 31 17:10:54 test2 systemd: Starting System Logging Service...
May 31 17:10:54 test2 rsyslogd: [origin software="rsyslogd" swVersion="8.24.0-34.el7" x-pid="16198" x-info="http://www.rsyslog.com"] start
May 31 17:10:54 test2 systemd: Started System Logging Service.
6、在test3里模拟一下
[root@test3 ~]# logger "this is xy102"
7、在test2的系统日志里显示
[root@test2 log]# tail -f /var/log/messages
May 31 17:14:07 test2 systemd-logind: Removed session 56.
May 31 17:15:02 test3 root: this is xy102
8、在test3的系统日志里不显示
[root@test3 ~]# tail -f /var/log/messages
May 31 17:07:05 localhost systemd: [/usr/lib/systemd/system/firstboot-graphical.service:14] Support for option SysVStartPriority= has been removed and it is ignored
@@192.168.233.10
@@表示tcp协议进行数据传输
@表示使用UDP协议进行传输
LISTEN:监听,端口是否开启。端口是否正常传输数据
ESTABLISHED:表示端口之间已经建立连接而且正在传输数据。
原文地址:https://blog.csdn.net/m0_71178834/article/details/139357968
免责声明:本站文章内容转载自网络资源,如本站内容侵犯了原著者的合法权益,可联系本站删除。更多内容请关注自学内容网(zxcms.com)!
