winform实现窗体设计器,什么?我也能用visual studio做一个visual studio,彻底解决鸡生蛋、蛋生鸡问题!
背景
好家伙,客户居然要自己定制流程,希望我们做一个可视化的窗体设计程序,要求实现他们定义的流程语言,拖拉拽实现他们的业务。
方案
1、新建winform[.net core 8]项目命名为WinFormDesigner。
2、修改Form1.cs名字为MainForm.cs。
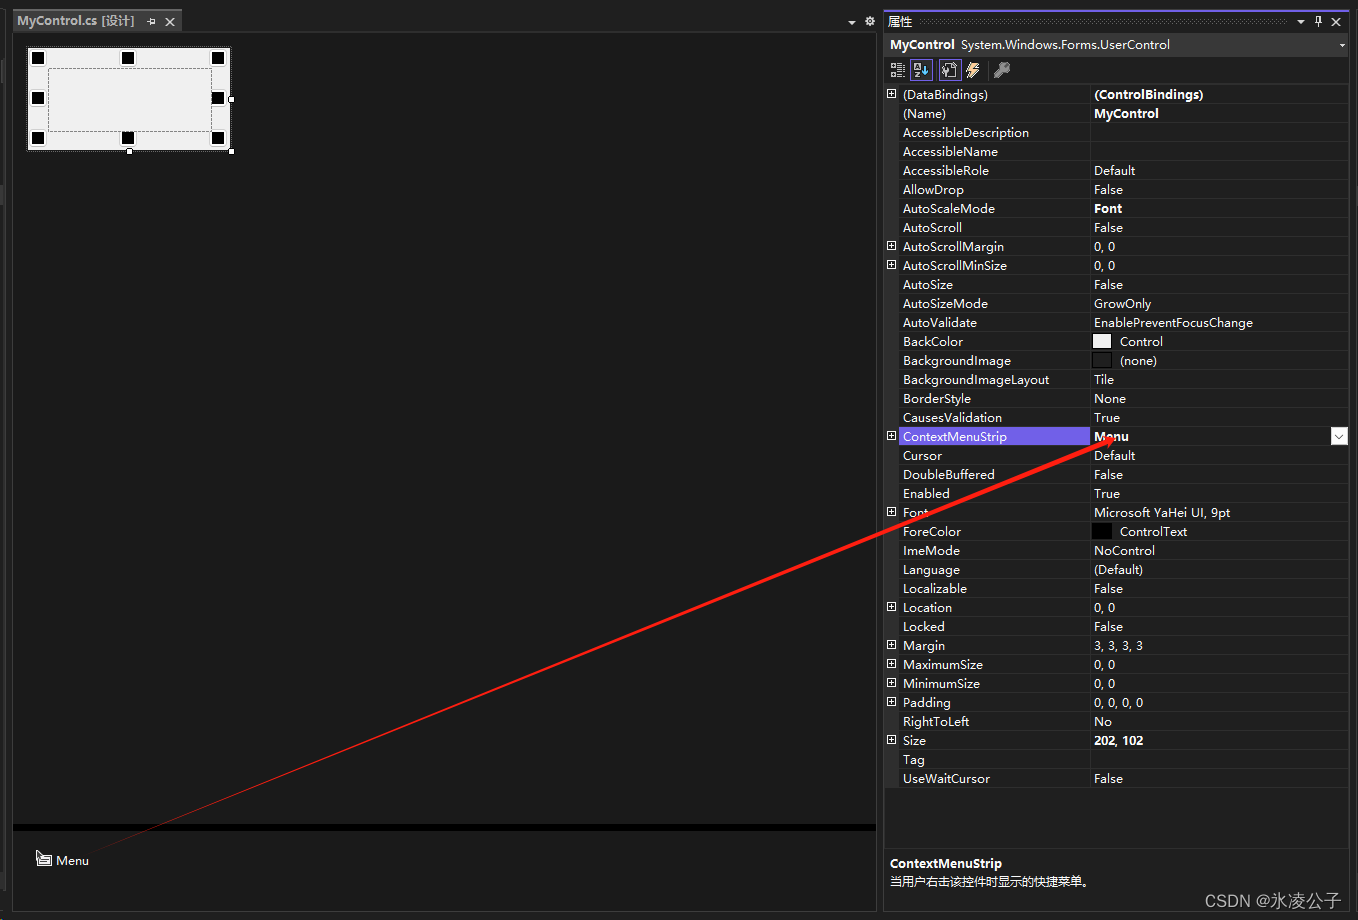
3、设置自定义控件基类MyControl,使其继承自用户控件类UserControl,宽高设置为(200,100),给其四周添加共8个按钮,方便拖拉拽,并在其中放置一个panel,用来承载winform自带控件。为其添加一个ContextMenuStrip命名为Menu,并配置ContextMenuStrip属性为Menu。

MyControl.cs代码修改为
using System;
using System.Collections.Generic;
using System.ComponentModel;
using System.Data;
using System.Diagnostics;
using System.Drawing;
using System.Linq;
using System.Text;
using System.Threading.Tasks;
using System.Windows.Forms;

namespace WinFormDesigner.MyControls
{
    public partial class MyControl : UserControl
    {
        public static PropertyGrid PropertyGrid { get; } = new PropertyGrid() { Dock = DockStyle.Fill };
        public static int MinSize { set; get; } = 60;

        private readonly List<Button> buttons;
        public List<Button> Buttons
        {
            get
            {
                return buttons;
            }
        }

        public MyControl()
        {
            InitializeComponent();
            buttons =
            [
                button_LT,
                button_LM,
                button_LB,
                button_RT,
                button_RM,
                button_RB,
                button_MT,
                button_MB
            ];
            Load += MyControl_Load;
            Enter += MyControl_Enter;
            Leave += MyControl_Leave;
        }

        private void MyControl_Load(object? sender, EventArgs e)
        {
            foreach (Button button in buttons)
            {
                button.MouseDown += Button_MouseDown;
                button.MouseUp += Button_MouseUp;

                button.Visible = false;
            }
        }

        private void MyControl_Enter(object? sender, EventArgs e)
        {
            PropertyGrid.SelectedObject = sender;

            foreach (Button button in buttons)
            {
                button.Visible = true;
            }
        }

        private void MyControl_Leave(object? sender, EventArgs e)
        {
            foreach (Button button in buttons)
            {
                button.Visible = false;
            }
        }

        Button? button;
        Point start;
        Point end;

        private void Button_MouseUp(object? sender, MouseEventArgs e)
        {
            if (button != null)
            {
                end = MousePosition;

                int offsetX = end.X - start.X;
                int offsetY = end.Y - start.Y;

                if (e.Button == MouseButtons.Left)
                {

                    if (button.Name.Contains('R'))
                    {
                        Width += offsetX;
                        Width = Math.Min(Width, end.X);
                        Width = Math.Max(Width, MinSize);
                    }
                    else if (button.Name.Contains('L'))
                    {
                        Width -= offsetX;
                        Left += offsetX;
                        Width = Math.Max(Width, MinSize);
                    }

                    if (button.Name.Contains('B'))
                    {
                        Height += offsetY;
                        Height = Math.Min(Height, end.Y);
                        Height = Math.Max(Height, MinSize);
                    }
                    else if (button.Name.Contains('T'))
                    {
                        Height -= offsetY;
                        Top += offsetY;
                        Height = Math.Max(Height, MinSize);
                    }
                }
                else if (e.Button == MouseButtons.Middle)
                {
                    Left += offsetX;
                    Top += offsetY;
                }
            }
            button = null;
        }

        private void Button_MouseDown(object? sender, MouseEventArgs e)
        {
            button = (sender as Button);
            start = MousePosition;
        }

        protected override void OnResize(EventArgs e)
        {
            base.OnResize(e);

            button_LT.Location = new Point(0, 0);
            button_LM.Location = new Point(0, Height / 2 - button_LM.Height / 2);
            button_LB.Location = new Point(0, Height - button_LB.Height);

            button_MT.Location = new Point(Width / 2 - button_MT.Width / 2, 0);
            button_MB.Location = new Point(Width / 2 - button_MB.Width / 2, Height - button_LB.Height);

            button_RT.Location = new Point(Width - button_RT.Width, 0);
            button_RM.Location = new Point(Width - button_RB.Width, Height / 2 - button_LM.Height / 2);
            button_RB.Location = new Point(Width - button_RB.Width, Height - button_LB.Height);

            PropertyGrid.Refresh();
        }

        protected override void OnMove(EventArgs e)
        {
            base.OnMove(e);
            PropertyGrid.Refresh();
        }

        private void DeleteToolStripMenuItem_Click(object sender, EventArgs e)
        {
            PropertyGrid.SelectedObject = null;
            Parent?.Controls.Remove(this);
        }
    }
}
重新生成解决方案。
4、打开MainForm.cs窗体设计器,在工具箱里就可以看到自己的MyControl控件了

5、MainForm.cs窗体设计器中,放入三个Panel控件分别命名为[panel_Left、panel_Right、panel_Fill],在panel_Left右边添加一个分隔控件Splitter{Dock=Left}、在panel_Right左边添加一个Splitter{Dock=Right}。
然后将三个panel的Dock属性按名字进行设置,让其呈现左中右效果,并由我们的分隔控件隔开,方便伸缩三个panel的大小。
6、将我们的MyControl控件拖一个进panel_Fill中,运行程序,即可体验基础效果。
7、本案例只是简单抛砖引玉,如需商业应用,请自行深入探究。
案例代码网址
WinFormDesigner: 使用winform做一个窗体设计器【样例】 (gitee.com)
8、效果


原文地址:https://blog.csdn.net/qq_36694133/article/details/135618937
免责声明:本站文章内容转载自网络资源,如本站内容侵犯了原著者的合法权益,可联系本站删除。更多内容请关注自学内容网(zxcms.com)!
