Unity Input System自动生成配置
参考视频
创建及配置新输入系统 New Input System|Unity2022.2 最新教程《勇士传说》入门到进阶|4K_哔哩哔哩_bilibili
ProjectSettings设置
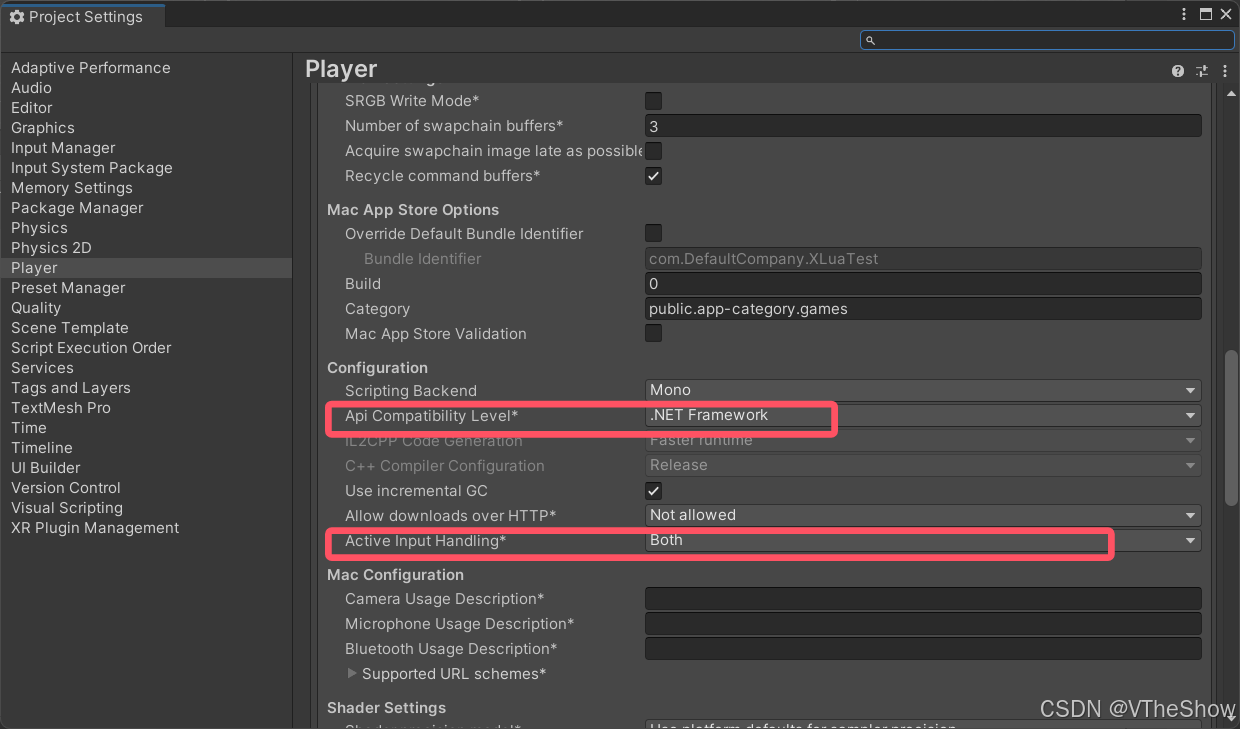
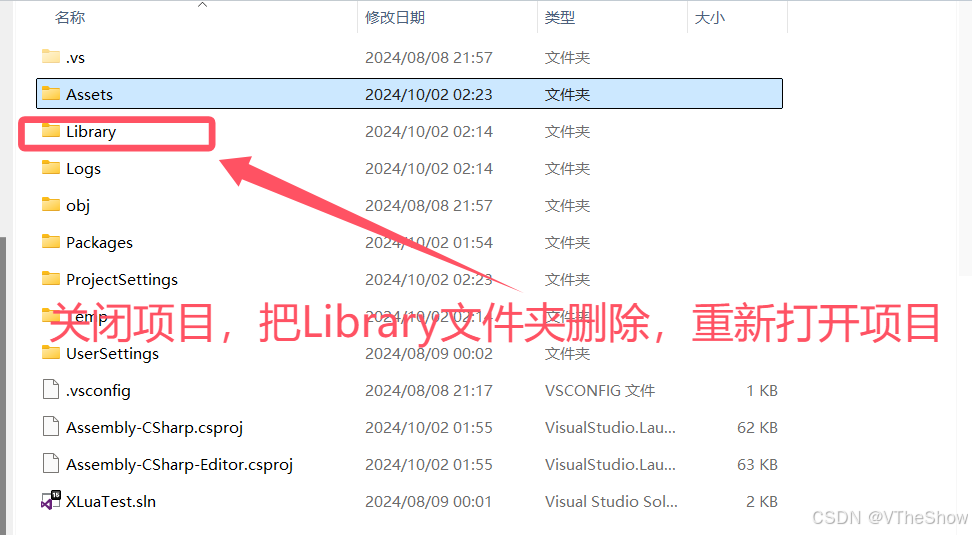
Unity编辑器菜单栏选择Edit->Project Settings->Player->Other Settings,将Api Compatibility Level 下拉列表选项改为.Net Framework,再将Active Input Handling 下拉列表选项改为Both(Active Input Handling下拉列表选项可能有时候会没有,不懂是bug还是啥,此时可打开资源目录,将Library文件夹删除并重新打开项目使Active Input Handling出现。注:有Active Input Handling下拉列表时跳过删除Library文件夹步骤)。
导入Input System
Unity编辑器菜单栏选择Window->Package Manager->Unity Registry,搜索Input System 并Install

自动生成配置文件
选择场景中任意一个物体,在Inspect面板中选择Add Component->Player Input,然后单击Player Input组件的Create Actions,选择保存路径(我的选择是放在Settings文件夹下,文件命名PlayerInputControl)并设置配置文件名称即可生成一个包含游戏控制和UI控制的输入系统配置文件,生成的配置文件可自定义修改(修改完成记得点击Save Asset保存或开启Auto Save)
配置可通过代码调用的Player Input Action
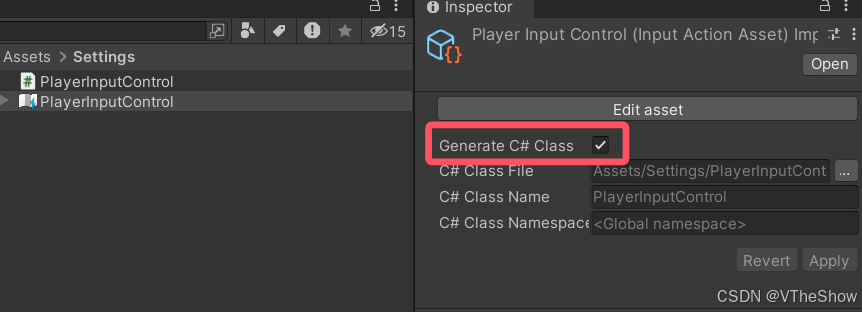
选中生成的配置文件PlayerInputControl,在Inspect面板中勾选Generate C# Class并点击Apply即可生成一个配置类。
通过代码使用Input System
创建一个输入系统管理类CharacterInputSystem,在类中实例化一个PlayerInputControl对象,使用该对象获取其成员属性(代码参考如下,可依据实际情况做修改)
using System.Collections;
using System.Collections.Generic;
using UnityEngine;

public class CharacterInputSystem : MonoBehaviour
{
    private PlayerInputControl inputActions;

    #region Bulit In Function

    void Awake()
    {
        if (inputActions == null)
        {
            inputActions = new PlayerInputControl();
        }
    }

    void OnEnable()
    {
        inputActions.Enable();
    }

    void OnDisable()
    {
        inputActions.Disable();
    }
    #endregion

    #region Key Setting

    public Vector2 PlayerMovement
    {
        get => inputActions.GamePlayer.Move.ReadValue<Vector2>();
    }

    public Vector2 CameraLook
    {
        get => inputActions.GamePlayer.Look.ReadValue<Vector2>();
    }

    #endregion
}
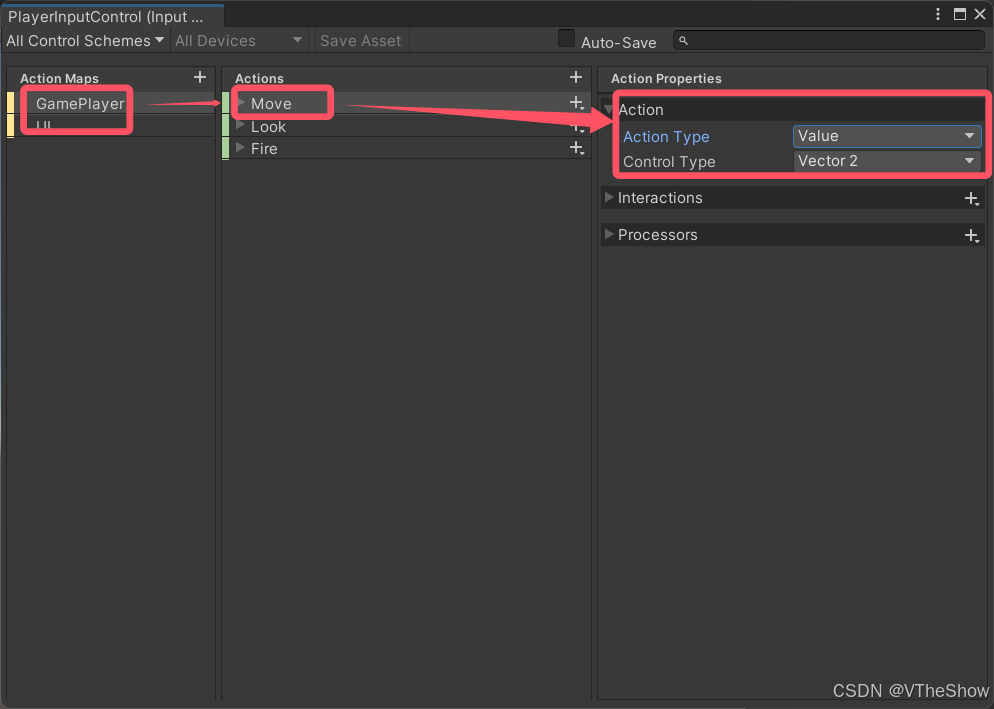
代码示例中的PlayerMovement属性获取的值对应上图,同理CameraLook属性对应Action Maps 为GamePlay的Look的值。
原文地址:https://blog.csdn.net/m0_65650233/article/details/142677075
免责声明:本站文章内容转载自网络资源,如本站内容侵犯了原著者的合法权益,可联系本站删除。更多内容请关注自学内容网(zxcms.com)!