[Kubernetes[K8S]集群:Slaver从节点初始化和Join]:添加到主节点集群内
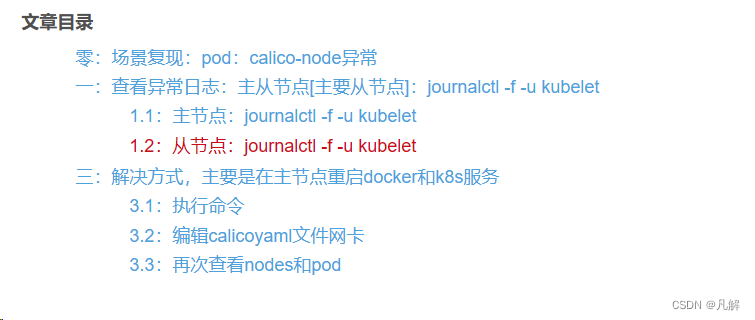
文章目录
操作流程:
主节点:安装coredns -> init初始化 主节点(此时还没有安装calico)
从节点:基于主节点生成join命令加入集群
主节点:安装calico:apply 生成pod,此时没有调整yaml网卡
coredns 和calico pod 运行成功
但是 calico-node-cl8f2 运行失败
查看 解决链接

上篇主节初始化地址:
前置:Docker和K8S安装版本匹配查看
因为之前写过一篇,calico一直异常,步骤一样所以怀疑是版本不匹配,这次看都是成功的
 Kubernetes 版本Docker 版本
 1.2019.03
 1.2120.10
 1.2220.10
 1.2320.10
 1.2420.10
0.1:安装指定docker版本
sudo yum-config-manager --add-repo https://download.docker.com/linux/centos/docker-ce.repo
sudo: yum-config-manager:找不到命令 -> 执行
sudo yum install yum-utils
yum list docker-ce --showduplicates | sort -r
[root@10 ~]# yum list docker-ce --showduplicates | sort -r
已加载插件:fastestmirror
已安装的软件包
可安装的软件包
 * updates: mirrors.ustc.edu.cn
Loading mirror speeds from cached hostfile
 * extras: mirrors.ustc.edu.cn
docker-ce.x86_64            3:26.0.0-1.el7                     docker-ce-stable
。。。。
docker-ce.x86_64            3:20.10.8-3.el7                    docker-ce-stable
docker-ce.x86_64            3:20.10.5-3.el7                    docker-ce-stable
yum install docker-ce20.10.8-3.el7 -y
**[1 — 8] ** [ 这些步骤主从节点前置操作一样的 ]
一:主节点操作 查看主机域名->编辑域名->域名配置
[root@localhost ~]# hostname
localhost.localdomain
[root@localhost ~]# hostnamectl set-hostname adam-init-slaver-one
[root@localhost ~]# hostname
adam-init-master
[root@localhost ~]#
[root@vbox-master-01-vbox-01 ~]# vi /etc/hosts
127.0.0.1   localhost localhost.localdomain localhost4 localhost4.localdomain4
::1         localhost localhost.localdomain localhost6 localhost6.localdomain6
# 以下添加
192.168.56.104  adam-init-master
192.168.56.105  adam-init-slaver-one
二:安装自动填充,虚拟机默认没有
[root@vbox-master-01-vbox-01 ~]# yum -y install bash-completion
已加载插件:fastestmirror, product-id, search-disabled-repos, subscription-manager

This system is not registered with an entitlement server. You can use subscription-manager to register.

Determining fastest mirrors
 * base: ftp.sjtu.edu.cn
 * extras: mirrors.nju.edu.cn
 * updates: mirrors.aliyun.com
三:关闭防火墙
systemctl stop firewalld
systemctl disable firewalld
四:关闭交换空间
free -h
swapoff -a
sed -i 's/.*swap.*/#&/' /etc/fstab
free -h
五:禁用 Selinux
sed -i “s/^SELINUX=enforcing/SELINUX=disabled/g” /etc/sysconfig/selinux
[root@nodemaster /]# sed -i "s/^SELINUX=enforcing/SELINUX=disabled/g" /etc/sysconfig/selinux
六: 允许 ip tables 检查桥接流量
iptables -F && iptables -X && iptables -F -t nat && iptables -X -t nat && iptables -P FORWARD ACCEPT
七:设置K8S相关系统参数
7.0:镜像加速
第一行驱动
tee /etc/docker/daemon.json <<-'EOF'
{
  "registry-mirrors": ["https://hnkfbj7x.mirror.aliyuncs.com"],
  "exec-opts": ["native.cgroupdriver=systemd"]
}
EOF
7.1:K8S仓库国内源
cat <<EOF > /etc/yum.repos.d/kubernetes.repo
[kubernetes]
name=Kubernetes
baseurl=https://mirrors.aliyun.com/kubernetes/yum/repos/kubernetes-el7-x86_64/
# 是否开启本仓库
enabled=1
# 是否检查 gpg 签名文件
gpgcheck=0
# 是否检查 gpg 签名文件
repo_gpgcheck=0
gpgkey=https://mirrors.aliyun.com/kubernetes/yum/doc/yum-key.gpg https://mirrors.aliyun.com/kubernetes/yum/doc/rpm-package-key.gpg

EOF
7.2:配置 sysctl 参数,网桥和地址转发,重新启动后配置不变
cat <<EOF | sudo tee /etc/sysctl.d/k8s.conf
net.bridge.bridge-nf-call-iptables  = 1
net.bridge.bridge-nf-call-ip6tables = 1
net.ipv4.ip_forward                 = 1
EOF
7.2.1:配置sysctl 内核参数而不重新启动
sysctl --system
八:安装K8S – kubelet,kubeadm,kubectl核心组件
8.1:安装命令
[root@master local]# sudo yum install -y kubelet-1.23.0 kubeadm-1.23.0 kubectl-1.23.0 --disableexcludes=kubernetes --nogpgcheck
已安装:
  kubeadm.x86_64 0:1.23.0-0            kubectl.x86_64 0:1.23.0-0            kubelet.x86_64 0:1.23.0-0

作为依赖被安装:
  conntrack-tools.x86_64 0:1.4.4-7.el7                    cri-tools.x86_64 0:1.26.0-0
  kubernetes-cni.x86_64 0:1.2.0-0                         libnetfilter_cthelper.x86_64 0:1.0.0-11.el7
  libnetfilter_cttimeout.x86_64 0:1.0.0-7.el7             libnetfilter_queue.x86_64 0:1.0.2-2.el7_2
  socat.x86_64 0:1.7.3.2-2.el7

完毕!
九:kubeadm init生成Node
9.1: 当前从节点
9.1.1:区别:从节点主要根据主节点生成的join命令进行join操作,不用init操作
9.2: 上述会生成如下日志说明成功
kubeadm join 192.168.56.104:6443 --token zxnok7.i6i4b4id4y5q1nsa --discovery-token-ca-cert-hash
[root@10 ~]# kubeadm join 192.168.56.104:6443 --token zxnok7.i6i4b4id4y5q1nsa         --discovery-token-ca-cert-hash sha256:7760cfca134b2df5ef7757e7a6756a13e66415665dd48ae94a20d98b812c277d
[preflight] Running pre-flight checks
        [WARNING Service-Docker]: docker service is not enabled, please run 'systemctl enable docker.service'
        [WARNING Service-Kubelet]: kubelet service is not enabled, please run 'systemctl enable kubelet.service'
[preflight] Reading configuration from the cluster...
[preflight] FYI: You can look at this config file with 'kubectl -n kube-system get cm kubeadm-config -o yaml'
[kubelet-start] Writing kubelet configuration to file "/var/lib/kubelet/config.yaml"
[kubelet-start] Writing kubelet environment file with flags to file "/var/lib/kubelet/kubeadm-flags.env"
[kubelet-start] Starting the kubelet
[kubelet-start] Waiting for the kubelet to perform the TLS Bootstrap...

This node has joined the cluster:
* Certificate signing request was sent to apiserver and a response was received.
* The Kubelet was informed of the new secure connection details.

Run 'kubectl get nodes' on the control-plane to see this node join the cluster.
10:后续异常Node not ready
10.1: 查看异常命令:journalctl -f -u kubelet
10.1.1:[root@10 ~]# 异常查看:journalctl -f -u kubelet 日志如下,cni下的net.d配置找不到
[root@10 ~]# journalctl -f -u kubelet
-- Logs begin at 三 2024-04-10 00:24:03 CST. --
4月 10 02:33:33 adam-init-slaver-one kubelet[9282]: E0410 02:33:33.734603    9282 kubelet.go:2347] "Container runtime network not ready" networkReady="NetworkReady=false reason:NetworkPluginNotReady message:docker: network plugin is not ready: cni config uninitialized"
4月 10 02:33:38 adam-init-slaver-one kubelet[9282]: I0410 02:33:38.160774    9282 cni.go:240] "Unable to update cni config" err="no networks found in /etc/cni/net.d"
4月 10 02:33:38 adam-init-slaver-one kubelet[9282]: E0410 02:33:38.742263    9282 kubelet.go:2347] "Container runtime network not ready" networkReady="NetworkReady=false reason:NetworkPluginNotReady message:docker: network plugin is not ready: cni config uninitialized"
4月 10 02:33:40 adam-init-slaver-one kubelet[9282]: E0410 02:33:40.168399    9282 pod_workers.go:918] "Error syncing pod, skipping" err="failed to \"StartContainer\" for \"install-cni\" with CrashLoopBackOff: \"back-off 20s restarting failed container=install-cni pod=calico-node-bdbjk_kube-system(21340f35-c5e1-4e42-a006-3ad6ee4c8a09)\"" pod="kube-system/calico-node-bdbjk" podUID=21340f35-c5e1-4e42-a006-3ad6ee4c8a09
4月 10 02:33:43 adam-init-slaver-one kubelet[9282]: I0410 02:33:43.161188    9282 cni.go:240] "Unable to update cni config" err="no networks found in /etc/cni/net.d"
4月 10 02:33:43 adam-init-slaver-one kubelet[9282]: E0410 02:33:43.750005    9282 kubelet.go:2347] "Container runtime network not ready" networkReady="NetworkReady=false reason:NetworkPluginNotReady message:docker: network plugin is not ready: cni config uninitialized"
10.2: 分析:K8S集群搭建Calico安装先后顺序问题
当前操作为先安装Master接着安装Calico有net.d文件,安装完Calico再对从节点机器初始化K8S相关操作,net.d没有同步到从机器;
10.3: 解决:调整安装顺序,或拷贝主节点配置到从节点
主节点操作
[root@10 ~]# scp /etc/cni/net.d/* root@sss-slaver-two:/etc/cni/net.d/
此slaver-one为主节点
[root@sv-slaver-one ~]# kubectl get pods -A
NAMESPACE     NAME                                       READY   STATUS    RESTARTS        AGE
kube-system   calico-kube-controllers-64cc74d646-4z8zf   1/1     Running   2 (9h ago)      9h
kube-system   calico-node-cl8f2                          1/1     Running   0               9h
kube-system   calico-node-pfxnd                          1/1     Running   0               9h
kube-system   coredns-6d8c4cb4d-8q7tb                    1/1     Running   2 (9h ago)      9h
kube-system   coredns-6d8c4cb4d-m2gz2                    1/1     Running   2 (9h ago)      9h
kube-system   etcd-sv-slaver-one                         1/1     Running   3 (9h ago)      9h
kube-system   kube-apiserver-sv-slaver-one               1/1     Running   3 (9h ago)      9h
kube-system   kube-controller-manager-sv-slaver-one      1/1     Running   4 (3h59m ago)   9h
kube-system   kube-proxy-6kfnf                           1/1     Running   2 (9h ago)      9h
kube-system   kube-proxy-s9pzm                           1/1     Running   3 (9h ago)      9h
kube-system   kube-scheduler-sv-slaver-one               1/1     Running   4 (3h59m ago)   9h
[root@sv-slaver-one ~]# kubectl get nodes
NAME            STATUS   ROLES                  AGE   VERSION
sv-master       Ready    <none>                 9h    v1.23.0
sv-slaver-one   Ready    control-plane,master   9h    v1.23.0
[root@sv-slaver-one ~]#
10-(2—3): 通用需要操作步骤
执行
[root@10 docker]# systemctl restart docker
[root@10 docker]# systemctl daemon-reload
[root@10 docker]# systemctl restart kubelet
编辑calico 网卡信息
重新运行calico
如果还没用,重启虚拟机,重复 10-(2—3)操作
原文地址:https://blog.csdn.net/Abraxs/article/details/137575321
免责声明:本站文章内容转载自网络资源,如本站内容侵犯了原著者的合法权益,可联系本站删除。更多内容请关注自学内容网(zxcms.com)!
