重学SpringBoot3-集成Redis(三)
更多SpringBoot3内容请关注我的专栏:《SpringBoot3》
期待您的点赞👍收藏⭐评论✍
重学SpringBoot3-集成Redis(三)
书接上回,重学SpringBoot3-集成Redis(二), Spring Boot 提供了对缓存的简便支持,使得开发者能够通过简单的注解实现缓存操作,减少重复代码的编写。本文将继续介绍如何在 Spring Boot 3 中通过注解驱动的方式针对不同缓存区域设置不同缓存策略。
在 Spring Boot 3 中,使用 RedisCacheManager 可以为不同的缓存区域(缓存名称)设置自定义的过期策略。通过为每个缓存区域创建不同的 RedisCacheConfiguration,你可以指定不同的过期时间(TTL)和其他缓存行为。以下是如何为不同的缓存区域设置自定义过期策略的详细说明。
1. 引入 Redis 依赖
首先确保你的 pom.xml 或 build.gradle 文件中已经引入了 Redis 相关的依赖。以 Maven 为例:
        <dependency>
            <groupId>org.springframework.boot</groupId>
            <artifactId>spring-boot-starter-data-redis</artifactId>
        </dependency>

        <dependency>
            <groupId>org.springframework.boot</groupId>
            <artifactId>spring-boot-starter-cache</artifactId>
        </dependency>
2. 配置 RedisCacheManager 及自定义过期策略
通过创建自定义的 CacheManager,你可以为不同的缓存名称指定不同的 RedisCacheConfiguration,每个配置可以有不同的过期时间或序列化规则。
2.1 示例代码:自定义过期策略
package com.coderjia.boot310redis.config;

import org.springframework.context.annotation.Bean;
import org.springframework.context.annotation.Configuration;
import org.springframework.data.redis.cache.RedisCacheConfiguration;
import org.springframework.data.redis.cache.RedisCacheManager;
import org.springframework.data.redis.connection.RedisConnectionFactory;
import org.springframework.data.redis.serializer.GenericJackson2JsonRedisSerializer;
import org.springframework.data.redis.serializer.RedisSerializationContext;
import org.springframework.data.redis.serializer.StringRedisSerializer;

import java.time.Duration;
import java.util.HashMap;
import java.util.Map;

/**
 * @author CoderJia
 * @create 2024/10/5 下午 12:36
 * @Description
 **/
@Configuration
public class CacheConfig {

    // @Bean
    // public RedisCacheConfiguration cacheConfiguration() {
    //     return RedisCacheConfiguration.defaultCacheConfig()
    //             .prefixCacheNameWith("coderjia:")  // 设置缓存 Key 前缀
    //             .entryTtl(Duration.ofMinutes(10))  // 设置缓存过期时间为 10 分钟
    //             .disableKeyPrefix()
    //             .enableTimeToIdle()
    //             .serializeKeysWith(RedisSerializationContext.SerializationPair.fromSerializer(new StringRedisSerializer())) // 自定义 Key 序列化器
    //             .serializeValuesWith(RedisSerializationContext.SerializationPair.fromSerializer(new GenericJackson2JsonRedisSerializer())); // 自定义 Value 序列化器
    // }

    @Bean
    public RedisCacheManager cacheManager(RedisConnectionFactory redisConnectionFactory) {

        // 创建默认的 RedisCacheConfiguration,并设置全局缓存过期时间
        RedisCacheConfiguration defaultCacheConfig = RedisCacheConfiguration.defaultCacheConfig()
                .entryTtl(Duration.ofMinutes(5))  // 默认全局缓存过期时间为5分钟
                .disableCachingNullValues();      // 禁止缓存 null 值

        // 为特定缓存配置不同的过期策略
        Map<String, RedisCacheConfiguration> cacheConfigurations = new HashMap<>();

        // 配置名为 "shortLivedCache" 的缓存,设置过期时间为1分钟
        cacheConfigurations.put("shortLivedCache",
                RedisCacheConfiguration.defaultCacheConfig()
                        .entryTtl(Duration.ofMinutes(1)) // 设置缓存的TTL为1分钟
                        .disableCachingNullValues());    // 禁止缓存 null 值

        // 配置名为 "longLivedCache" 的缓存,设置过期时间为1小时
        cacheConfigurations.put("longLivedCache",
                RedisCacheConfiguration.defaultCacheConfig()
                        .entryTtl(Duration.ofHours(1))  // 设置缓存的TTL为1小时
                        .disableCachingNullValues());    // 禁止缓存 null 值

        // 配置名为 "jsonCache" 的缓存,使用 JSON 序列化器
        cacheConfigurations.put("jsonCache",
                RedisCacheConfiguration.defaultCacheConfig()
                        .entryTtl(Duration.ofMinutes(30))  // 30分钟过期
                        .serializeKeysWith(RedisSerializationContext.SerializationPair.fromSerializer(new StringRedisSerializer()))
                        .serializeValuesWith(RedisSerializationContext.SerializationPair.fromSerializer(new GenericJackson2JsonRedisSerializer()))
                        .disableCachingNullValues());       // 禁止缓存 null 值

        // 创建 RedisCacheManager,加载自定义的缓存配置
        return RedisCacheManager.builder(redisConnectionFactory)
                .cacheDefaults(defaultCacheConfig)   // 设置默认的缓存配置
                .withInitialCacheConfigurations(cacheConfigurations) // 加载不同缓存区域的配置
                .build();
    }
}
3. 配置说明
-
defaultCacheConfig:这是默认的缓存配置,用于所有未显式定义的缓存区域。在上面的例子中,默认的 TTL 是 5 分钟。 -
cacheConfigurations.put("shortLivedCache", ...):为缓存名为"shortLivedCache"的区域设置了特定的过期时间为 1 分钟。这意味着,当你使用@Cacheable指定该缓存时,它的 TTL 将为 1 分钟。 -
cacheConfigurations.put("longLivedCache", ...):为缓存名为"longLivedCache"的区域设置了 1 小时的 TTL。这非常适合需要长时间保留的数据。 -
cacheConfigurations.put("jsonCache", ...):这个缓存区域使用 JSON 序列化器。这样可以确保键和值的序列化与反序列化是通过 JSON 格式完成的。
4. 使用自定义的缓存区域
在代码中使用这些自定义的缓存区域时,你可以通过 @Cacheable 注解指定不同的缓存名称。
import org.springframework.cache.annotation.Cacheable;
import org.springframework.stereotype.Service;
@Service
public class UserService {
// 当方法第一次调用时,结果将被缓存起来,之后相同参数的调用将直接从缓存中获取数据
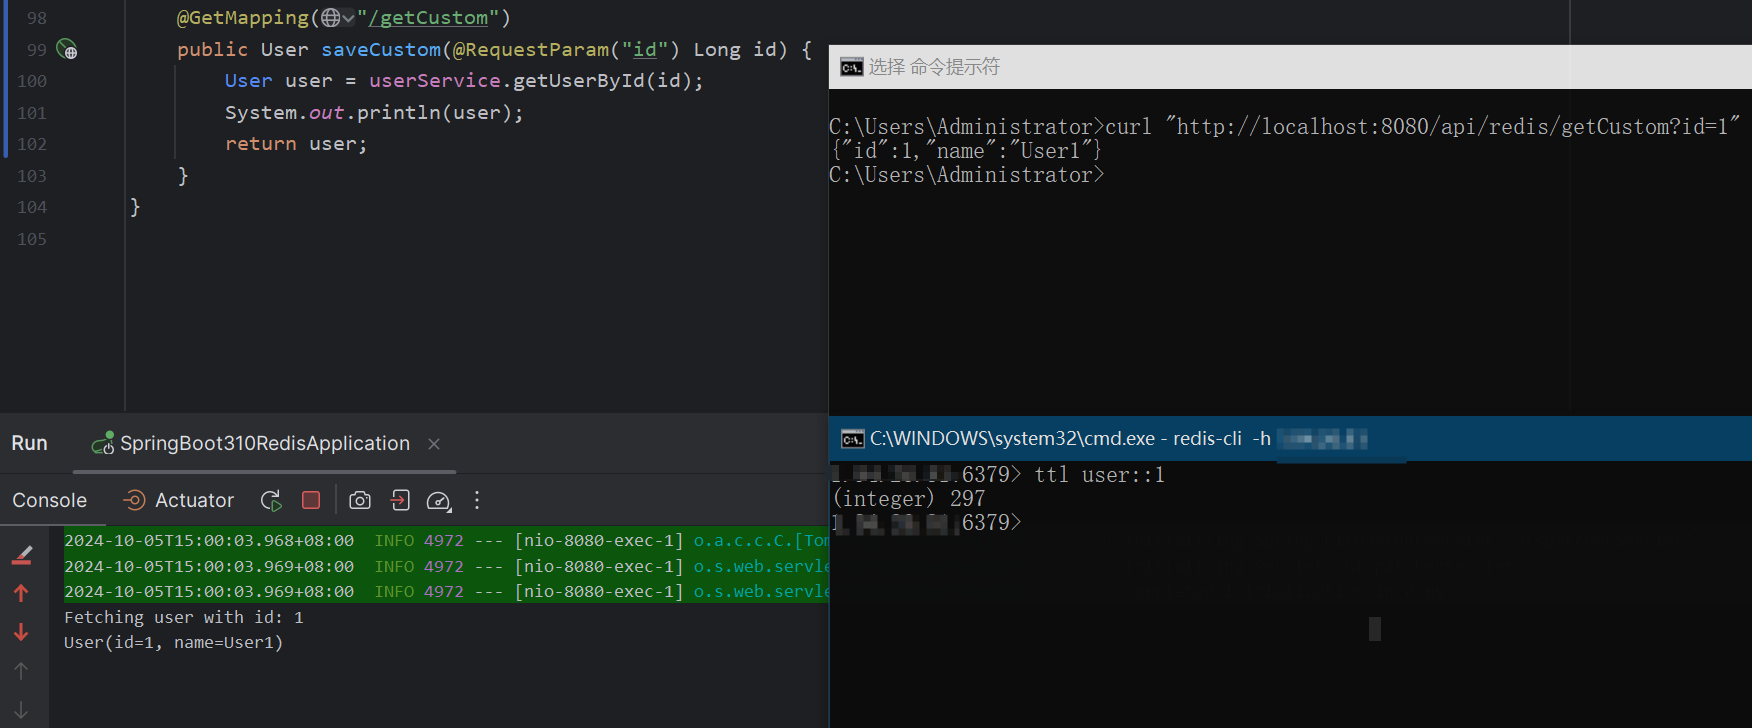
@Cacheable(value = "user", key = "#p0")
public User getUserById(Long id) {
// 模拟数据库查询操作
System.out.println("Fetching user with id: " + id);
return new User(id, "User" + id);
}
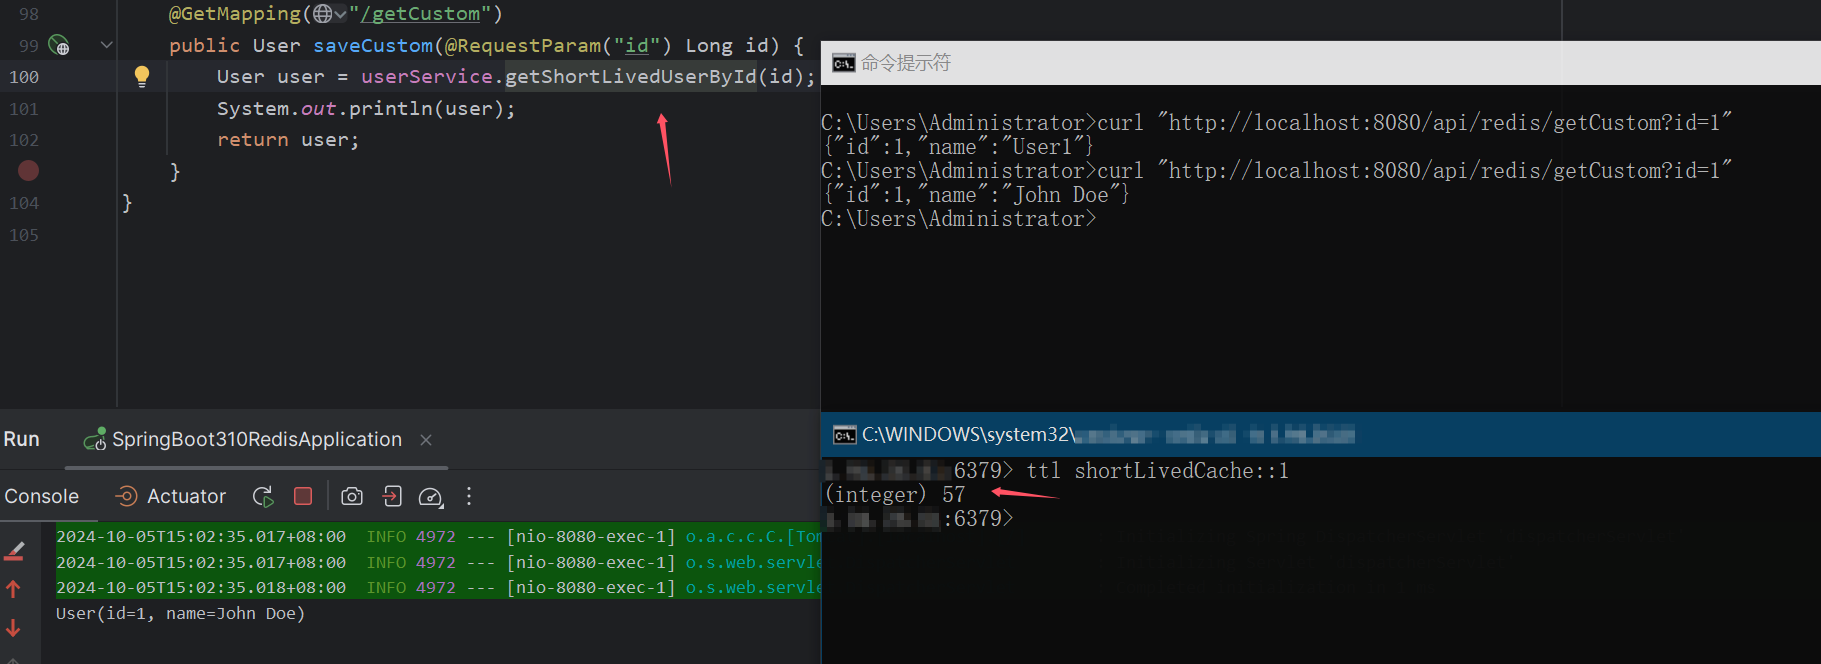
// 使用短生命周期的缓存配置(1分钟)
@Cacheable(value = "shortLivedCache", key = "#p0")
public User getShortLivedUserById(Long id) {
return findUserInDatabase(id);
}
// 使用长生命周期的缓存配置(1小时)
@Cacheable(value = "longLivedCache", key = "#p0")
public User getLongLivedUserById(Long id) {
return findUserInDatabase(id);
}
// 使用 JSON 序列化的缓存(30分钟)
@Cacheable(value = "jsonCache", key = "#p0")
public User getJsonSerializedUserById(Long id) {
return findUserInDatabase(id);
}
private User findUserInDatabase(Long userId) {
// 模拟数据库查找
return new User(userId, "John Doe");
}
}
5. 验证
当调用 getUserById 时,缓存数据会存储在默认的缓存区域,数据会在 5 分钟后过期。
调用 getShortLivedUserById 时,数据会在 1 分钟后自动失效。
调用 getLongLivedUserById 时,缓存数据会在 1 小时后失效。

getJsonSerializedUserById 方法将数据以 JSON 格式序列化,并在 30 分钟后过期。

6. 总结
通过 RedisCacheManager 和 RedisCacheConfiguration,你可以为不同的缓存区域设置不同的 TTL、序列化策略、以及缓存行为。这样可以根据不同的业务场景调整缓存的生命周期,优化应用的性能。
为了更进一步完整代码,可以将缓存名称和对应有效期放入都配置文件中,更有利于线上环境根据实际情况调整缓存有效期,示例如下:
@Value("${cache.shortLiveCache.name}")
private String shortLiveCacheName;

@Value("${cache.shortLiveCache.ttl}")
private long shortLiveCacheTtl;

RedisCacheConfiguration config = RedisCacheConfiguration.defaultCacheConfig()
        .cacheName(shortLiveCacheName)
        .enableTimeToIdle(true)
        .tti(Duration.ofSeconds(shortLiveCacheTtl));
原文地址:https://blog.csdn.net/u014390502/article/details/142714655
免责声明:本站文章内容转载自网络资源,如本站内容侵犯了原著者的合法权益,可联系本站删除。更多内容请关注自学内容网(zxcms.com)!