HTML翻牌器:用CSS和HTML元素创造动态数字展示
HTML翻牌器:用CSS和HTML元素创造动态数字展示
前言

翻牌器是一种数字动态展示形式,在生活中常见的例如翻牌计分、翻牌时钟等。
之所以以翻牌的形式是因为其物理设计的原因使其只能滚动翻牌展示数字,在电子显示设备不普及时,使用场景较广。
现在电子屏可以很方便的去切换数字,翻牌器已经渐渐淡出我们的生活,但是这样的表现形式在某些情况下更能突出数字的变化、丰富页面的内容,使其更具有吸引力。
那么今天我们就来聊一聊怎样在HTML中使用CSS + HTML元素制作一个翻牌器。
翻牌器的机制
翻牌器数字翻牌是通过翻动展示一张卡片不同的面而实现的。如下图所示:

那么,这样来说的话,一个数字其实是由一张卡片的正面及它前一张卡片的背面组成,然后多张卡片组成一个循环,依次滚动就能实现展示数字。
HTML中实现
为了实现翻牌器的效果,那么我们需要用到CSS 3D 中的 rotateX 加上景深来展现出3D 的翻动效果。
除此之外,我们还需要将数字卡片进行上下分块,这个办法有很多,这里我们是使用CSS 中的 clipPath 属性,这样能保证数字的上部分和下部分能在拼接时能完全对齐且居中。
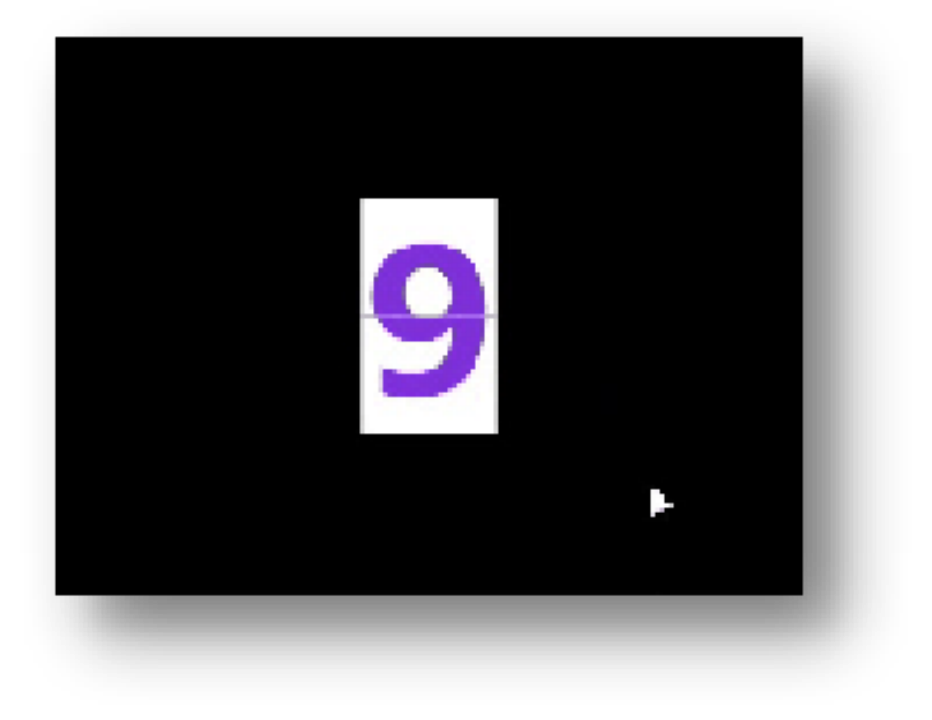
HTML中元素是没有正面和背面的概念的,我们没办法使用背面,那么只能通过两个正面去模拟一个背面加一个正面,然后让其滚动。单个的数字就如下图所示:

接下来就是滚动的问题,在CSS 3D 中,rotateX 配合动画就能实现上下的翻动效果。
多次滚动其实就是依次播放动画,这里会有一个问题,当我们快速翻动卡片时,上面的部分后出现的内容在层级上需要在后面,但是翻滚到下面部分时,后面的内容在层级上需要在前面。
我们通过 z-index 去控制会很麻烦。那我们应该怎么去做才好呢?
HTML中我们是没办法去使用背面的,那我们的卡片进行翻滚是在上部分仅需注意正面,在下部分只要注意反面(卡片对应的反面,用元素的正面来表示),当上部分结束后再插入下部分,这样层级就能从上下区分开。
我们仅需关注单个数字再进行组合即可实现多位的翻牌器。
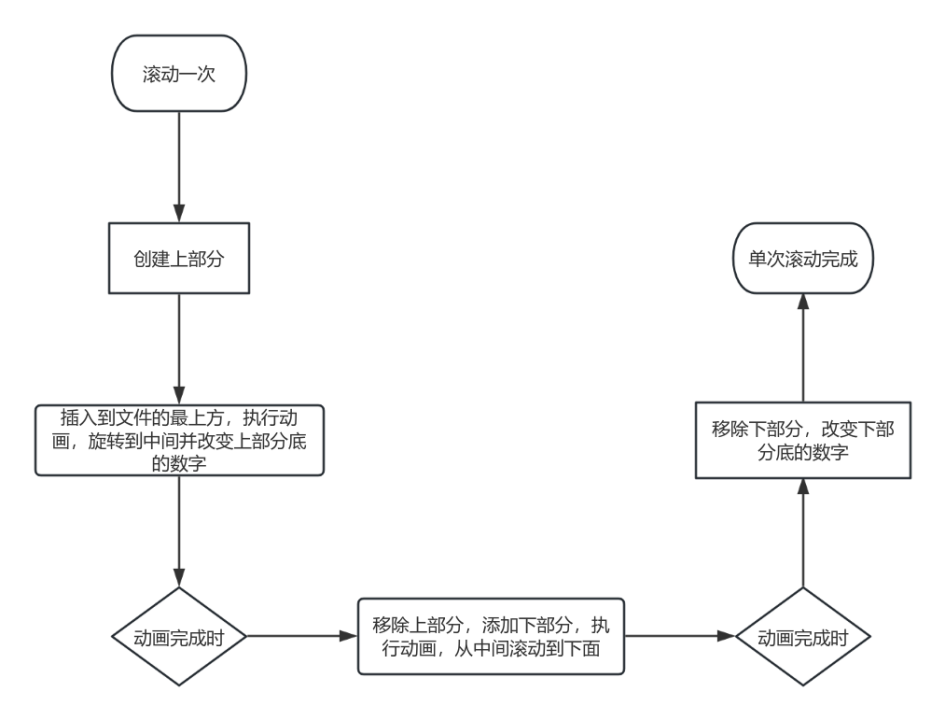
而且在动画播放结束时,我们只需要保证上下各部分有一张卡片能正确展示即可,多余的内容我们可以去除,节省空间和提高效率。基本翻动流程如下:

- 创建卡片的正面和背面。
- 使用
clipPath将卡片分割为上下两部分。 - 通过
rotateX和动画实现翻牌效果。 - 管理卡片的层级和顺序,确保动画流畅。
基础HTML和CSS代码
<!DOCTYPE html>
<html lang="en">
<head>
  <meta charset="UTF-8">
  <meta name="viewport" content="width=device-width, initial-scale=1.0">
  <title>Document</title>
  <style>
    * {
      margin: 0;
      padding: 0;
    }
    body {
      width: 100vw;
      height: 100vh;
      overflow: hidden;
      background: #000;
      display: flex;
      align-items: center;
      justify-content: center;
    }
    .wrap {
      height: 120px;
      line-height: 120px;
    }
    .filper-item {
      position: relative;
      color: blueviolet;
      font-size: 100px;
      font-weight: bold;
      perspective: 700px;
    }
    .card-item {
      top: 0;
      left: 0;
      position: absolute;
      background: #fff;
    }
  </style>
</head>
<body>
  <div id="wrap" class="wrap"></div>

  <script>
    // JavaScript代码
  </script>
</body>
</html>
JavaScript实现
在 JavaScript中,我们创建一个 FilperItem 类来管理翻牌器的逻辑。这个类负责创建卡片、初始化DOM结构、以及实现增加和减少数字的动画效果。
class FilperItem {
  constructor(wrap) {
    this.num = 0;
    this.initDom();
    wrap.appendChild(this.el);
  }

  createCard(type, num, fixed) {
    const el = document.createElement('div');
    el.className = 'card-item';
    const innerText = num;
    if (fixed) {
      el.style.position = 'relative';
    }
    // 上下的 clipPath
    const clipPath = type === 'top' ? 'polygon(0 0, 100% 0%, 100% 50%, 0 50%)' : 'polygon(0 50%, 100% 50%, 100% 100%, 0% 100%)';
    el.innerText = innerText;
    el.style.clipPath = clipPath;
    return el;
  }

  initDom() {
    const el = document.createElement('div');
    el.className = 'filper-item';
    const top = this.createCard('top', 0, false);
    const bottom = this.createCard('bottom', 0, true);
    // 添加默认的上下
    el.appendChild(top);
    el.appendChild(bottom);
    this.el = el;
    this.top = top;
    this.bottom = bottom;
  }

  increase(to = undefined) {
    const { num, top, bottom, el } = this;
    let txt = to ?? (num + 1) % 10;
    if (txt === num) return;
    // 动画
    const animate = {
      zIndex: [1, 1],
      transform: ['rotateX(0)', 'rotateX(-90deg)'],
      offset: [0, 1]
    };
    const animate1 = {
      zIndex: [1, 1],
      transform: ['rotateX(90deg)', 'rotateX(0deg)'],
      offset: [0, 1]
    };
    const animateOption = {
      duration: 500
    };
    const t = this.createCard('top', num);
    el.insertBefore(t, el.childNodes[1]);
    const ta = t.animate(animate, animateOption);
    setTimeout(() => {
      top.innerText = txt;
    });
    // 上部分动画完成后插入下部分并执行动画
    ta.onfinish = () => {
      el.removeChild(t);
      const b = this.createCard('bottom', txt);
      el.appendChild(b);
      const ba = b.animate(animate1, animateOption);
      ba.onfinish = () => {
        bottom.innerText = txt;
        el.removeChild(b);
      };
    };
    this.num = txt;
  }

  reduce(to = undefined) {
    const { num, top, bottom, el } = this;
    let txt = to ?? (num + 9) % 10;
    if (txt === num) return;
    const animate = {
      zIndex: [1, 1],
      transform: ['rotateX(-90deg)', 'rotateX(0)'],
      offset: [0, 1]
    };
    const animate1 = {
      zIndex: [1, 1],
      transform: ['rotateX(0deg)', 'rotateX(90deg)'],
      offset: [0, 1]
    };
    const animateOption = {
      duration: 500
    };
    const b = this.createCard('bottom', num);
    if (bottom.nextElementSibling) {
      el.insertBefore(b, bottom.nextElementSibling);
    } else {
      el.appendChild(b);
    }

    const ba = b.animate(animate1, animateOption);
    setTimeout(() => {
      bottom.innerText = txt;
    });
    ba.onfinish = () => {
      el.removeChild(b);
      const t = this.createCard('top', txt);
      el.insertBefore(t, bottom);
      const ta = t.animate(animate, animateOption);
      ta.onfinish = () => {
        top.innerText = txt;
        el.removeChild(t);
      };
    };
    this.num = txt;
  }

  filper(next, dir = 'increase') {
    switch (dir) {
      case 'increase': {
        this.increase(next);
        break;
      }
      case 'reduce': {
        this.reduce(next);
      }
    }
  }
}
使用方式:
const wrap = document.querySelector('#wrap');
const f = new FilperItem(wrap);

window.f = f;

window.onkeydown = (e) => {
  if (e.code === 'ArrowDown') {
    f.reduce();
  } else if (e.code === 'ArrowUp') {
    f.increase();
  } else if (/^\d$/.test(e.key)) {
    f.filper(Number(e.key));
  }
};
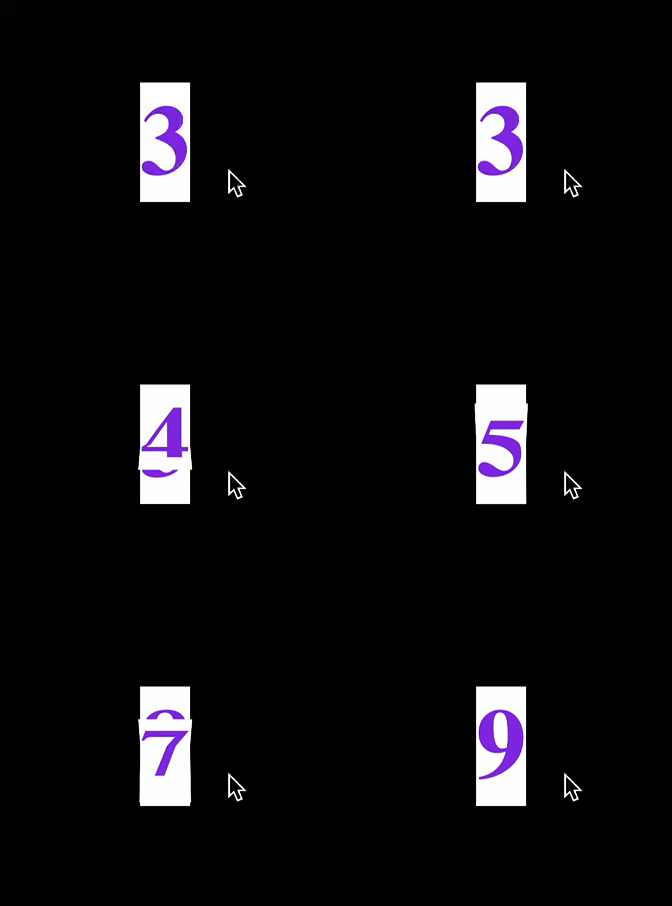
效果如下

总结
通过上述步骤,我们已经在 HTML 中使用 CSS 和 JavaScript 创建了一个基础的翻牌器。
这个翻牌器可以响应键盘事件,实现数字的增加和减少。
虽然这里的实现相对简单,但它展示了如何利用现代Web技术来模拟传统翻牌器的动态效果。
随着技术的进一步发展,我们可以在此基础上添加更多功能,如动画效果的优化、多数字支持等,以创造出更加炫酷的效果。
– 欢迎点赞、关注、转发、收藏【我码玄黄】,各大平台同名。
原文地址:https://blog.csdn.net/qq_30333063/article/details/142438358
免责声明:本站文章内容转载自网络资源,如本站内容侵犯了原著者的合法权益,可联系本站删除。更多内容请关注自学内容网(zxcms.com)!
