hexo github部署,通过域名访问你的博客
hexo github部署,通过域名访问你的博客
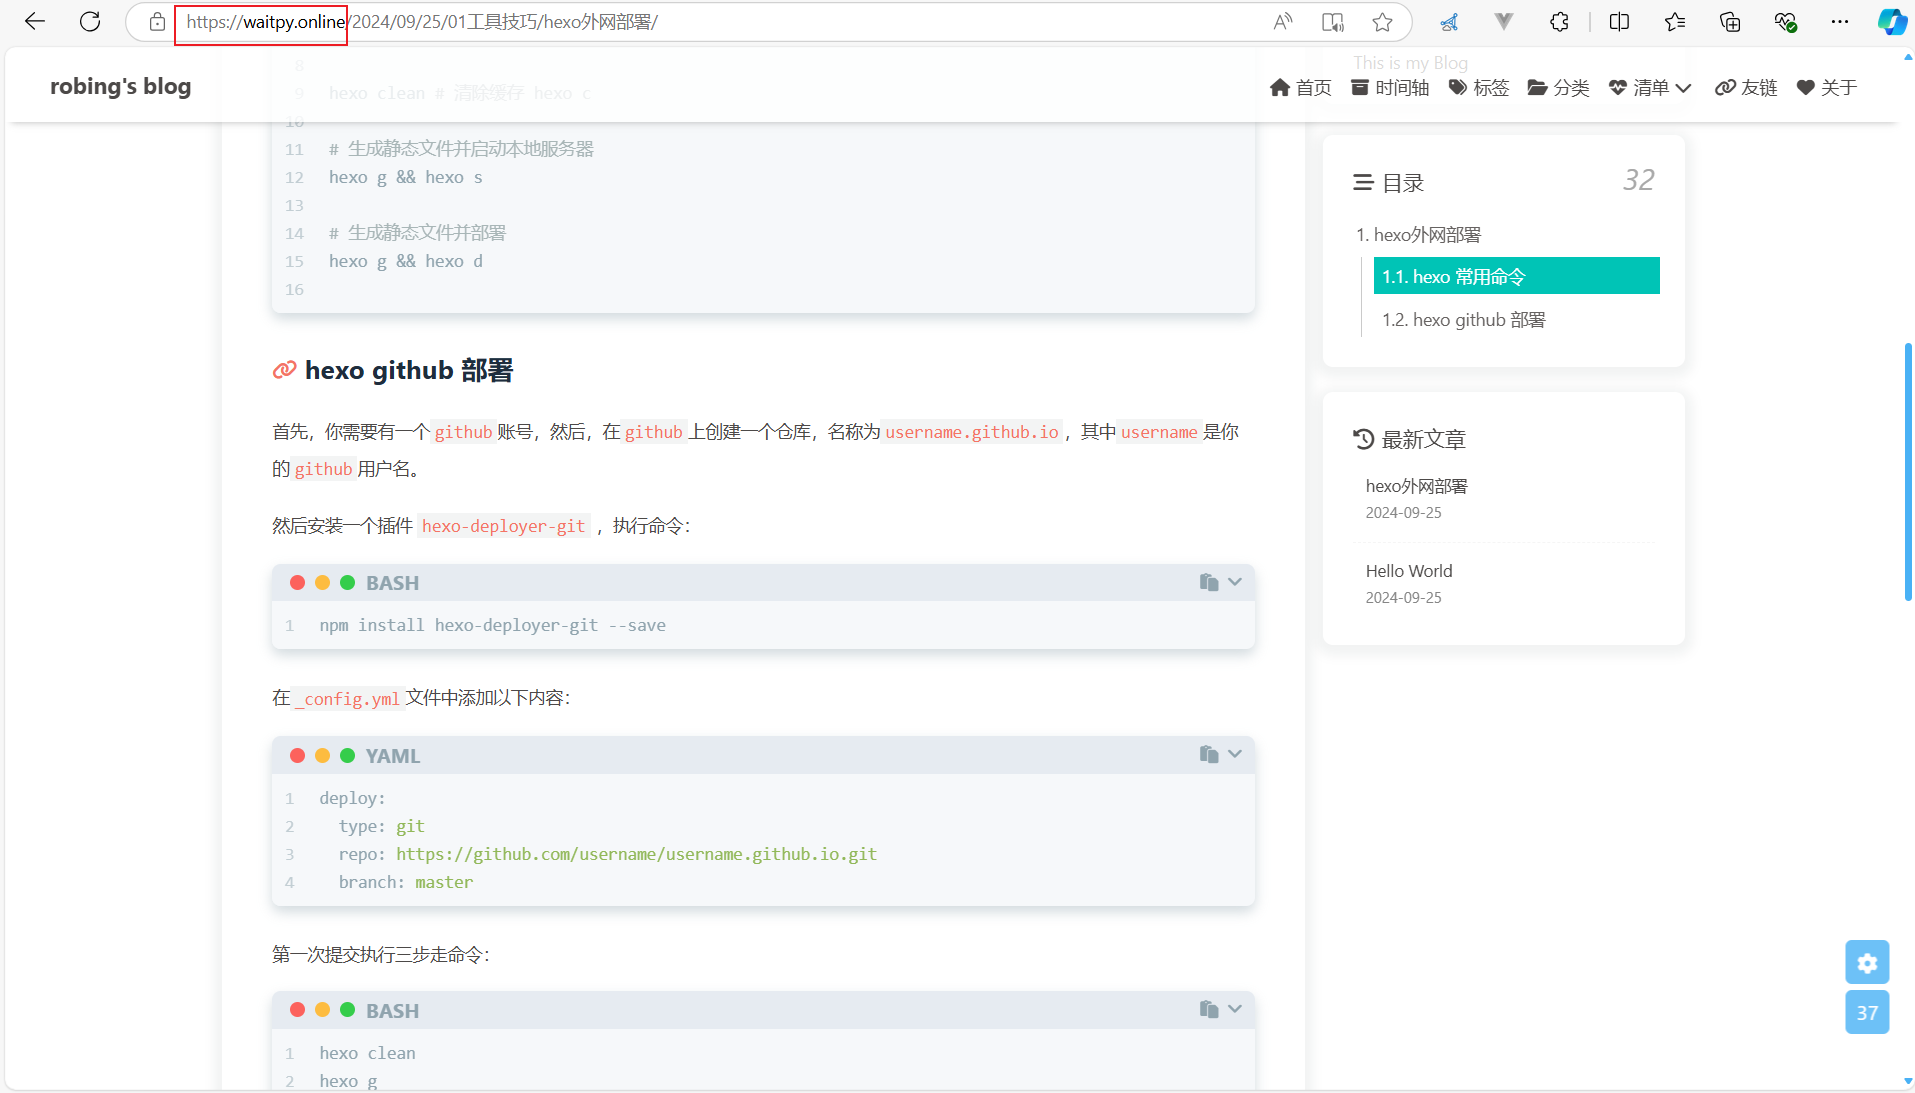
在部署之前,了解一下hexo的常用命令
hexo 常用命令
hexo new "My New Post" # 新建文章 hexo n "My New Post"

hexo generate # 生成静态文件 hexo g

hexo server # 启动本地服务器 hexo s

hexo deploy # 部署 hexo d

hexo clean # 清除缓存 hexo c

# 生成静态文件并启动本地服务器
hexo g && hexo s

# 生成静态文件并部署
hexo g && hexo d
hexo github 部署
首先,你需要有一个github账号,然后,在github上创建一个仓库,名称为username.github.io,其中username是你的github用户名。
Tips: 如果是第一次使用github,需要配那个ssk秘钥,账号用户名,建议百度,我这里就不过多赘述了。
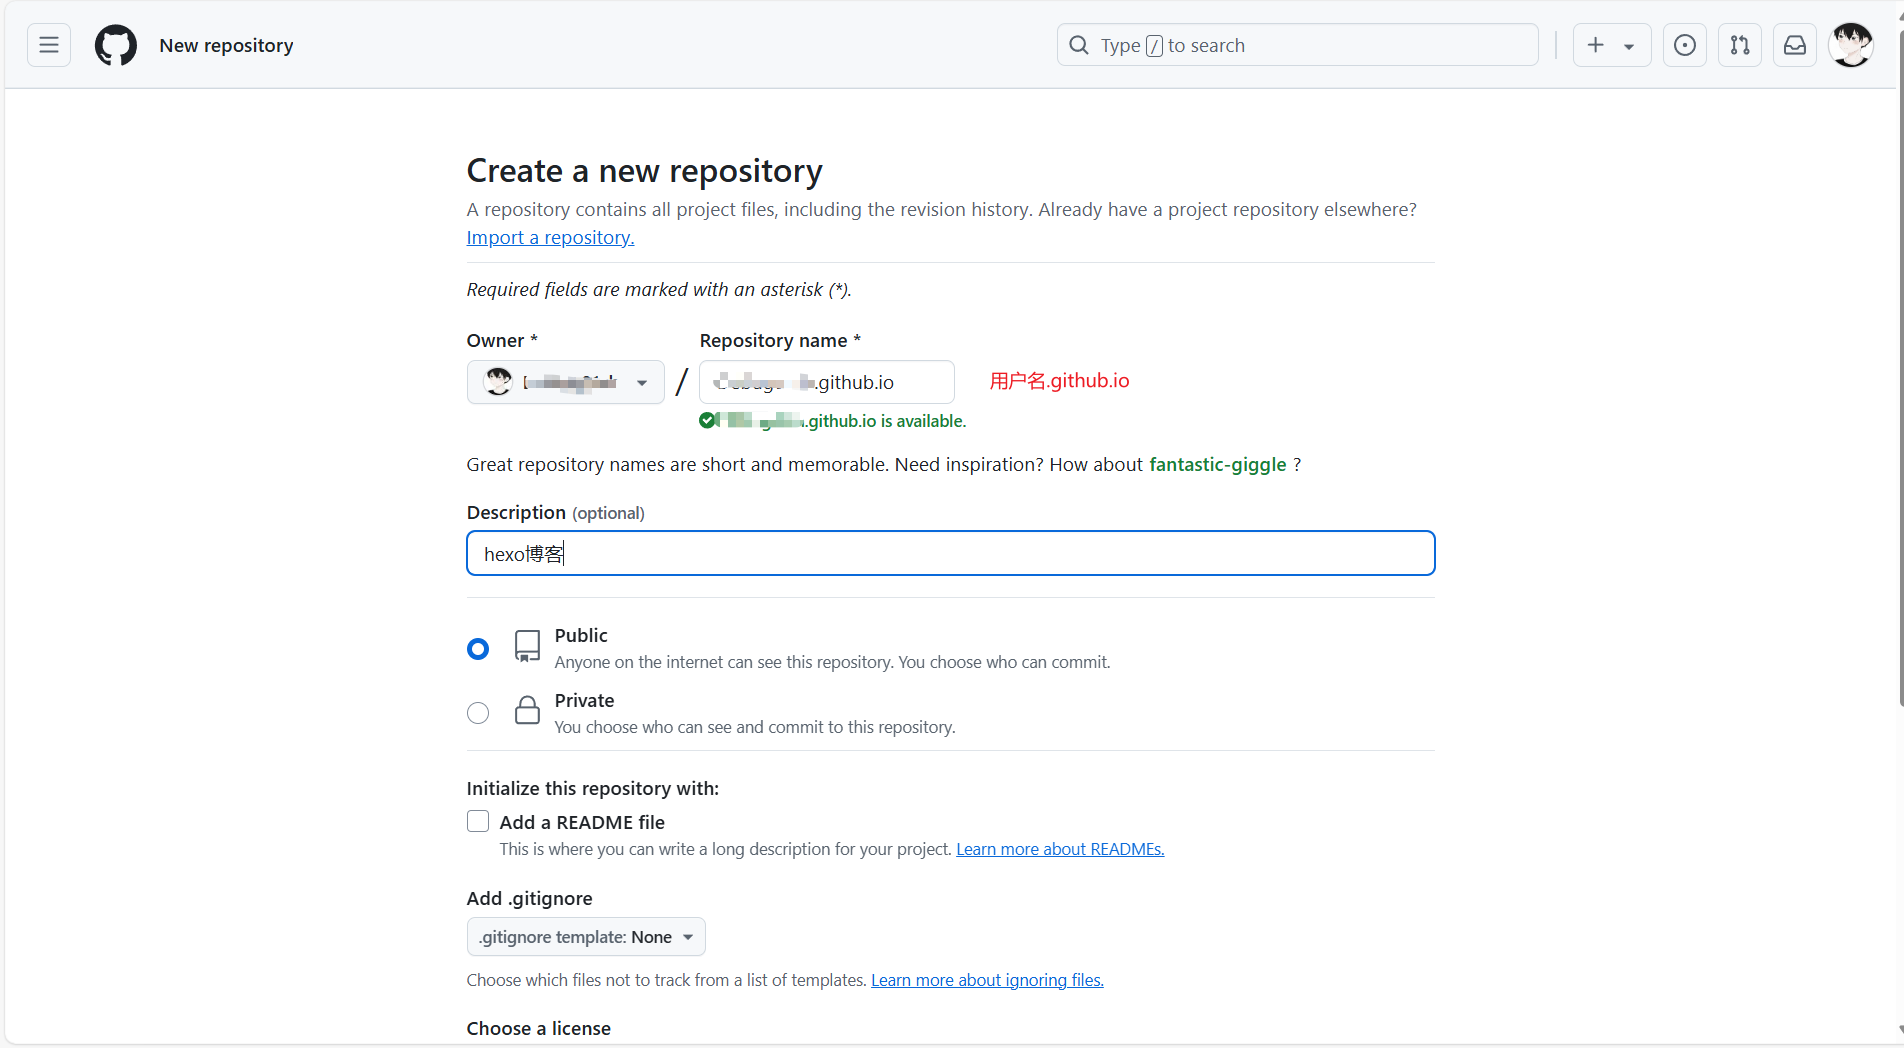
安装一个插件 hexo-deployer-git ,用于git提交,执行命令:
npm install hexo-deployer-git --save

在_config.yml文件中添加以下内容:
# 将username 改为你的github账号
deploy:
  type: git
  repo: https://github.com/username/username.github.io.git
  branch: master
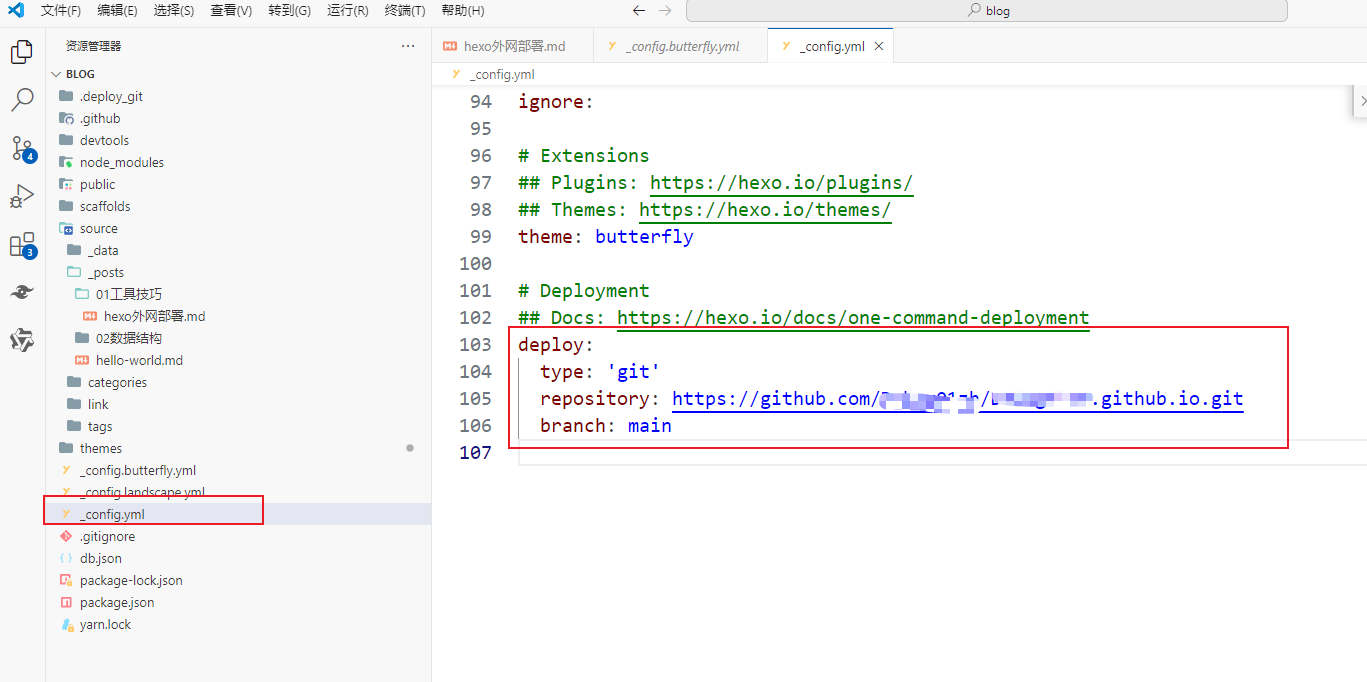
提交执行"三步走"命令:
hexo clean
hexo g
hexo d
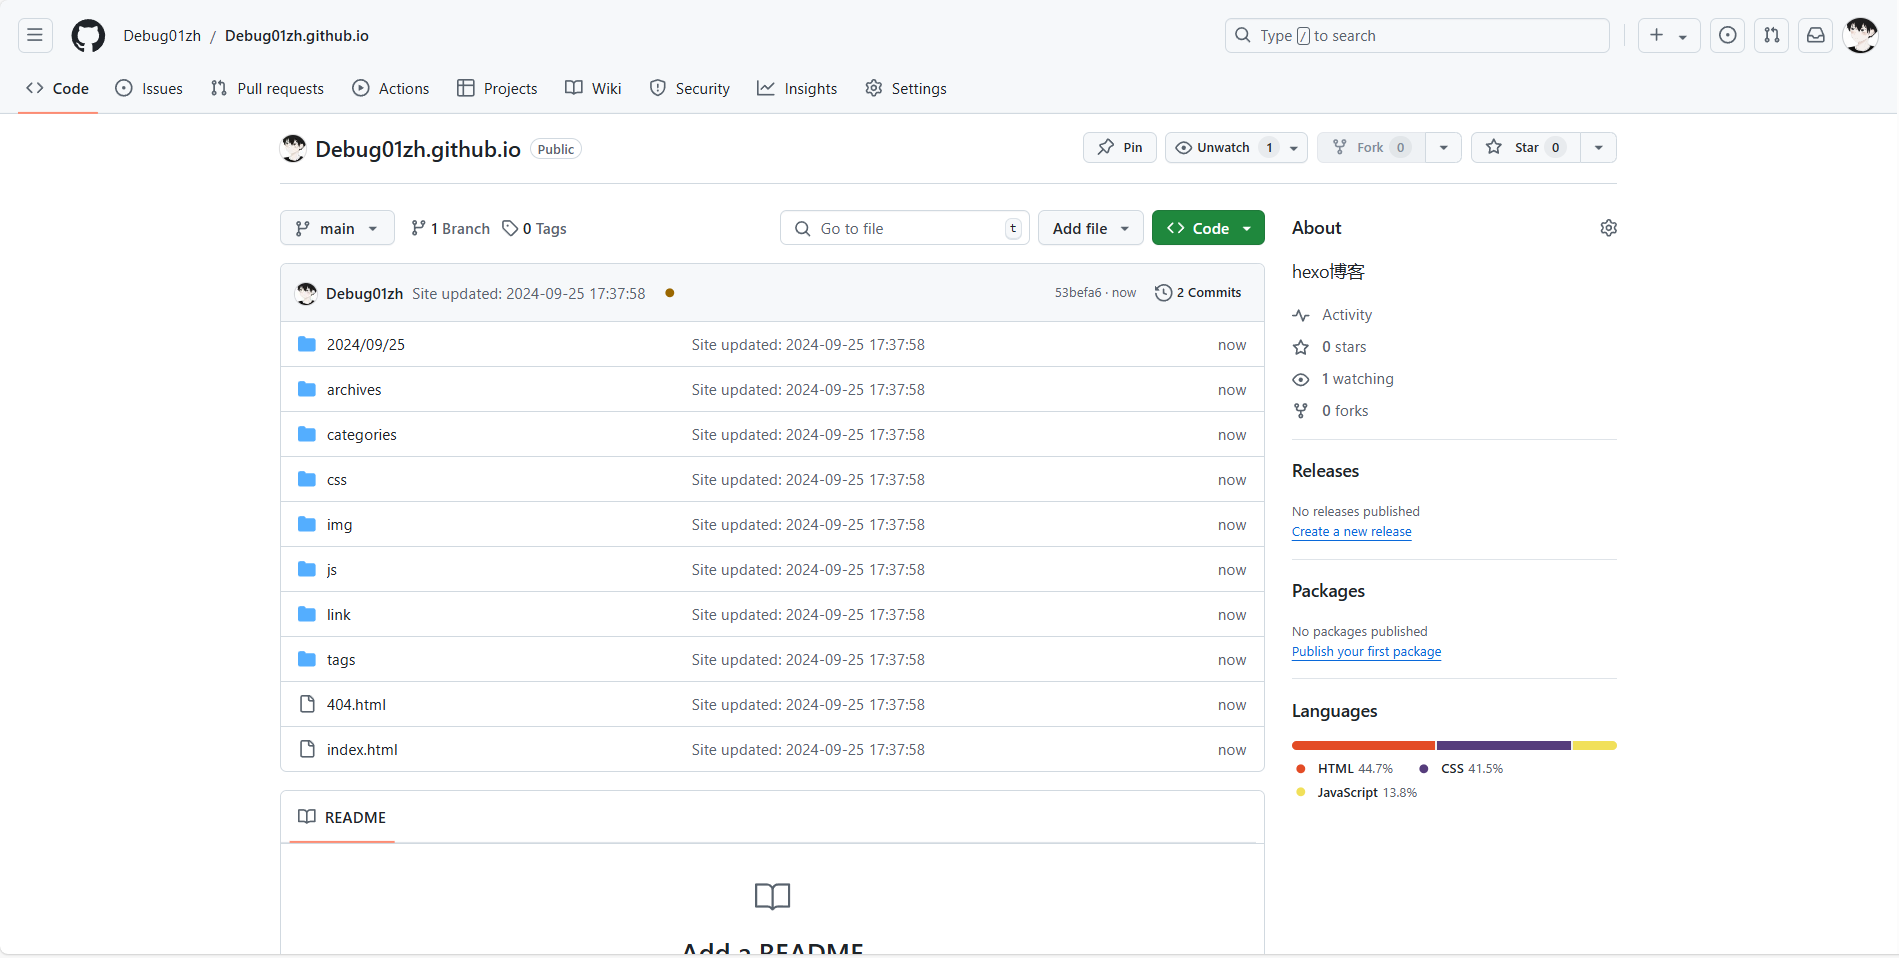
此时,你可以直接通过 username.github.io 访问你的博客了。
如果你想要通过域名访问,接着执行下面的步骤。
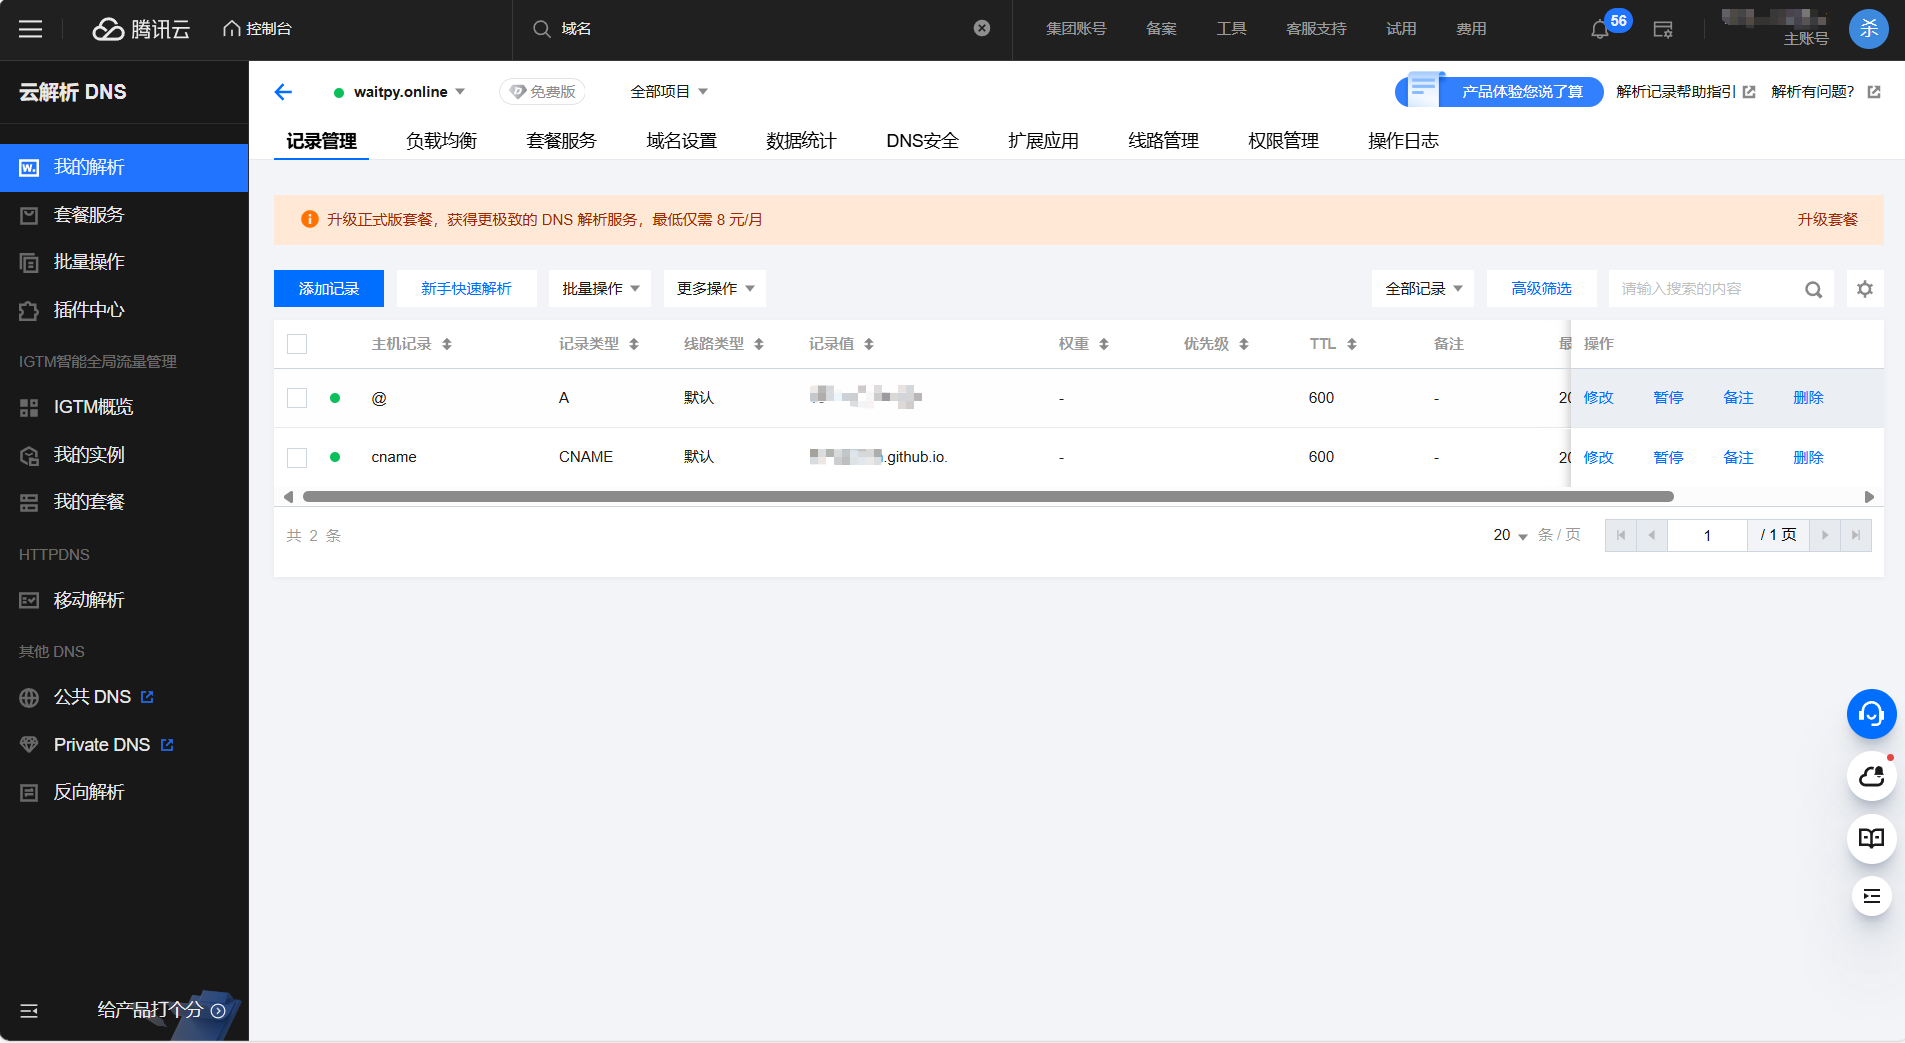
购买一个域名,如腾讯云的域名,然后,在域名上,添加两个个CNAME记录。在你的域名注册商的控制面板中,找到DNS设置,然后添加以下两个CNAME记录:
www 指向 username.github.io(你的用户名)
@ 指向 IP地址(你的github的站点IP,使用ping 命令即可)
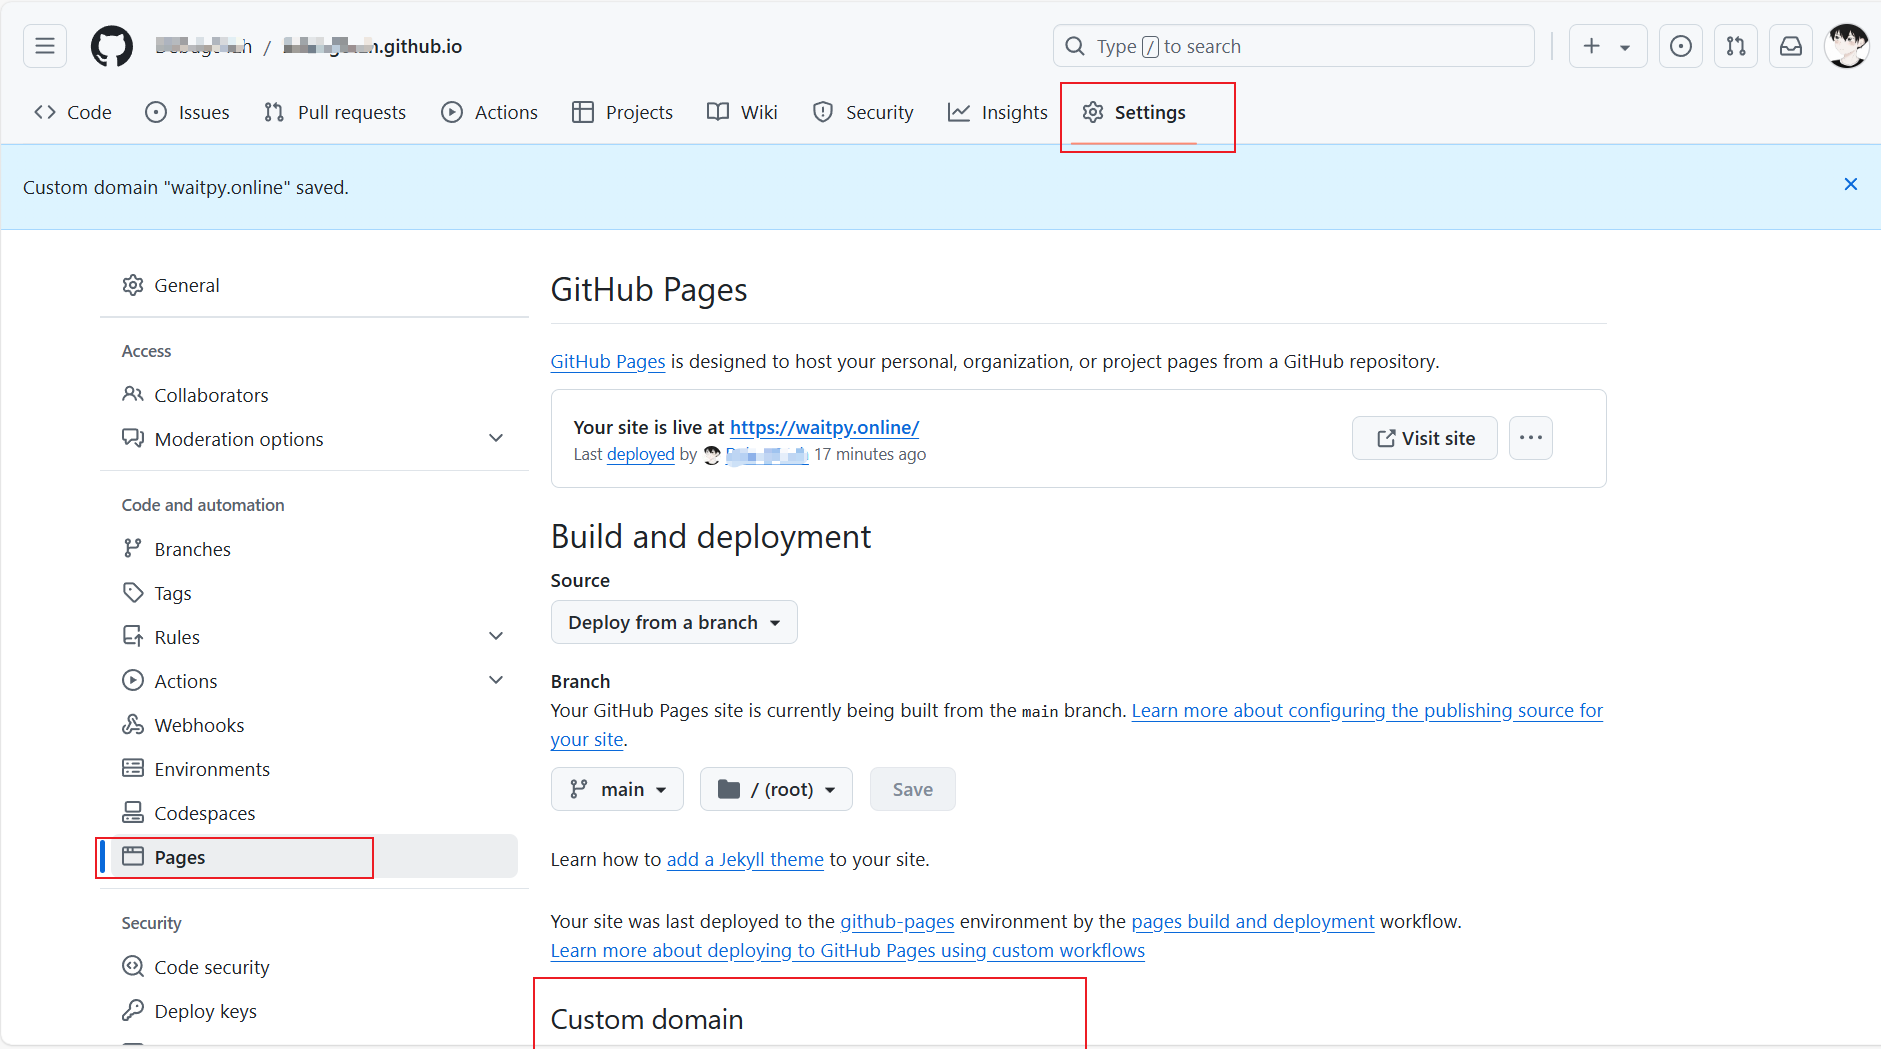
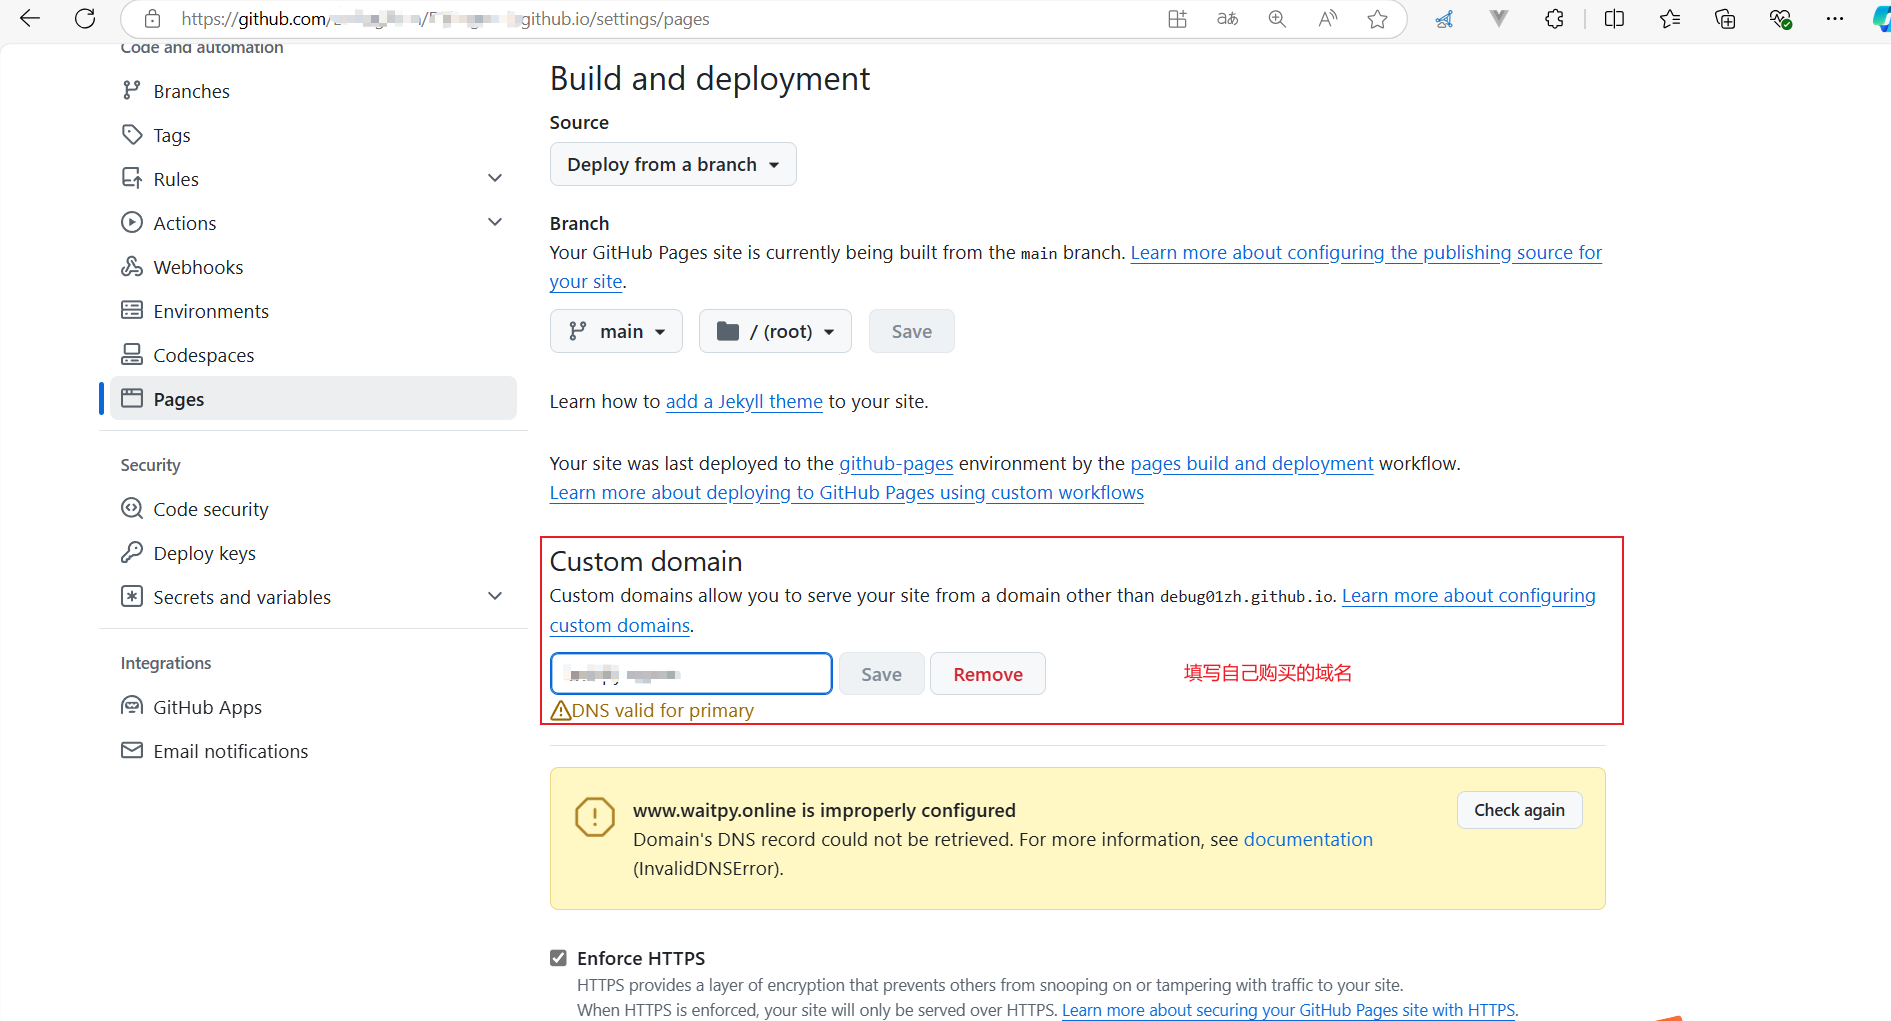
在github上,点击settings,找到Github Pages,选择customer domain,然后输入自己的域名,点击Save,等待几秒,刷新页面,即可看到你的博客了。


最后,欢迎大家来访问我的 站点哦:https://waitpy.online/
原文地址:https://blog.csdn.net/m0_63622279/article/details/142530177
免责声明:本站文章内容转载自网络资源,如本站内容侵犯了原著者的合法权益,可联系本站删除。更多内容请关注自学内容网(zxcms.com)!
