Android获取本地文件目录
一、实现效果
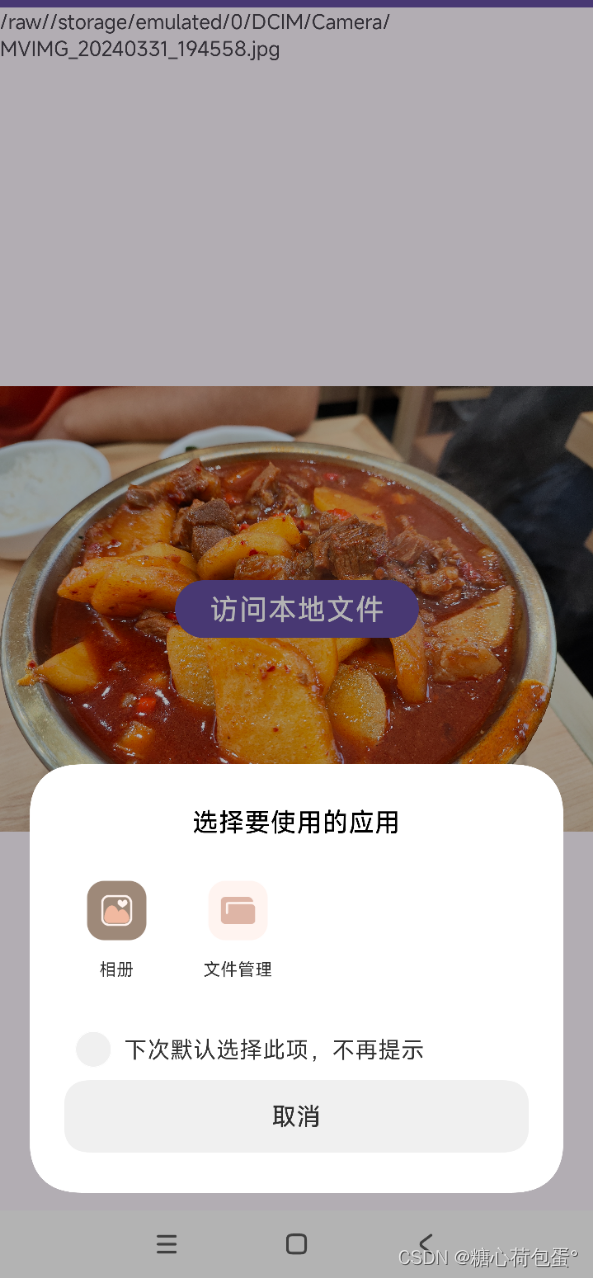
一个简单的demo。点击按钮,获取本地文件目录,可以选择图片,展示选取的对应图片和展示存储路径。如图所示:

二、实现方式
1. 权限
AndroidManifest.xml文件里面添加权限
<uses-permission android:name="android.permission.READ_EXTERNAL_STORAGE" />
<uses-permission android:name="android.permission.WRITE_EXTERNAL_STORAGE" />
2. 布局
<?xml version="1.0" encoding="utf-8"?>
<androidx.constraintlayout.widget.ConstraintLayout xmlns:android="http://schemas.android.com/apk/res/android"
    xmlns:app="http://schemas.android.com/apk/res-auto"
    xmlns:tools="http://schemas.android.com/tools"
    android:layout_width="match_parent"
    android:layout_height="match_parent"
    tools:context=".MainActivity">

    <ImageView
        android:id="@+id/main_iv"
        android:layout_width="wrap_content"
        android:layout_height="wrap_content"
        app:layout_constraintBottom_toBottomOf="parent"
        app:layout_constraintEnd_toEndOf="parent"
        app:layout_constraintStart_toStartOf="parent"
        app:layout_constraintTop_toTopOf="parent" />
    <Button
        android:id="@+id/main_btn"
        android:layout_width="wrap_content"
        android:layout_height="wrap_content"
        android:text="@string/file_store"
        android:textSize="20sp"
        app:layout_constraintBottom_toBottomOf="parent"
        app:layout_constraintEnd_toEndOf="parent"
        app:layout_constraintStart_toStartOf="parent"
        app:layout_constraintTop_toTopOf="@+id/main_iv"/>
    <TextView
        android:layout_width="wrap_content"
        android:layout_height="wrap_content"
        android:id="@+id/main_tx"
        tools:ignore="MissingConstraints" />

</androidx.constraintlayout.widget.ConstraintLayout>
3. kotlin代码
class MainActivity : AppCompatActivity() {
    private lateinit var btn2: Button
    private lateinit var ivImage: ImageView
    private lateinit var btx:TextView
    private lateinit var activityResultLauncher: ActivityResultLauncher<Intent>
    @SuppressLint("MissingInflatedId")
    override fun onCreate(savedInstanceState: Bundle?) {
        super.onCreate(savedInstanceState)
        setContentView(R.layout.activity_main)

        btn2 = findViewById(R.id.main_btn)
        ivImage = findViewById(R.id.main_iv)
        btx=findViewById(R.id.main_tx)


        activityResultLauncher = registerForActivityResult(ActivityResultContracts.StartActivityForResult()) { result ->
            if (result.resultCode == RESULT_OK) {
                Log.e(this::class.java.name, "Result: " + result.data.toString())
                // 处理返回的图片数据
                val uri: Uri? = result.data?.data
                uri?.let {
                    ivImage.setImageURI(it)
                    Log.e(this::class.java.name, "Uri: $it")
                    // 获取并显示图片的路径
                    btx.text=getPathFromUri(it)
                }
            }
        }

        btn2.setOnClickListener {
            val intent = Intent(Intent.ACTION_PICK).apply {
                data = MediaStore.Images.Media.EXTERNAL_CONTENT_URI
                type = "image/*"
            }
            activityResultLauncher.launch(intent)
        }


    }
    //返回图片的路径字符串
    private fun getPathFromUri(uri:Uri):String{
        return uri.path?:"Unknown"
    }
}
以上就是全部内容
主页有更多 Android 相关文章,欢迎点赞收藏~
原文地址:https://blog.csdn.net/Waterme10n/article/details/137240886
免责声明:本站文章内容转载自网络资源,如本站内容侵犯了原著者的合法权益,可联系本站删除。更多内容请关注自学内容网(zxcms.com)!
