vue2集成markdown编辑器及前台渲染
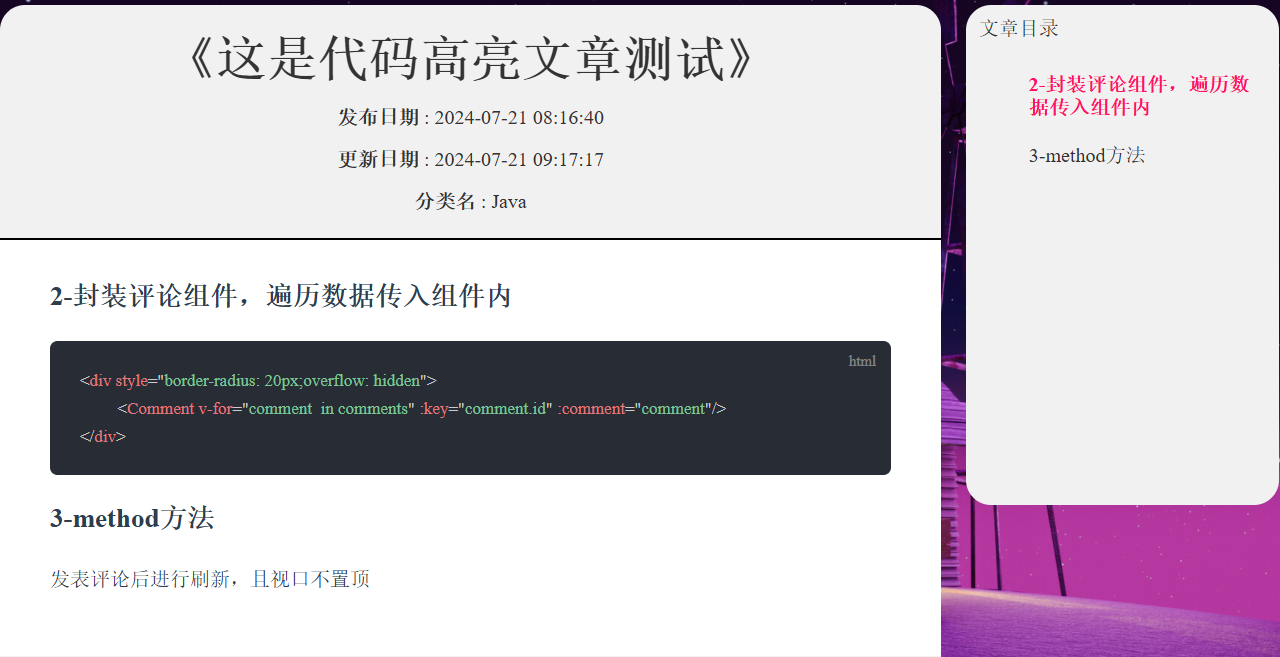
效果展示
后台编辑器
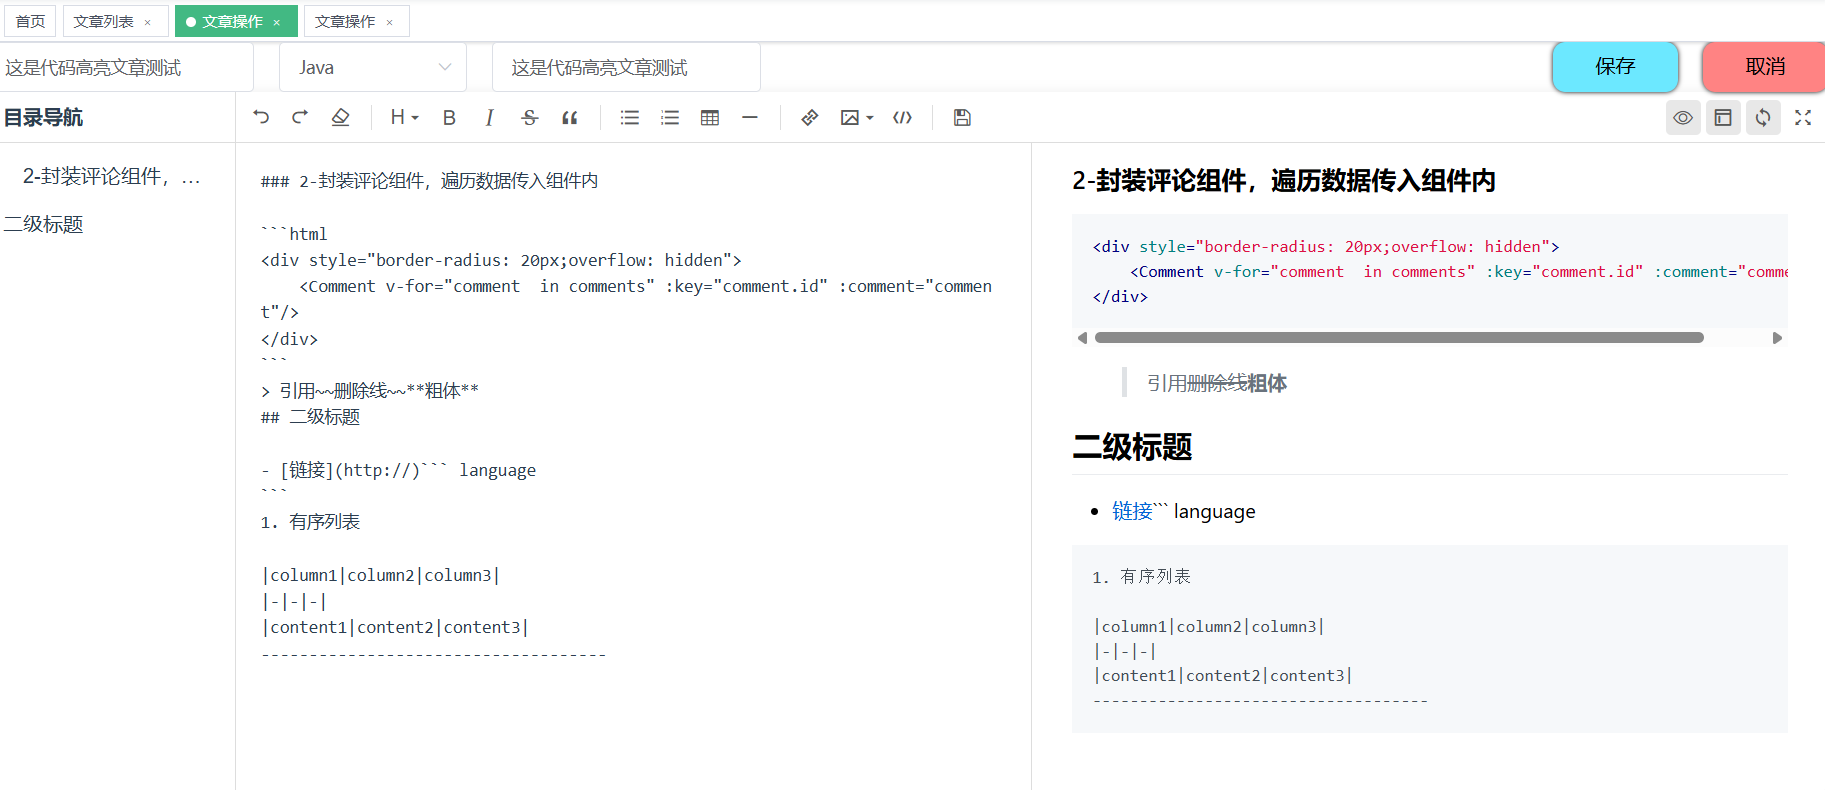
前台渲染
后台编辑器步骤
安装包
npm i @kangc/v-md-editor -S
main.js里全局注册
编辑器VueMarkdownEditor组件
import Vue from 'vue';
import VueMarkdownEditor from '@kangc/v-md-editor';
import '@kangc/v-md-editor/lib/style/base-editor.css';
import vuepressTheme from '@kangc/v-md-editor/lib/theme/vuepress.js';
import '@kangc/v-md-editor/lib/theme/style/vuepress.css';
import Prism from 'prismjs';
VueMarkdownEditor.use(vuepressTheme, {
  Prism,
});
Vue.use(VueMarkdownEditor);
VMDEditor.vue文件
自己内部
<template>
  <div>
    <v-md-editor
      v-model="editorValue"
      :disabled-menus="[]"
      height="calc(100vh - 150px)"
      @upload-image="handleUploadImage"
    />
  </div>
</template>

<script>
export default {
  name: 'MdEditor',
  props: {
    // 接收值父组件传递值
    content: String
  },
  data() {
    return {
      editorValue: this.content != null ? this.content : '',
    }
  },
  watch: {
    editorValue: function(newNum, oldNum) {
      // 修改调用者传入的值
      this.$emit('update:content', newNum)
    }
  },
  methods: {
    // v-md-editor 文件上传
    handleUploadImage(event, insertImage, files) {
      // console.log(files);
      // 上传
      for (let i = 0; i < files.length; i++) {
        this.crud.upload(files[i], 'image/vMdEditor/').then(res => {
          // 获取返回数据
          const data = res.data.data
          // 添加图片到内容
          insertImage({
            url: data.url,
            desc: data.name
          })
        })
      }
    }
  }
}
</script>

<style>
</style>
在需要用到的页面里引入注册并使用
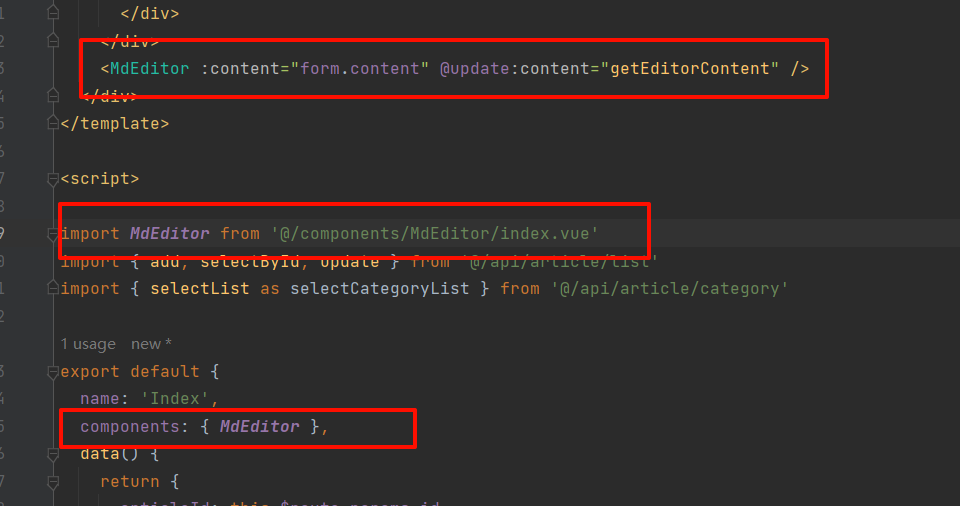
监听输入框并给页面传值
使用到了父子组件emit on传值方法
子组件
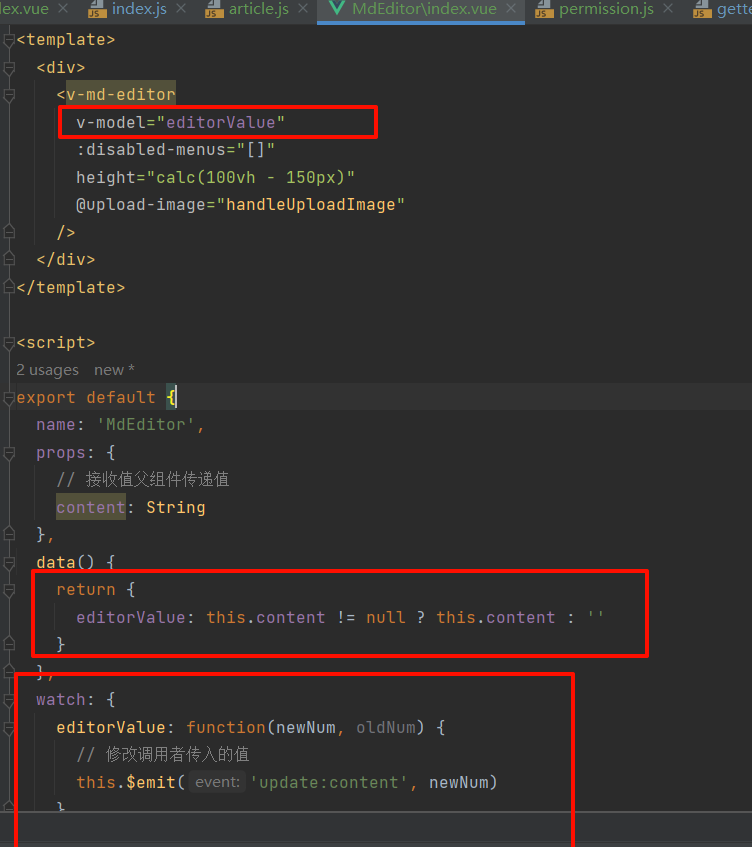
父组件

编辑时回显数组
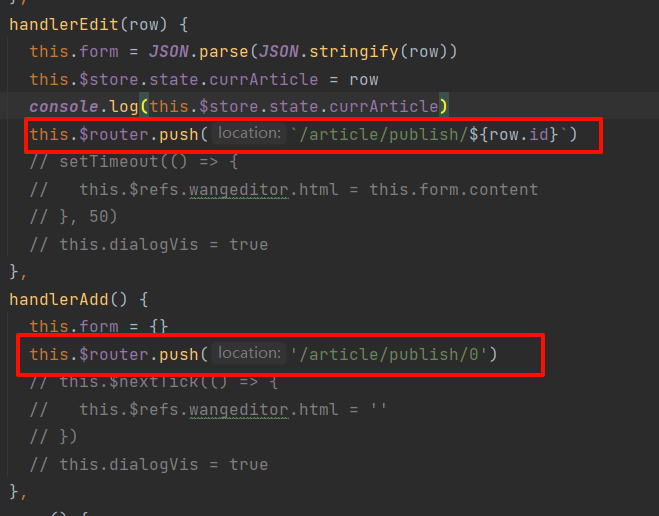
如果是发布新增,路径参数为0,如果是修改,参数为文章id,以此区分编辑还是发布
编辑时记录当前文章的所有信息在vuex里
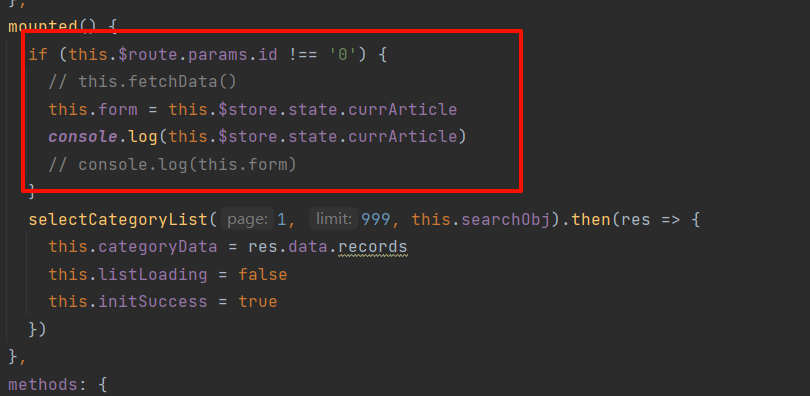
操作文章的组件里挂载时判断是编辑还是新增,编辑则获取vuex数据到form表单对象
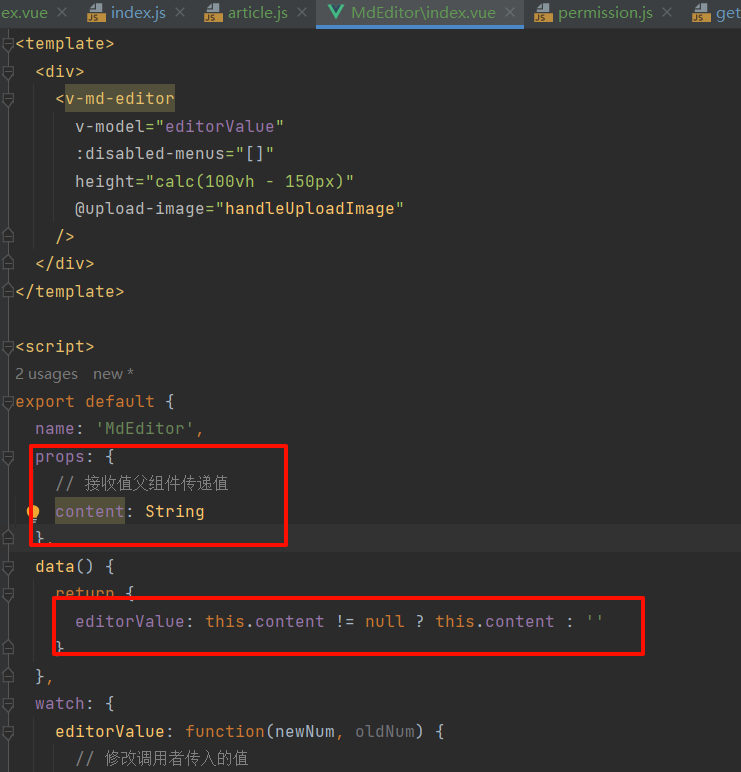
然后表单数据给md编辑器组件传值,md接收绑定即可

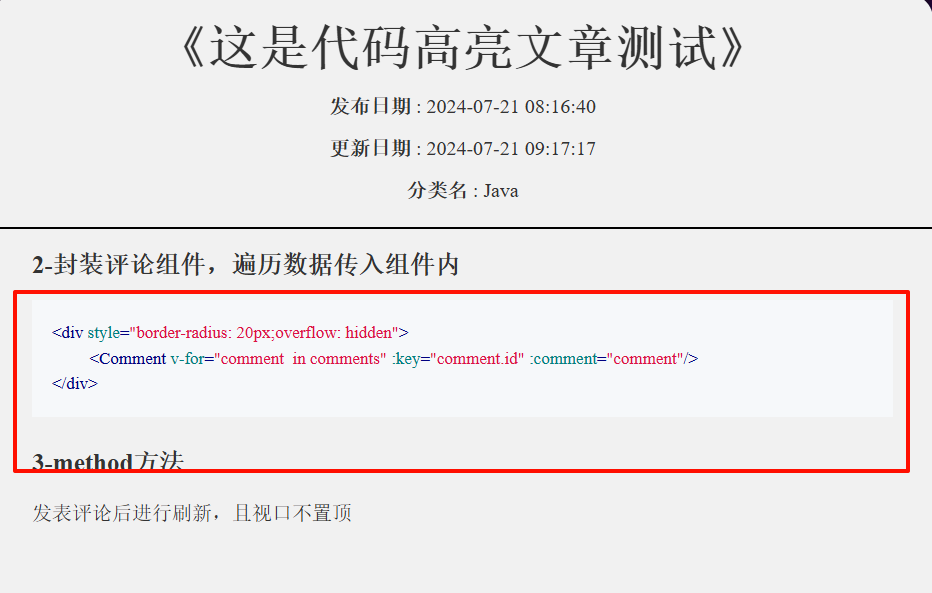
前台渲染md格式数据步骤
main.js 引入
github主题
import VMdPreview from '@kangc/v-md-editor/lib/preview';
import '@kangc/v-md-editor/lib/style/base-editor.css';
import '@kangc/v-md-editor/lib/style/preview.css';
// github主题
import githubTheme from '@kangc/v-md-editor/lib/theme/github.js'
import '@kangc/v-md-editor/lib/theme/style/github.css'
import hljs from 'highlight.js'
VMdPreview.use(githubTheme,{
    Hljs: hljs
})
Vue.use(VMdPreview)
vuepress主题
main.js
import VMdPreview from '@kangc/v-md-editor/lib/preview';
import '@kangc/v-md-editor/lib/style/base-editor.css';
import '@kangc/v-md-editor/lib/style/preview.css';
// vuepressTheme主题
import vuepressTheme from '@kangc/v-md-editor/lib/theme/vuepress.js';
import '@kangc/v-md-editor/lib/theme/style/vuepress.css';
import Prism from 'prismjs';
VMdPreview.use(vuepressTheme,{
    Prism
})
Vue.use(VMdPreview)
还需要安装一个包和修改配置文件
npm install babel-plugin-prismjs
在babel.config.js里 按需引入对应语言
// babel.config.js
module.exports = {
  plugins: [
    [
      'prismjs',
      {
        languages: ['json'],
      },
    ],
  ],
};
引入所有语言
const components = require('prismjs/components');
const allLanguages = Object.keys(components.languages).filter((item) => item !== 'meta');
module.exports = {
  plugins: [
    [
      'prismjs',
      {
        languages: allLanguages
      },
    ],
  ],
}
渲染组件的使用

点击按钮复制代码块内容

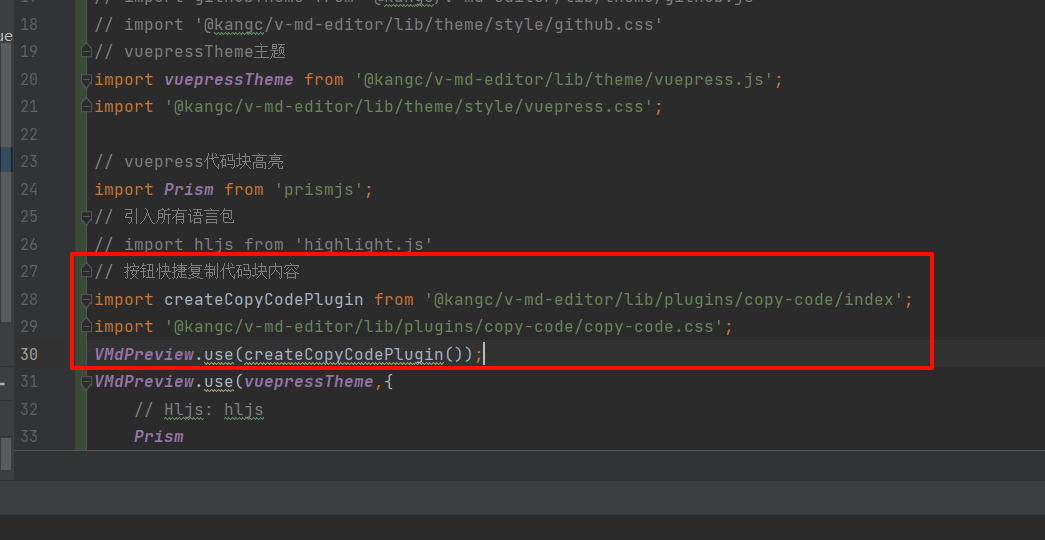
// main.js
import createCopyCodePlugin from '@kangc/v-md-editor/lib/plugins/copy-code/index';
import '@kangc/v-md-editor/lib/plugins/copy-code/copy-code.css';
VMdPreview.use(createCopyCodePlugin());
如果想要点击后弹框则在组件上设置监听事件对应的回调即可

文章目录的展示
method
思路
获取所有h1-h6标签的的document文档设置id
过滤标题标签内容不为空的
使用set集合的不重复特性,获取所有h标签,后续根据标签名,确定缩进值大小,h1-> 缩进级别为1,根据级别*padding-left的固定值实现分层
(也可以使用获取nodeName的第二个值也就是h1=> 1 获取层次等级)
加工titles数组,所有对象有id,level(indent)层级
结尾设置监听器,等待文章目录的a标签映射上去之后监听,点击后调用高亮方法.将自身作用参数传递过去,增加类样式
getTitles() {
    // 文章目录操作
    const anchors = this.$refs.articleContent.$el.querySelectorAll('h1,h2,h3,h4,h5,h6');
    // 给h1,2,3标签设置id
    anchors.forEach((item, index) => {
        item.setAttribute('id', 'header-' + index)
    })
    // 存数组,后续监听该标题的变化位置来高亮标题
    this.titlesDoms = anchors

    // 判断标题里是否为空
    const titles = Array.from(anchors).filter((title) => title.innerText.trim() !== null);
    if (!titles.length) {
        this.titles = [];
        return;
    }

    const hTags = Array.from(new Set(titles.map((title) => title.tagName))).sort();
    this.titles = titles.map((el, index) => ({
        id: 'header-' + index,
        title: el.innerText,
        // lineIndex: el.getAttribute('data-v-md-line'),
        level: Number(el.nodeName.substring(1, 2)),
        indent: hTags.indexOf(el.tagName),
    }));
    setTimeout(() => {
        this.setClickListen()
        // 初始化高亮
    }, 50)
},
    setClickListen() {
        const headers = document.querySelectorAll('a');
        headers.forEach(header => {
            // 如果是id为header开始的a标签,则设置监听
            if (header.id.startsWith('header')) {
                //监听自己,如果被点击了,就触发函数,将自己丢过去
                header.addEventListener('click', () => {
                    this.highlight(header)
                })
            }
        })
    },
        highlight(header) {
            // 清空所有a标签的高亮,进行初始化
            document.querySelectorAll('a.highlight')
                .forEach(a => a.classList.remove('highlight'));
            //将此次点击的header目录进行添加高亮
            if (document.querySelector(`a#${header.id}`) === null) {
                console.log('空')
                return
            }
            document.querySelector(`a#${header.id}`).classList.add('highlight')
        }
监听滚动视窗原理 在以往的文章有提及,可自行查找,这里不过多赘述了
原文地址:https://blog.csdn.net/Zwwxd666/article/details/140591469
免责声明:本站文章内容转载自网络资源,如本站内容侵犯了原著者的合法权益,可联系本站删除。更多内容请关注自学内容网(zxcms.com)!
