Linux的学习之路:14、文件(1)
摘要
有一说一文件一天学不完,细节太多了,所以这里也没更新完,这里部分文件知识,然后C语言和os两种的文件操作
目录
一、文件预备
1、文件=文件内容+属性(也就是数据)
2、文件的所有操作,无外乎是:对内容、对属性也就是文件的操作范畴
3、文件在磁盘(硬件)上放着,我们访问文件的流程:
先写代码->编译->exe->运行->访问文件。
文件的访问本质上是谁在访问文件呢?当然是进程了,我们写的代码就是进程,这个在之前的文章写了,这里就不具体解释了。
那么向硬件写入,只有谁有权利呢?这个肯定是OS也就是操作系统,那么普通用户也想写入呢?这个就是让OS提供接口,也就是各种语言封装了,要不然跨平台操作的时候需要把所有平台的代码都实现条件编译,动态裁剪,但是在不同语言下文件操作的接口都不一样,但是OS的接口只有一套。
4、显示器是硬件吗?printf像显示器打印和磁盘写入到文件没什么区别
5、在Linux的认为,一切皆文件
那么什么叫做文件呢?
站在系统的角度,能够被printf读取,或者能够被output写出的设备就叫做的文件。
侠义的文件:普通的磁盘文件
广义上的文件:显示器、键盘、网卡、声卡、显卡、磁盘、几乎所有的外设、都可以被称之为文件。
二、c文件操作
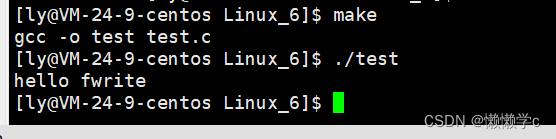
如下方代码就是利用C语言的函数进行创建文件并且三种写入文件的方式的演示,这里使用w进行写入,在文档中w是如果没有这个文件就会创建这个文件,也就是说我这里写入的是test1.txt这个文件,但是文件里没有就会进行生成一个文件。官方的使用代码选项如下,这里是利用man指令进行查看的。
r Open text file for reading. The stream is positioned at the beginning of the file.
r+ Open for reading and writing. The stream is positioned at the beginning of the file.
w Truncate file to zero length or create text file for writing. The stream is positioned at the beginning of the file.
w+ Open for reading and writing. The file is created if it does not exist, otherwise it is truncated. The stream is positioned at the beginning of the file.
a Open for appending (writing at end of file). The file is created if it does not exist. The stream is positioned at the end of the file.
a+ Open for reading and appending (writing at end of file). The file is created if it does not exist. The initial file position for reading is at the beginning of the file, but output is
always appended to the end of the file.
  1 #include <stdio.h>
  2 #include <stdlib.h>
  3 #include <string.h>
  4 #include <unistd.h>
  5
  6 int main()
  7 {
  8     FILE* fp=fopen("test1.txt","w");
  9     if(fp==NULL)
 10     {
 11         perror("fopen");
 12         return 1;
 13     }
 14     const char* s1="hello fwrite\n";
 15     fwrite(s1,strlen(s1),1,fp);
 16     const char* s2="hello fprintf\n";
 17     fprintf(fp,"%s",s2);
 18     const char* s3="hello fputs\n";
 19     fputs(s3,fp);
 20     fclose(fp);
 21     return 0;
 22 }
~

接着就是演示一下读取的示例,这里是读取一行进行打印在屏幕上。
6 int main()
  7 {
  8     FILE* fp=fopen("test1.txt","r");
  9     char buf[1024];
 10     const char *msg = "hello read!\n";
 11     while(1)
 12     {
 13         ssize_t s = fread(buf, 1, strlen(msg), fp);
 14         if(s > 0)
 15         {
 16             buf[s] = 0;
 17             printf("%s\n", buf);
 18         }
 19         if(feof(fp))
 20         {
 21             break;
 22         }
 23
 24     fclose(fp);
 25     return 0;
 26     }
 27 }
三、OS文件操作
1、系统文件I/O
操作文件,除了上述C接口(当然,C++也有接口,其他语言也有),我们还可以采用系统接口来进行文件访问,先来直接以代码的形式,实现和上面一模一样的代码,这里先是实现输出在文件里,如下方代码,这里是需要穿几个标志位,也就是放在一个int中的字节里,使用方式如下方代码,写文件。
#include <stdio.h>
 20 #include <sys/types.h>
 21 #include <sys/stat.h>
 22 #include <fcntl.h>
 23 #include <unistd.h>
 24 #include <string.h>
 25 int main()
 26 {
 27     umask(0);
 28     int fd = open("myfile", O_WRONLY|O_CREAT, 0644);
 29     if(fd < 0){
 30         perror("open");
 31         return 1;
 32
 33     }
 34     int count = 5;
 35     const char *msg = "hello word!\n";
 36     int len = strlen(msg);
 37     while(count--){
 38         write(fd, msg, len);
 39
 40     }
 41     close(fd);
 42     return 0;
 43
 44 }

读文件如下方代码所示
 #include <stdio.h>
 48 #include <sys/types.h>
 49 #include <sys/stat.h>
 50 #include <fcntl.h>
 51 #include <unistd.h>
 52 #include <string.h>
 53 int main()
 54 {
 55     int fd = open("myfile", O_RDONLY);
 56     if(fd < 0)
 57     {
 58         perror("open");
 59         return 1;
 60     }
 61     const char *msg = "hello word!\n";
 62     char buf[1024];
 63     while(1)
 64     {
 65         ssize_t s = read(fd, buf, strlen(msg));//类比write
 66         if(s > 0)
 67         {
 68             printf("%s", buf);
 69         }
 70         else
 71         {
 72             break;
 73         }
 74     }
 75     close(fd);
 76     return 0;
 77 }
~

2、接口介绍
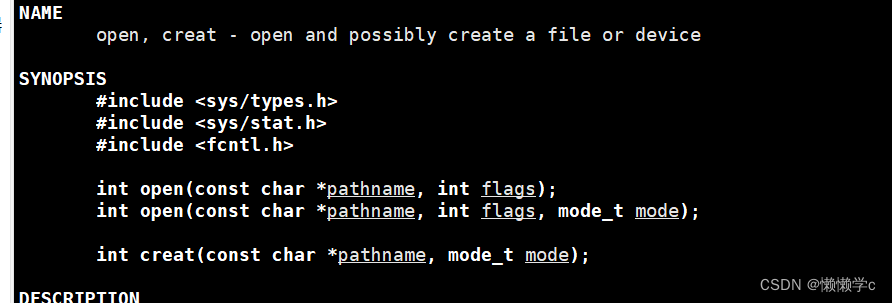
这里是 利用man进行查看open进行讲解,如下图一就是所需的头函数以及可以使用的函数接口,这里就不多截图了,我把常用的放在下方块中了。
#include <sys/types.h>
#include <sys/stat.h>
#include <fcntl.h>//头函数
int open(const char *pathname, int flags);
int open(const char *pathname, int flags, mode_t mode);//函数接口的使用
pathname: 要打开或创建的目标文件
flags: 打开文件时,可以传入多个参数选项,用下面的一个或者多个常量进行“或”运算,构成flags。
参数:
O_RDONLY: 只读打开
O_WRONLY: 只写打开
O_RDWR : 读,写打开
这三个常量,必须指定一个且只能指定一个
O_CREAT : 若文件不存在,则创建它。需要使用mode选项,来指明新文件的访问权限
O_APPEND: 追加写返回值:
成功:新打开的文件描述符
失败:-1
四、思维导图

原文地址:https://blog.csdn.net/weixin_64257568/article/details/137973107
免责声明:本站文章内容转载自网络资源,如本站内容侵犯了原著者的合法权益,可联系本站删除。更多内容请关注自学内容网(zxcms.com)!