使用Cloudreve快速搭建一个私有网盘,配置存储策略和管理权限以及Webdav设置访问
Cloudreve 是什么?
Cloudreve 可以让您快速搭建起公私兼备的网盘系统。Cloudreve
在底层支持不同的云存储平台,用户在实际使用时无须关心物理存储方式。你可以使用 Cloudreve
搭建个人用网盘、文件分享系统,亦或是针对大小团体的公有云系统。

这里介绍的是linux环境下安装方案:
下载,如果没有访问github的网络,可以在本地先下载下来。
https://github.com/cloudreve/Cloudreve/releases
安装:
#解压获取到的主程序
tar -zxvf cloudreve_VERSION_OS_ARCH.tar.gz

# 赋予执行权限
chmod +x ./cloudreve

# 启动 Cloudreve
./cloudreve
这里会创建初始化用户名密码,请保存好,如果不记得了,可以删去db文件,重启会重新创建
访问http://服务器IP:5212进入 Cloudreve
配置进程守护
如果不配置进程守护,有时候突然系统会不稳定的风险,建议配置下,这个很简单,官方提供的方法如下:
新建一个配置文件cloudreve.service,传到目录/usr/lib/systemd/system/ 将下文
PATH_TO_CLOUDREVE 更换为程序所在目录:
Service中是配置了停止重启方案
[Unit]
Description=Cloudreve
Documentation=https://docs.cloudreve.org
After=network.target
After=mysqld.service
Wants=network.target

[Service]
WorkingDirectory=/PATH_TO_CLOUDREVE
ExecStart=/PATH_TO_CLOUDREVE/cloudreve
Restart=on-abnormal
RestartSec=5s
KillMode=mixed

StandardOutput=null
StandardError=syslog

[Install]
WantedBy=multi-user.target
更新配置
systemctl daemon-reload
启动服务
systemctl start cloudreve
设置开机启动
systemctl enable cloudreve
管理命令:
# 启动服务
systemctl start cloudreve

# 停止服务
systemctl stop cloudreve

# 重启服务
systemctl restart cloudreve

# 查看状态
systemctl status cloudreve
配置系统信息
登录地址:
http://x.x.x.x:5212
用户密码是执行的时候创建的那个用户名和密码
配置存储空间大小:


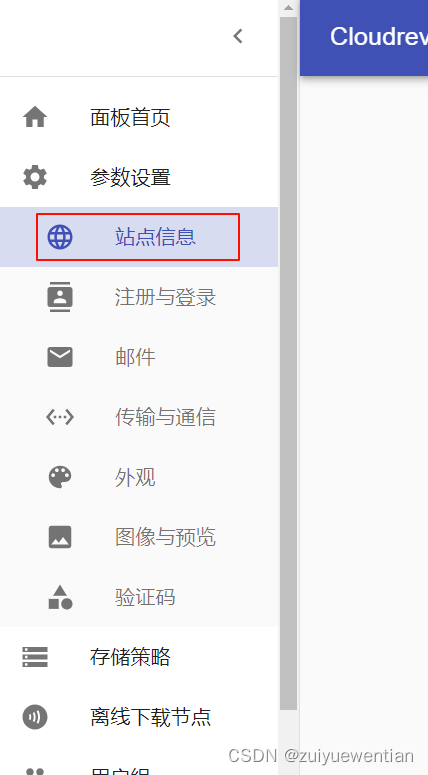
配置站点信息

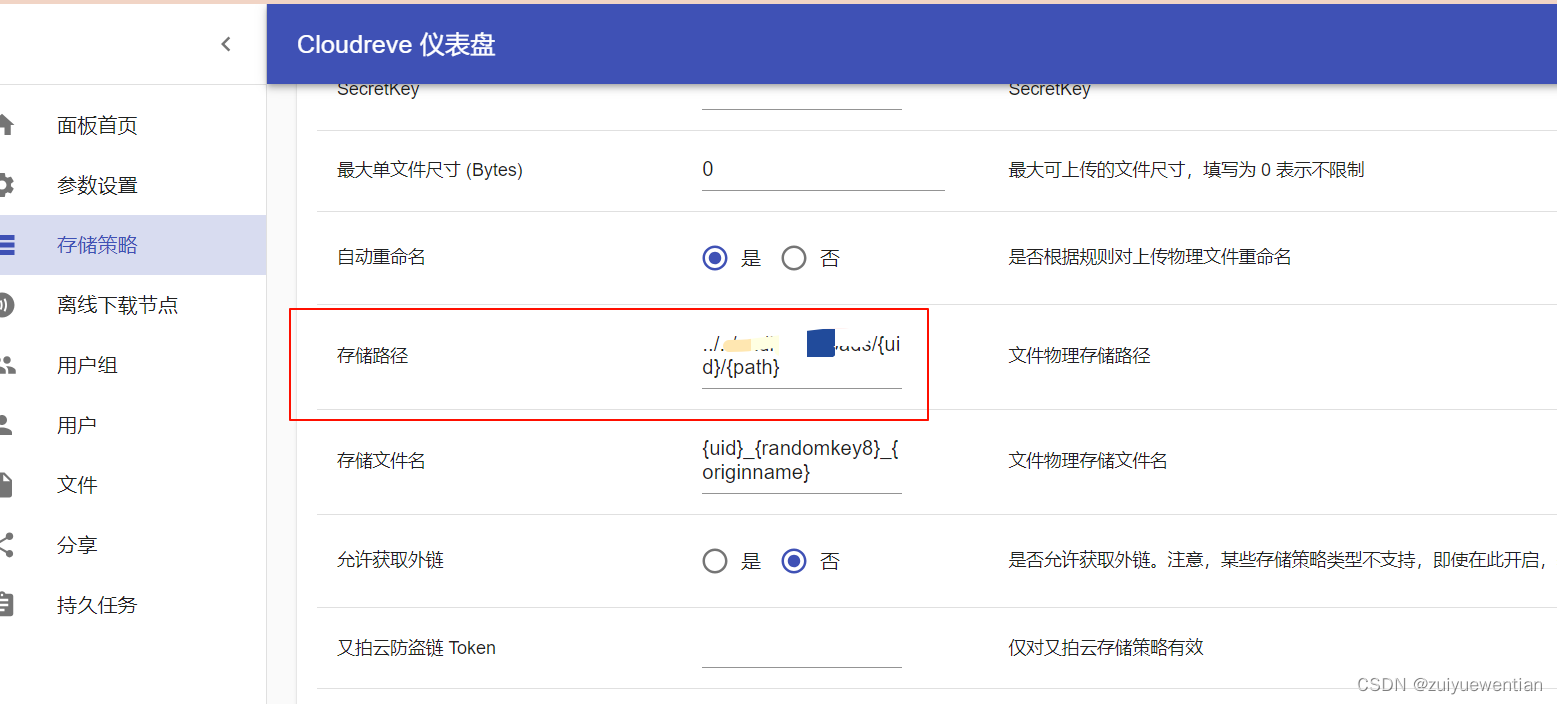
修改存储路径:

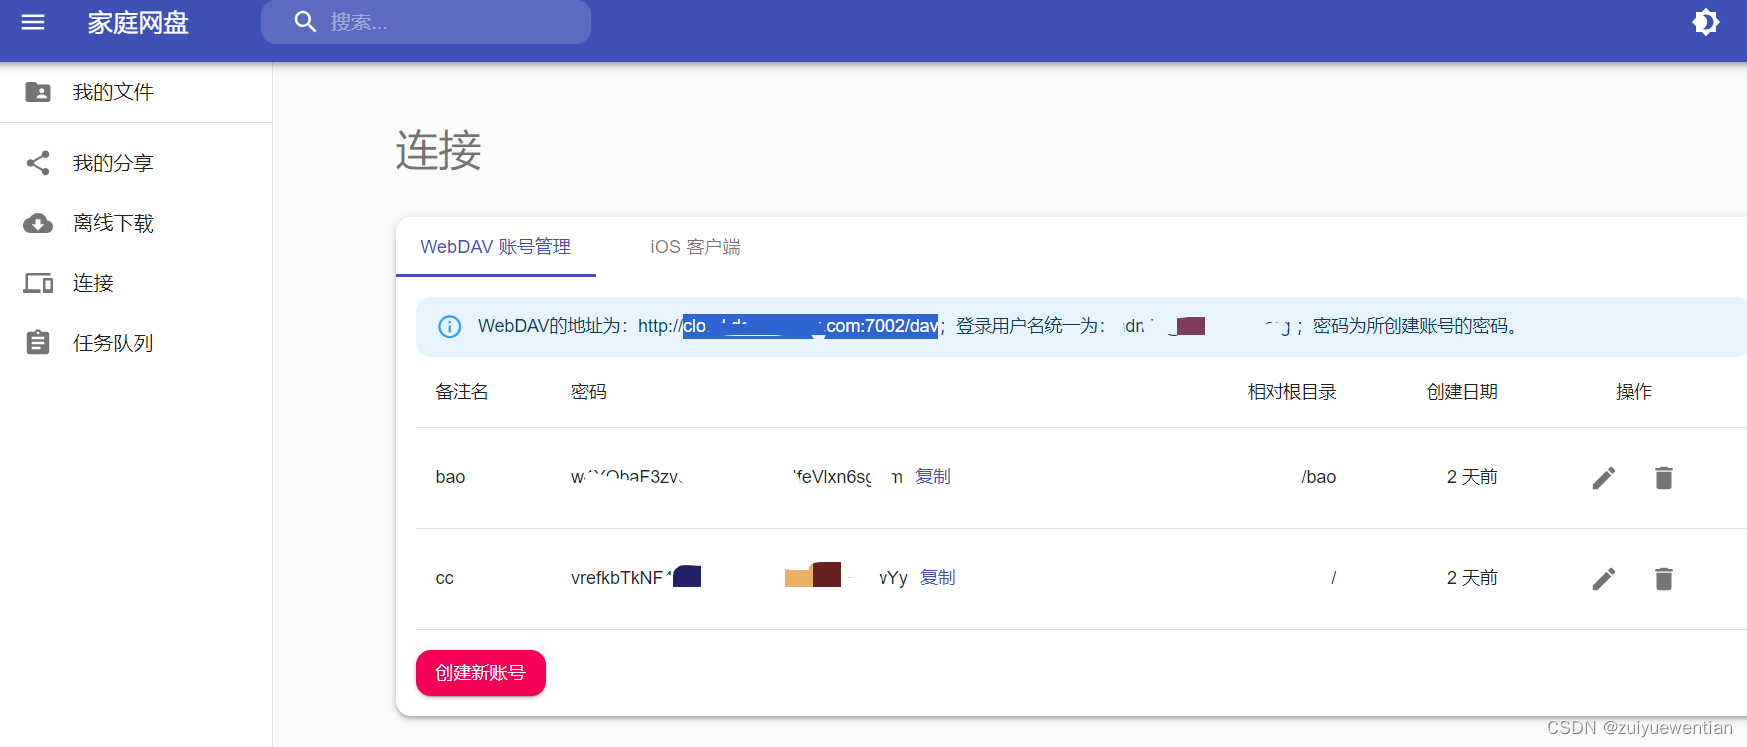
配置Webdav权限:
可以给不同用户配置不同路径的权限

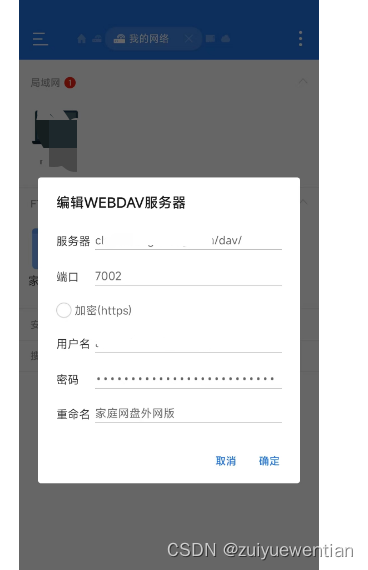
手机上配置webdav连接:
注意服务器不需要http://这种前缀

然后就可以愉快的玩耍了
原文地址:https://blog.csdn.net/zuiyuewentian/article/details/135618663
免责声明:本站文章内容转载自网络资源,如本站内容侵犯了原著者的合法权益,可联系本站删除。更多内容请关注自学内容网(zxcms.com)!
