【QT】QSS基础


👉🏻基本语法
Qt的QSS(Qt Style Sheets)是一个用于定制Qt应用程序外观的样式表语言,类似于CSS。通过QSS,开发者可以修改控件的外观和样式,使其更加美观和符合应用需求。以下是QSS的基本语法和常用属性的介绍。
基本语法
-
选择器:
- 选择器用于指定要应用样式的控件。例如,
QPushButton选择所有按钮。
- 选择器用于指定要应用样式的控件。例如,
-
属性:
- 样式属性使用
属性名: 属性值;的形式书写。例如,background-color: red;。
- 样式属性使用
-
规则:
- 一个完整的QSS规则如下所示:
QButton {
    background-color: blue;
    color: white;
}
- 一个完整的QSS规则如下所示:
给指定控件设置样式之后, 该控件的⼦元素也会受到影响
常用属性
-
背景和边框:
background-color: 背景颜色。border: 边框样式,例如border: 1px solid black;。
-
字体:
font-family: 字体类型,例如font-family: Arial;。font-size: 字体大小,例如font-size: 12px;。color: 字体颜色,例如color: #000000;。
-
间距和填充:
padding: 控件内边距,例如padding: 5px;。margin: 控件外边距,例如margin: 10px;。
-
状态样式:
- 可以根据控件状态应用不同样式,例如:
QPushButton:hover {
    background-color: green;
}
- 可以根据控件状态应用不同样式,例如:
-
图像:
background-image: 设置背景图像,例如background-image: url(image.png);。
示例
以下是一个简单的QSS示例,应用于一个按钮和一个标签:
QPushButton {
    background-color: blue;
    color: white;
    border: 2px solid black;
    padding: 10px;
}

QLabel {
    font-size: 14px;
    color: darkgray;
    margin: 5px;
}
使用方法
-
在代码中应用QSS:
- 可以在Qt应用程序中通过
setStyleSheet方法应用QSS样式。QPushButton *button = new QPushButton("Click Me"); button->setStyleSheet("QPushButton { background-color: blue; color: white; }");
- 可以在Qt应用程序中通过
-
外部文件:
- 也可以将QSS样式保存到文件中,并在应用启动时加载:
QFile file("style.qss");
file.open(QFile::ReadOnly);
QString styleSheet = QLatin1String(file.readAll());
qApp->setStyleSheet(styleSheet);
- 也可以将QSS样式保存到文件中,并在应用启动时加载:
👉🏻从⽂件加载样式表
首先自己创建一个qss文件,然后放入qrc资源中。
最后在初始化时,从文件中读取好设定好的qss样式即可。

#include "widget.h"
#include "ui_widget.h"
#include<QFile>
Widget::Widget(QWidget *parent)
    : QWidget(parent)
    , ui(new Ui::Widget)
{
    ui->setupUi(this);
    QString style = Widget::loadQss();
    this->setStyleSheet(style);
}

Widget::~Widget()
{
    delete ui;
}

QString Widget::loadQss()
{
    QFile file(":/style.qss");
    file.open(QFile::ReadOnly);

    QString style = file.readAll();

    return style;
}
Tips:
当我们发现⼀个控件的样式不符合预期的时候, 要记得排查这四个地⽅:
• 全局样式
• 指定控件样式
• qss ⽂件中的样式
• ui ⽂件中的样式
👉🏻选择器
| 选择器类型 | 说明 |
|---|---|
类型选择器 | 选择特定类型的控件且影响子控件,例如 QWidget。 |
类选择器 | 选择特定类型的控件,不会选择子控件,例如 .QPushButton。 |
id选择器 | 根据控件的对象名称选择,例如 #myButton。 |
后代选择器 | 选择特定控件的子控件,例如 QWidget QLineEdit。 |
伪状态选择器 | 根据控件状态选择样式,例如 QPushButton:hover。 |
属性选择器 | 根据控件属性选择样式,例如 QLineEdit[readOnly="true"]。 |
组合选择器 | 组合多个选择器,例如 QPushButton, QLabel。 |
通配符选择器 | 通配所有控件,例如 *。 |
类名选择器 | 选择类的所有实例,例如 QAbstractButton。 |
当某个控件⾝上, 通过类型选择器和 ID 选择器设置了冲突的样式时, ID 选择器样式优先级更
⾼.
伪类选择器
| 伪类选择器 | 说明 |
|---|---|
:hover | 当鼠标悬停在控件上时应用的样式。 |
:pressed | 当控件被按下时应用的样式。 |
:checked | 当复选框或单选按钮被选中时应用的样式。 |
:unchecked | 当复选框或单选按钮未被选中时应用的样式。 |
:enabled | 当控件处于启用状态时应用的样式。 |
:disabled | 当控件处于禁用状态时应用的样式。 |
:focus | 当控件获得焦点时应用的样式。 |
:selected | 当项在下拉框或列表中被选中时应用的样式。 |
:first | 选择第一个子元素。 |
:last | 选择最后一个子元素。 |
:nth-child(n) | 选择第n个子元素,n可以是数字或表达式。 |
::indicator | 用于自定义复选框和单选按钮的指示器外观。通常与 QCheckBox 或 QRadioButton 一起使用,可以设置背景、边框等样式。 |
这些状态可以使⽤ ! 来取反. ⽐如 :!hover 就是⿏标离开控件时, :!pressed 就是⿏标松开时,等等.
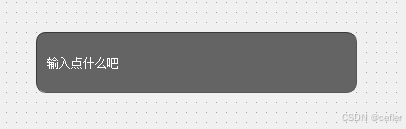
👉🏻自定义输入框
QLineEdit {
 border-width: 1px;
 border-radius: 10px;
 border-color: rgb(58, 58, 58);
 border-style: inset;
 padding: 0 8px;
 color: rgb(255, 255, 255);
 background:rgb(100, 100, 100);
 selection-background-color: rgb(187, 187, 187);
 selection-color: rgb(60, 63, 65);
}
| 属性 | 说明 |
|---|---|
border-width | 设置边框宽度。 |
border-radius | 设置边框圆角。 |
border-color | 设置边框颜色。 |
border-style | 设置边框风格。 |
padding | 设置内边距。 |
color | 设置文字颜色。 |
background | 设置背景颜色。 |
selection-background-color | 设置选中文本的背景颜色。 |
| selection-color | 设置选中⽂字的⽂本颜⾊ |
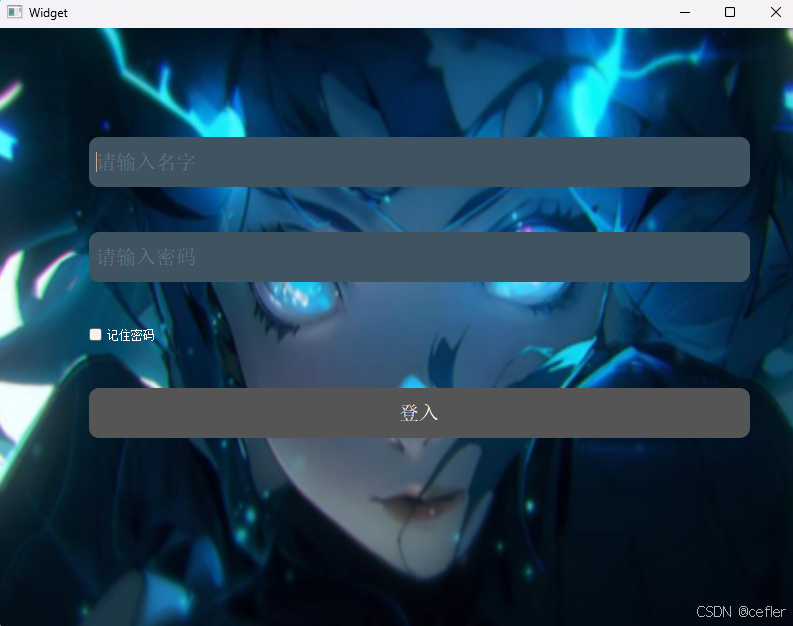
👉🏻设计登录界面
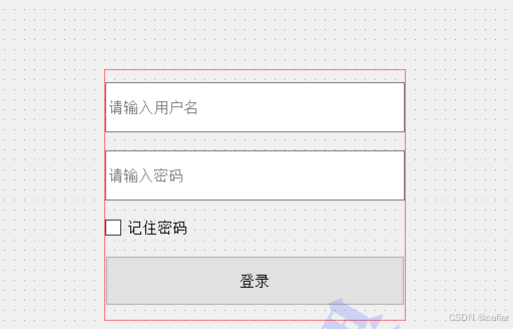
使⽤ QVBoxLayout 来管理上述控件
2.编写 QSS 样式.
QFrame {
 border-image: url(:/blue_girl.png);
}
QLineEdit {
 color: #8d98a1;
 background-color: #405361;
 padding: 0 5px;
 font-size: 20px;
 border-style: none;
 border-radius: 10px;
}
QCheckBox {
 color: white;
 background-color: transparent;
}
QPushButton {
 font-size: 20px;
 color: white;
 background-color: #555;
 border-style: outset;
 border-radius: 10px;
}
QPushButton:pressed {
 color: black;
 background-color: #ced1db;
 border-style: inset;
}
如上便是本期的所有内容了,如果喜欢并觉得有帮助的话,希望可以博个点赞+收藏+关注🌹🌹🌹❤️ 🧡 💛,学海无涯苦作舟,愿与君一起共勉成长


原文地址:https://blog.csdn.net/cefler/article/details/142458731
免责声明:本站文章内容转载自网络资源,如本站内容侵犯了原著者的合法权益,可联系本站删除。更多内容请关注自学内容网(zxcms.com)!