django开发流式格式后的在nginx的部署的记录
关键记录.
django上传代码要导出配置
pip freeze > requirements.txt
这个很关键。后面部署直接读取的
关键记录.
django上传代码要导出配置
pip freeze > requirements.txt
这个很关键。后面部署直接读取的
关键记录.
django上传代码要导出配置
pip freeze > requirements.txt
这个很关键。后面部署直接读取的
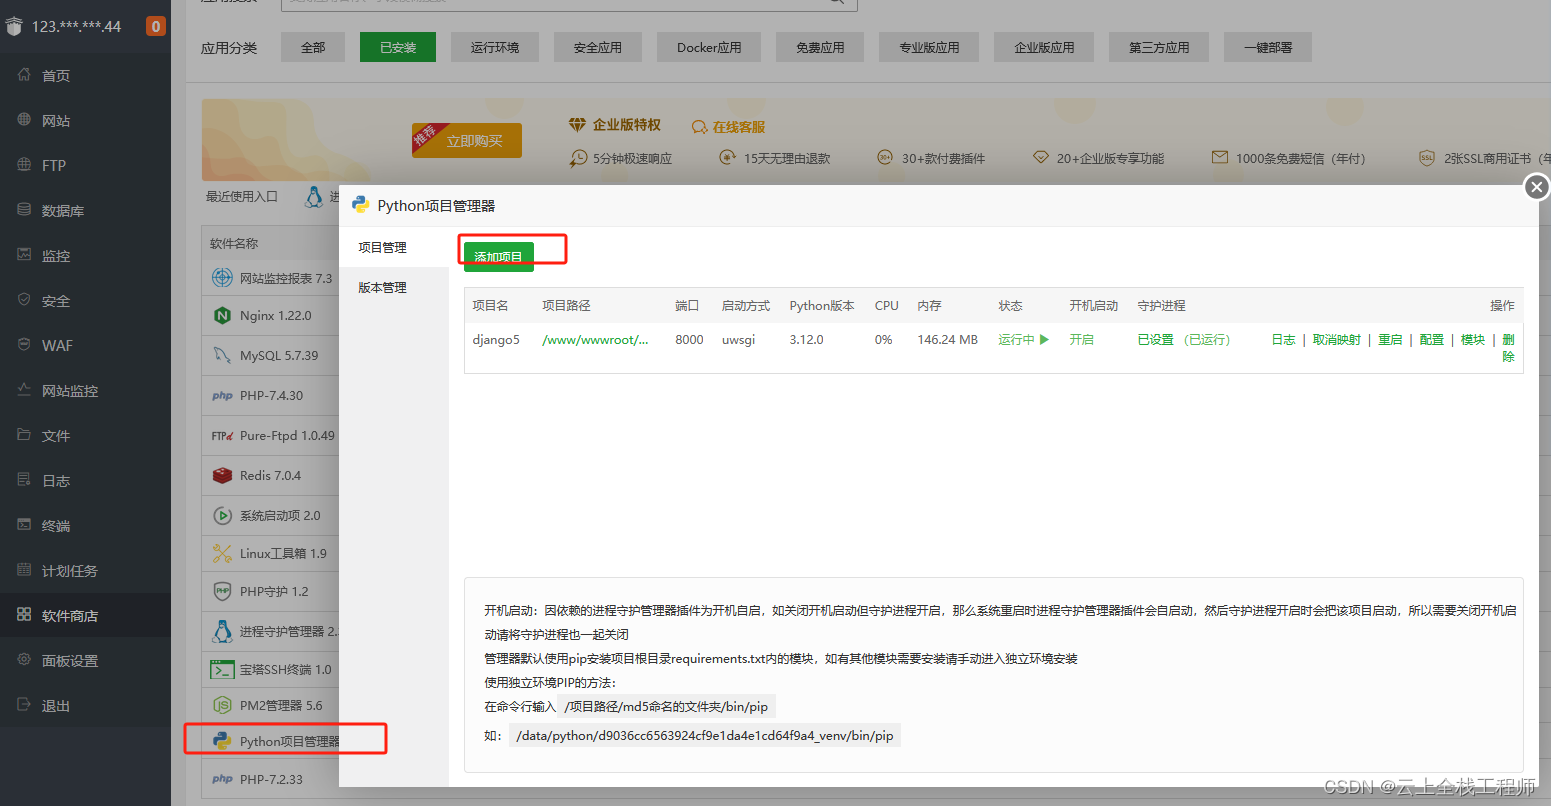
1.进入宝塔,下载Python管理器
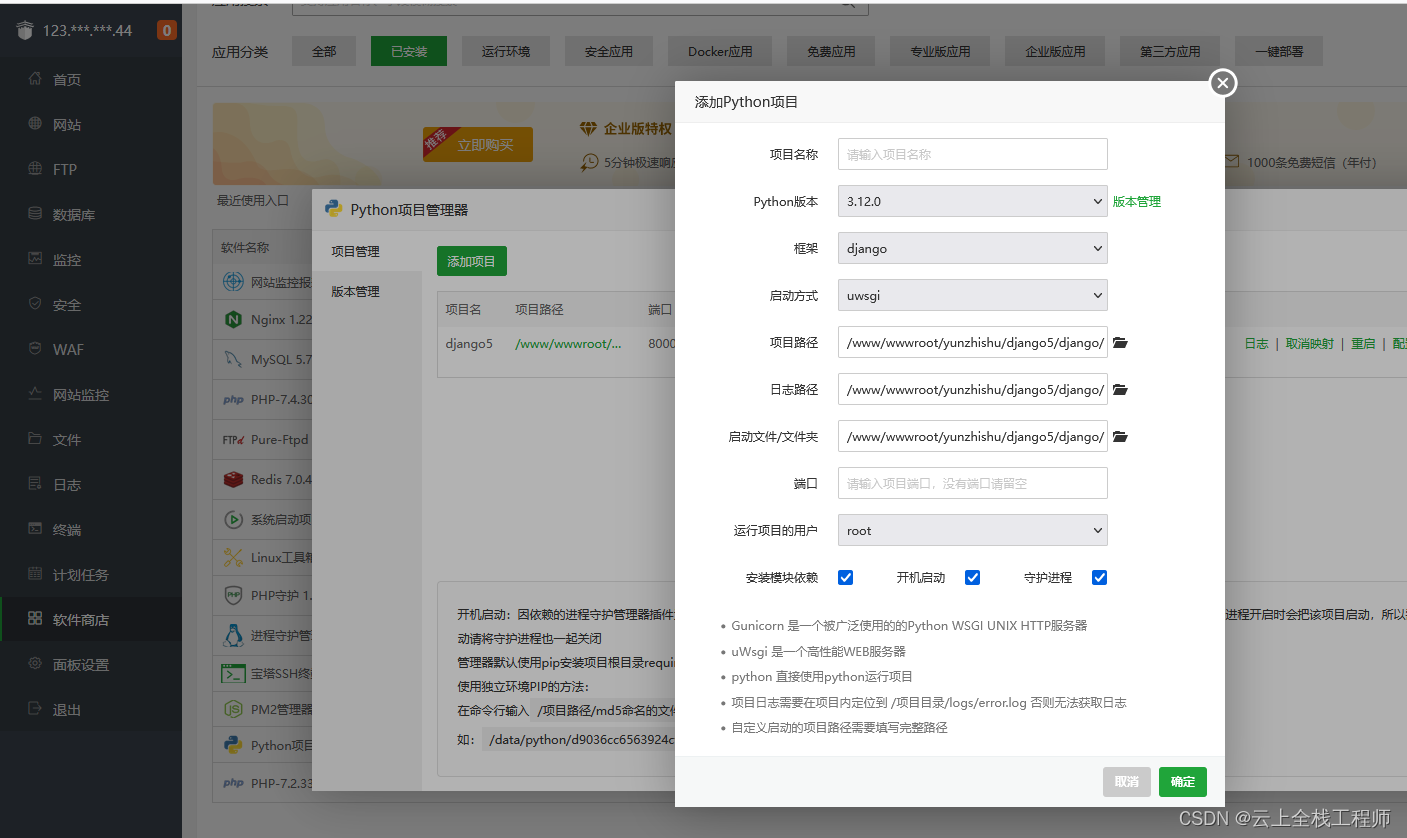
 2.添加项目,配置按照图片
项目路径选中在manage.py文件的这层

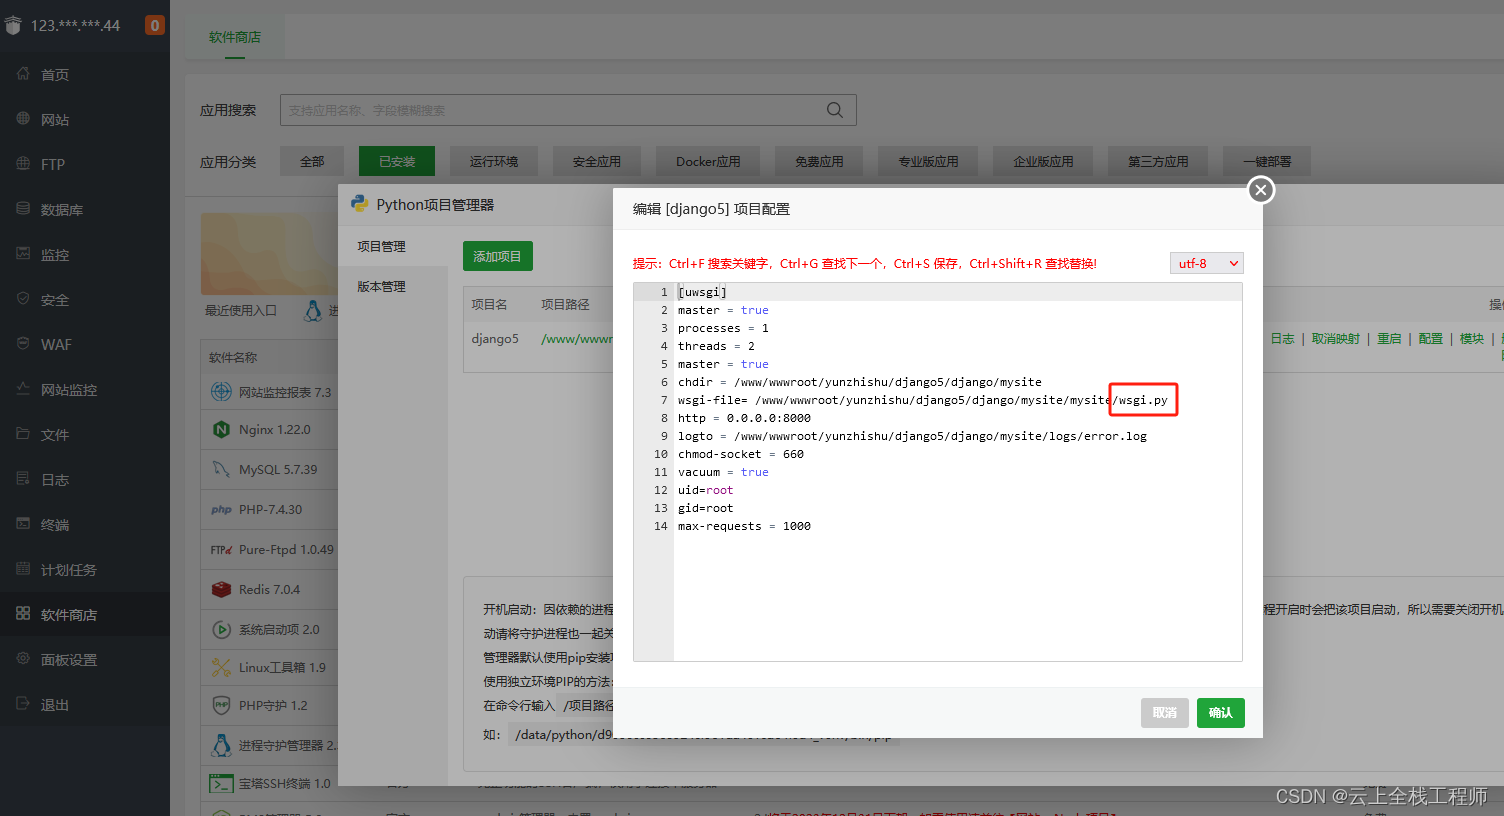
3.重新配置wsgi-file,看图,在后面新增/wsgi.py,也就是项目有配置好的,修改后重新运行
 4.项目是需要流式格式输出的,在本地是可以的,那nginx需要重新开启的
在反向代理修改,新增
#改流式格式输出
proxy_set_header Accept $http_accept; # 将请求中的 Accept 头传递给后端服务器
proxy_set_header Connection “”; # 清除 Connection 头,以便 Nginx 可以代理长连接
proxy_buffering off; # 关闭缓冲,以便实时地传递数据
proxy_read_timeout 3600s; # 设置代理的读取超时时间为 1 小时
# proxy_hide_header Upgrade;
代码👇
#PROXY-START/

location /api/
{
    proxy_pass http://127.0.0.1:8000/;
    proxy_set_header Host $host;
    proxy_set_header X-Real-IP $remote_addr;
    proxy_set_header X-Forwarded-For $proxy_add_x_forwarded_for;
    proxy_set_header REMOTE-HOST $remote_addr;
    proxy_set_header Upgrade $http_upgrade;

    proxy_http_version 1.1;

    #改流式格式输出
    proxy_set_header Accept $http_accept;  # 将请求中的 Accept 头传递给后端服务器
    proxy_set_header Connection "";  # 清除 Connection 头,以便 Nginx 可以代理长连接
    proxy_buffering off;  # 关闭缓冲,以便实时地传递数据
    proxy_read_timeout 3600s;  # 设置代理的读取超时时间为 1 小时
    # proxy_hide_header Upgrade;

    add_header X-Cache $upstream_cache_status;
    #Set Nginx Cache

    set $static_fileDPUeIsWj 0;
    if ( $uri ~* "\.(gif|png|jpg|css|js|woff|woff2)$" )
    {
        set $static_fileDPUeIsWj 1;
        expires 1m;
    }
    if ( $static_fileDPUeIsWj = 0 )
    {
        add_header Cache-Control no-cache;
    }
}
#PROXY-END/
这样在前端就可以支持流式格式请求了
注意流式格式在前端代码请求示例,因为是post的请求,这里就在记录一下,怎么请求这个流式代码
const fetchStreamingData = (chat_id, role_id, centers) => {
let isNewChat = false;
if (!chat_id) {
isNewChat = true;
chat_id = UUID();
}

const _role = getRoleById(role_id);
// console.log('_role===:', _role);
const Url = 'http://127.0.0.1:8000/api/aistudio/chat';
// 使用
ctrl = new AbortController();
fetchEventSource(Url, {
method: 'POST',
headers: {
'Content-Type': 'application/json',
},
body: JSON.stringify({
messages: centers,
}),
signal: ctrl.signal,
openWhenHidden: true,
async onopen(response) {
// console.log('onopen', response);
},
onmessage(e) {
const data = JSON.parse(e.data);
// console.log('收到的数据===:', data);

},
onclose() {
// console.log('onclose22');
},
onerror(err) {
enableInput()
ctrl.abort();
throw err;
}
});


};
原文地址:https://blog.csdn.net/weixin_42021688/article/details/136616983
免责声明:本站文章内容转载自网络资源,如本站内容侵犯了原著者的合法权益,可联系本站删除。更多内容请关注自学内容网(zxcms.com)!
