一、获取所有文章地址
1.进csdn首页,点击自己的头像

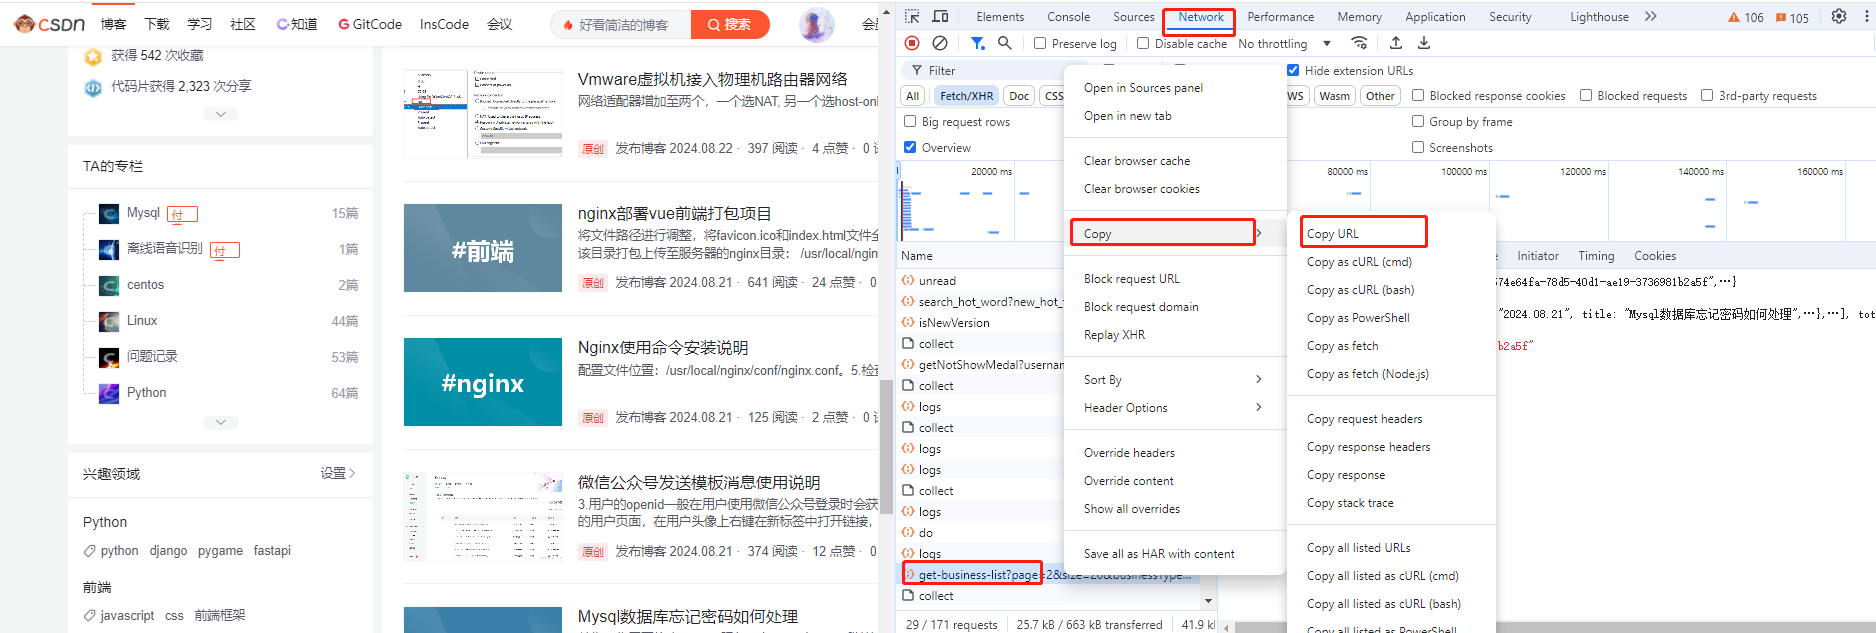
2.在个人主页界面,按F12打开控制台,并找到network,找到get-business开头的请求,右键copy他的url
3.选择console,输入一下代码,其中fetch里面的url是你刚才复制的地址,并把里面的size改为100(这个是返回的文章内容数,上限为100),page是页码数,如果你的文章数大于100,那么后面的请求需要将page=1改为2,3,4...一直到你请求完所有的文章,这里以page=1,size=100请求的数据来进行处理:
fetch('https://blog.csdn.net/community/home-api/v1/get-business-list?page=1&size=100&businessType=blog&orderby=&noMore=false&year=&month=&username=qq_35204012')
  .then(response => {
    if (!response.ok) {
      throw new Error('Network response was not ok');
    }
    return response.json(); // 假设服务器响应的是JSON格式的数据
  })
  .then(data => {
    console.log(data); // 处理并显示响应的数据
  })
  .catch(error => {
    console.error('There has been a problem with your fetch operation:', error);
  });
执行后的结果:
可以看到,这里打印了一百篇博文数据
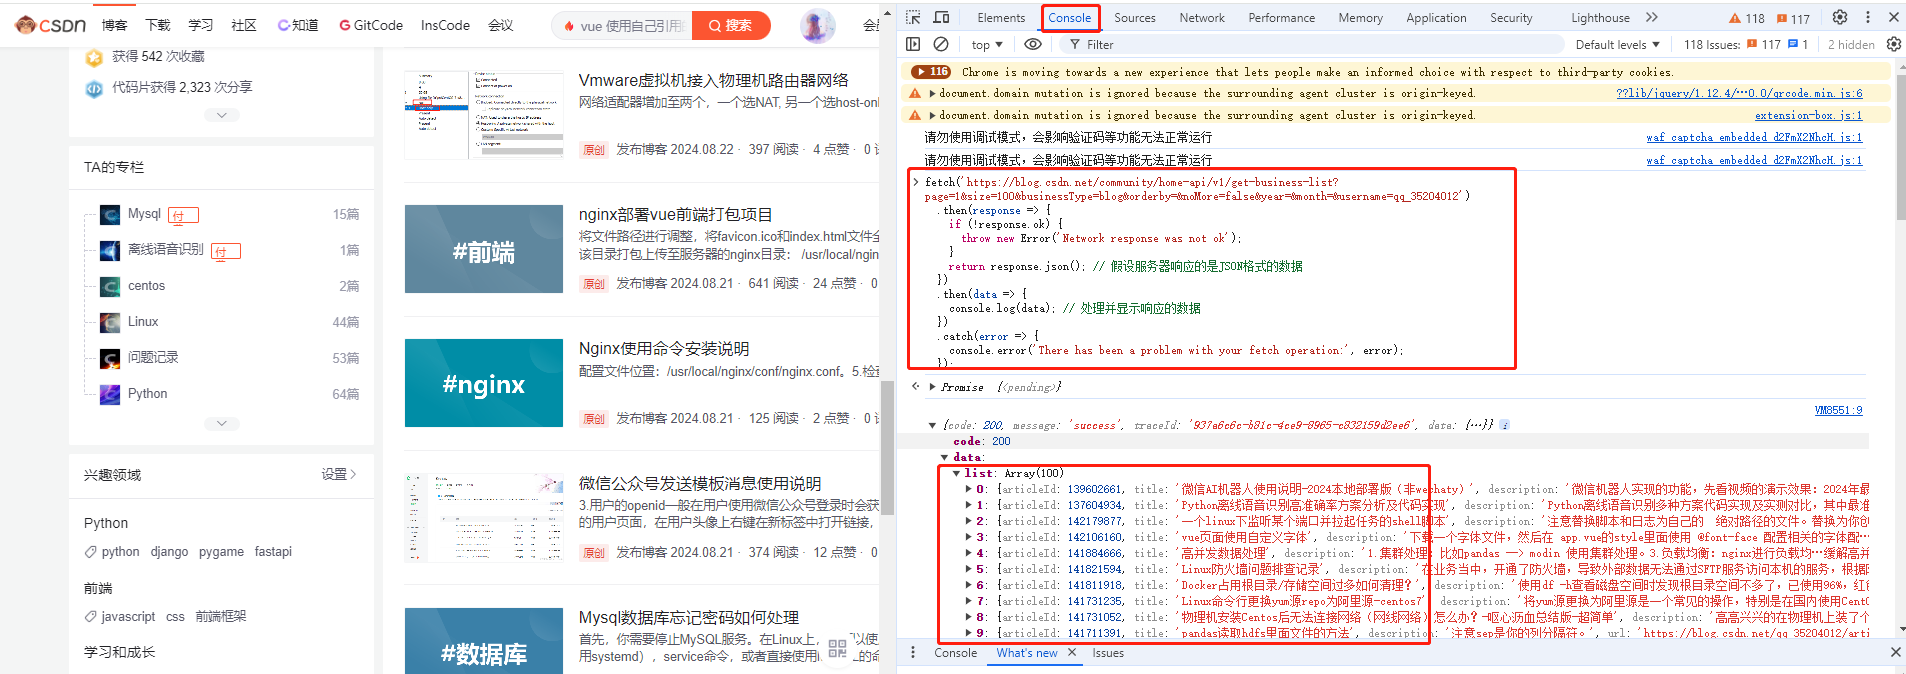
4.将鼠标放在list上并右键copy object

5.将内容去掉[]后复制到脚本的data里面,data是一个列表,里面包含若干字典,注意格式(需要将所有的false替换为False,true替换为True),根据自己的博文数量,修改page的值,找到所有的文章信息复制到脚本的data数据里面
二、使用脚本进行采集
注意:需要将所有文章全部开放,不能有付费或者VIP文章,需要将data里面的内容替换为你自己的,记得在脚本目录创建一个md文件夹用来放md文件
import pandas as pd
import requests

import html2text

data = [
{
        "articleId": 139602661,
        "title": "微信AI机器人使用说明-2024本地部署版(非wechaty)",
        "description": "微信机器人实现的功能,先看视频的演示效果:2024年最新稳定的本地部署AI微信机器人使用方法演示可以对话可以语音可以绘画支持主账号管理好友权限管理。",
        "url": "https://blog.csdn.net/qq_35204012/article/details/139602661",
        "type": 1,
        "top": True,
        "forcePlan": False,
        "viewCount": 1581,
        "commentCount": 0,
        "editUrl": "https://mp.csdn.net/console/editor/html/139602661",
        "postTime": "2024-06-11 16:31:56",
        "diggCount": 34,
        "formatTime": "2024.06.11",
        "picList": [
            "https://img-blog.csdnimg.cn/img_convert/cf52fbe57e404f30babcdda6f1ef2c08.png"
        ],
        "collectCount": 6
    }
]


def html_to_md(html_content, output_file):
    """
    将HTML内容转换为Markdown,并保存到指定的文件。

    :param html_content: str, 要转换的HTML内容
    :param output_file: str, 输出的Markdown文件名(包括路径)
    """
    # 创建一个html2text转换器对象
    h = html2text.HTML2Text()
    # 使用转换器的handle方法将HTML转换为Markdown
    md_content = h.handle(html_content)

    # 将转换后的Markdown内容写入文件
    with open(output_file, 'w', encoding='utf-8') as f:
        f.write(md_content)


if __name__ == '__main__':

    url_list = [{'url': item['url'], 'title': item['title']} for item in data]
    # 解析地址
    base_url = 'https://www.helloworld.net/getUrlHtml?url='
    # 解析错误的url
    err_list = []
    for item in url_list:
        try:
            print(item['url'])
            res = requests.get(base_url + item['url'])
            content = res.json().get('html')
            title = item['title']
            print(title+'已完成')
            # 调用函数,将HTML转换为Markdown并保存为文件
            html_to_md(content, os.path.join('md', f'{title}.md')
) except Exception as e: print(e) err_list.append(item['url']) if err_list: print(err_list) df = pd.DataFrame([{'name': err_list}]) df.to_csv('err.csv', index=False)
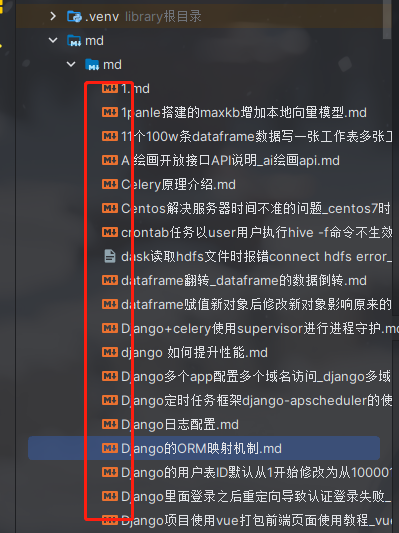
导出的结果如下:
三、博客园上传文章
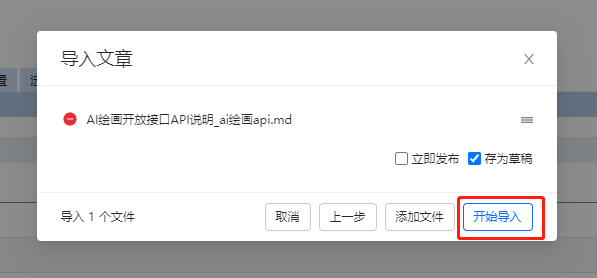
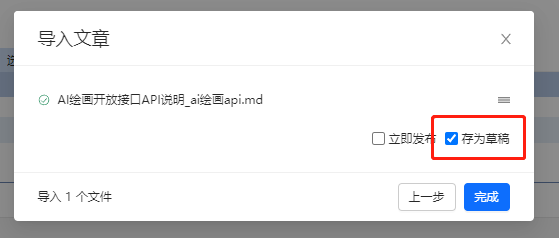
1.选择导入文章,也可以在随笔里面上传md

2.选择自己的markdown文件

3.编辑随笔或文章

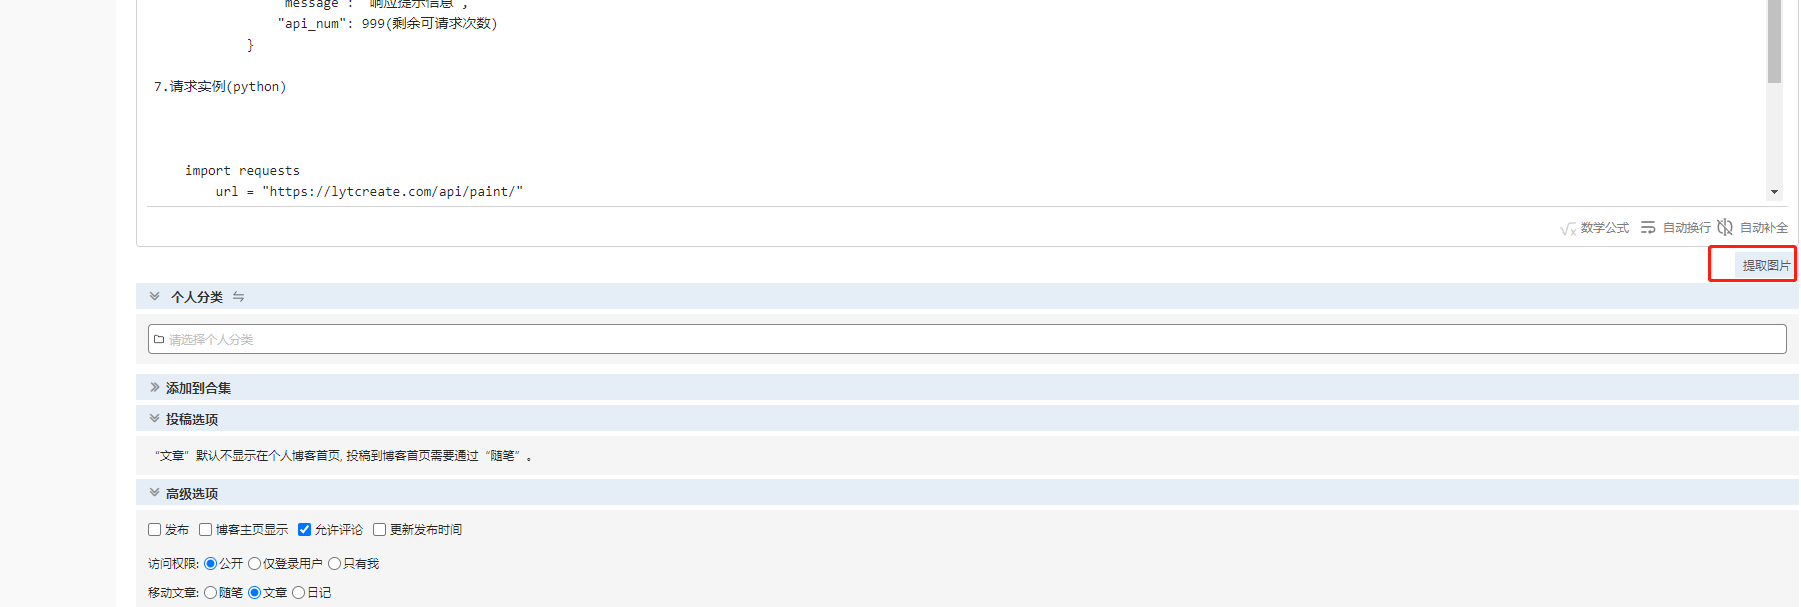
4.拉取图片,许多文章他是有图片的,图片如果有防盗链的话就没办法显示,所以需要手动拉取一下图片
5.拉取成功后,发布即可!
