HarmonyOS Next元服务开发快速入门案例
项目代码gitee地址:
(HarmonyOS Next 元服务开发快速入门: HarmonyOS Next 元服务开发快速入门 - Gitee.com)
开源协议使用:Apache License 2.0 ,代码包支持免费使用,可进行二次开发后选择开源或闭源。
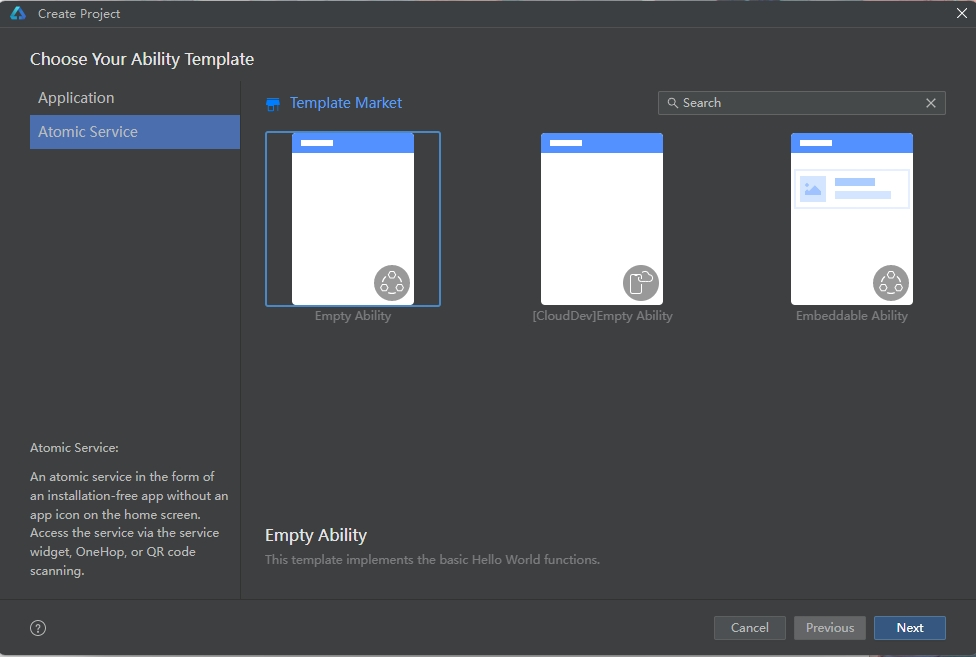
一、创建项目
1.创建项目,选择Atomic Service
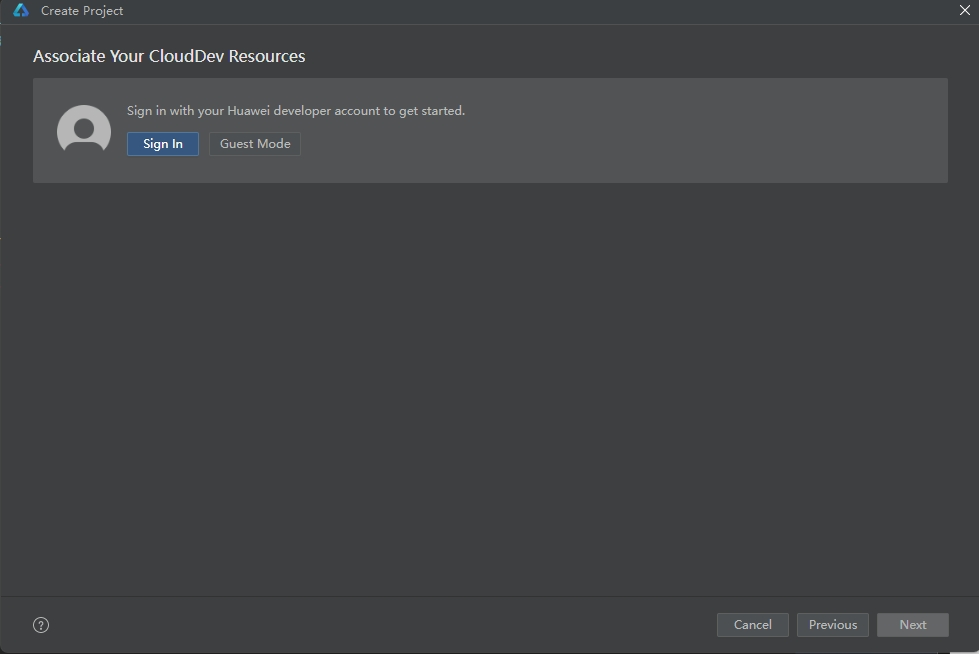
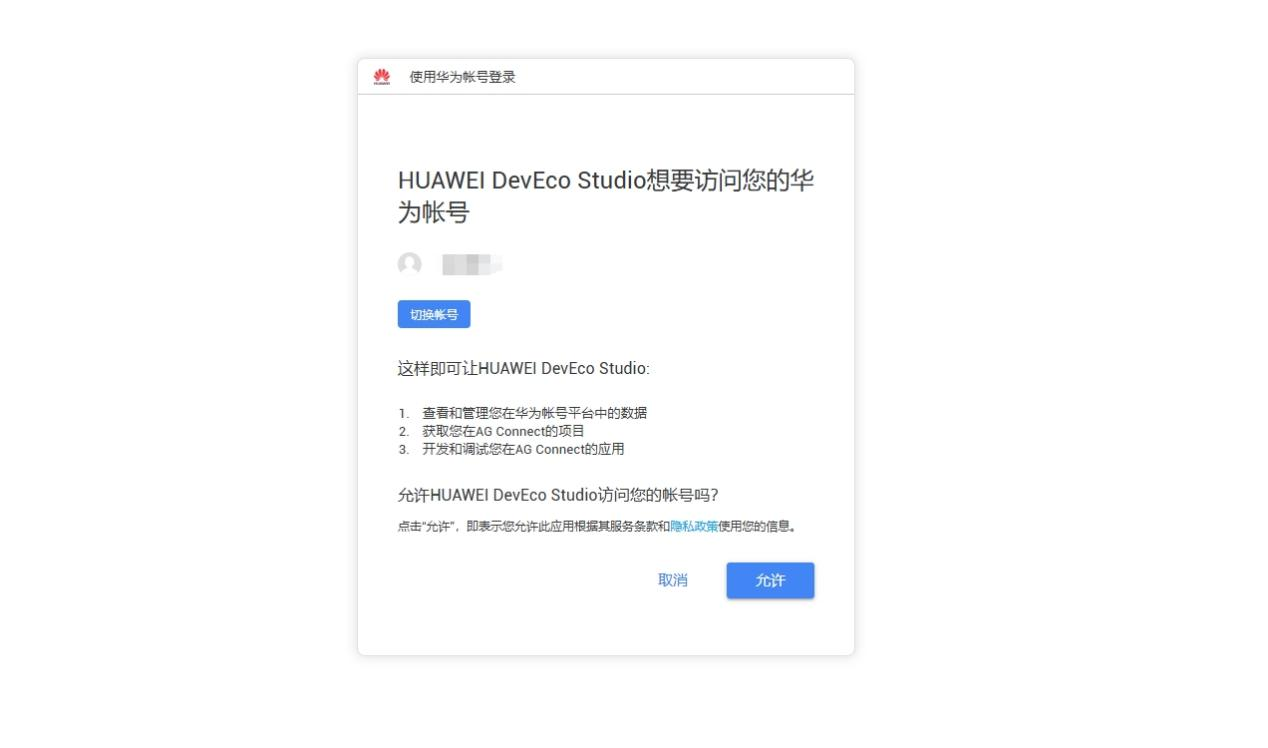
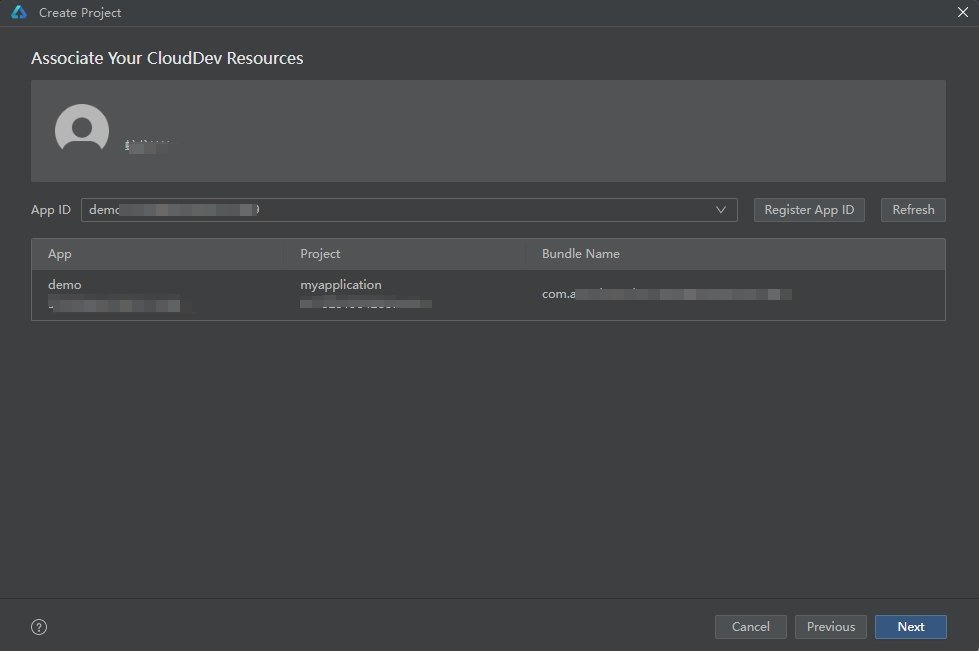
2.AGC中先创建元服务项目
3.获取元服务项目
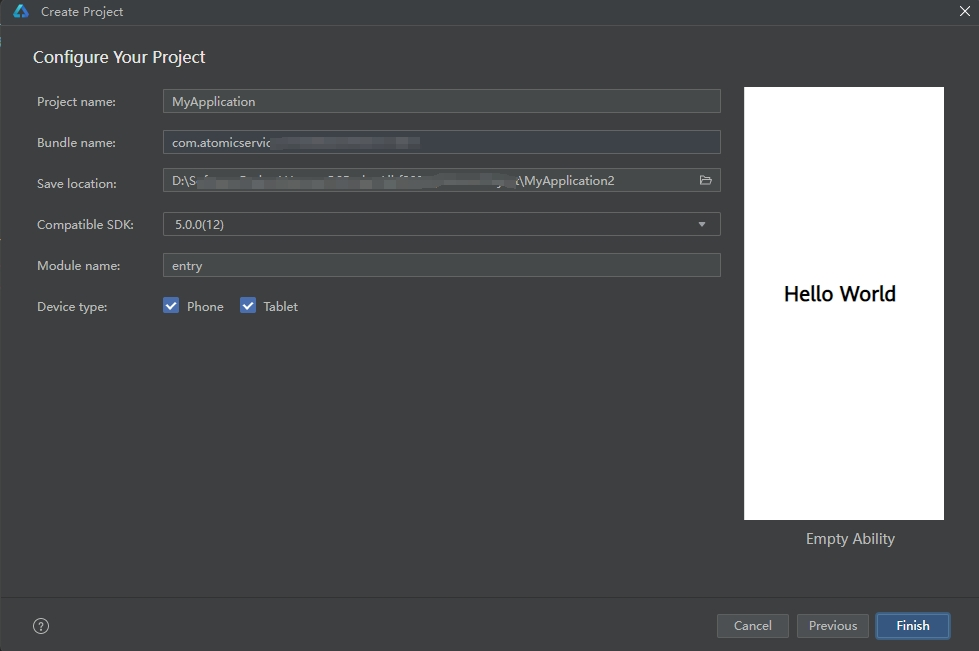
4.配置项目
5.在AppScope文件下修改自定义项目配置
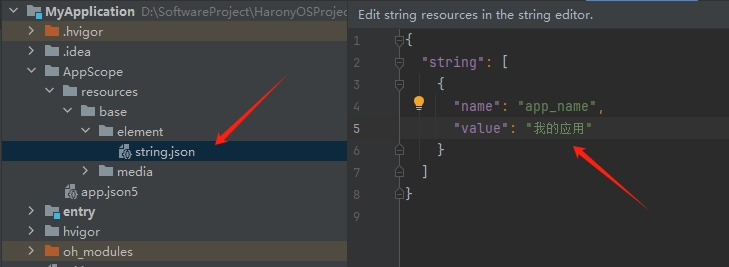
在resources>base>element>string.json中修改“app_name”值,该值表示“应用名称”。
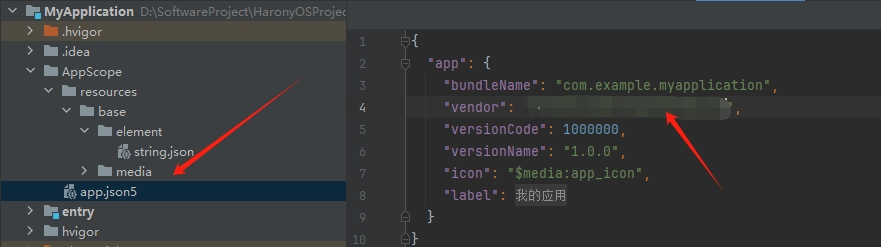
在app.json5中修改“vender”值,该值表示“应用程序供应商”。
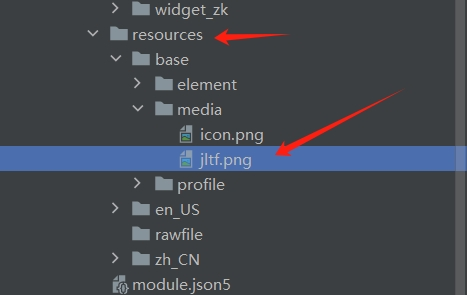
6.在项目下的resource>base>media下添加图片
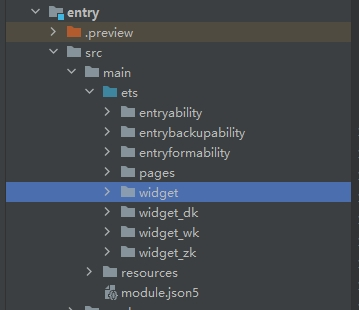
二、创建卡片widget
1.创建微、小、中、大卡片
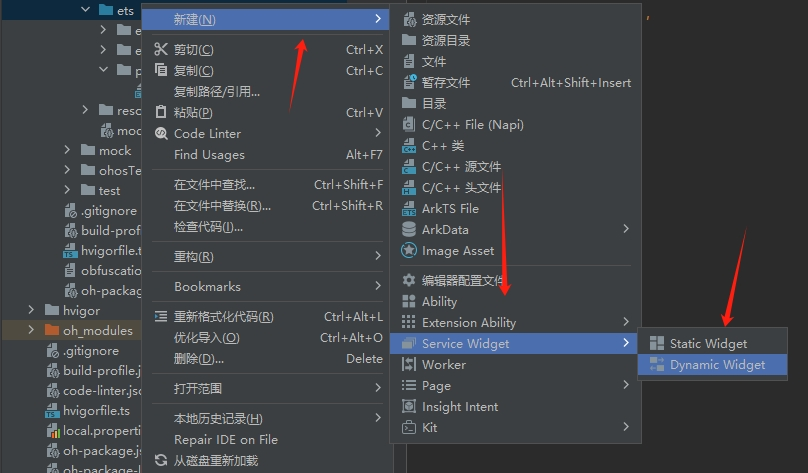
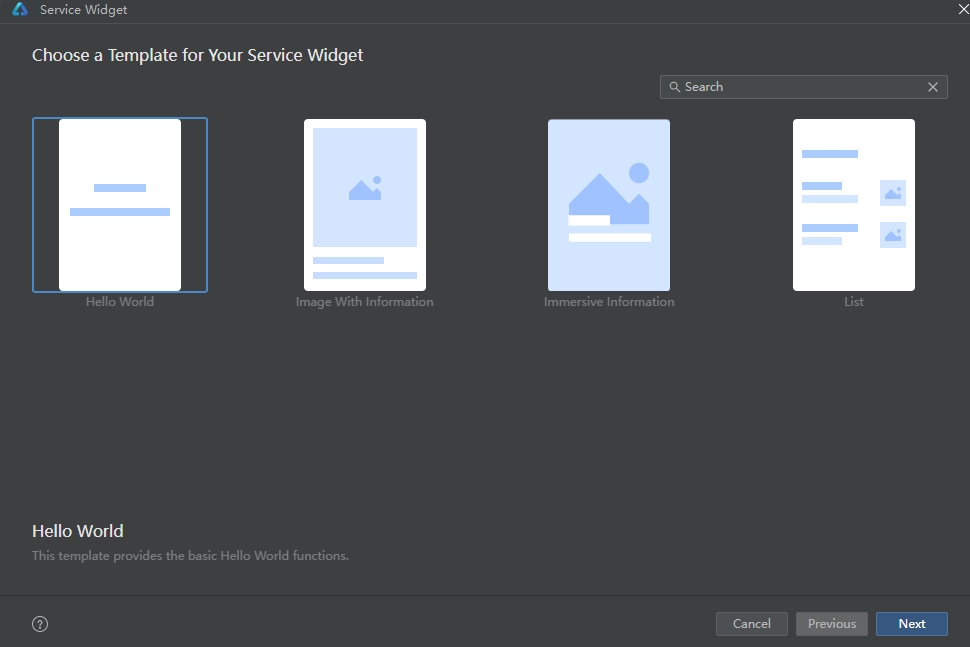
2.依次创建卡片

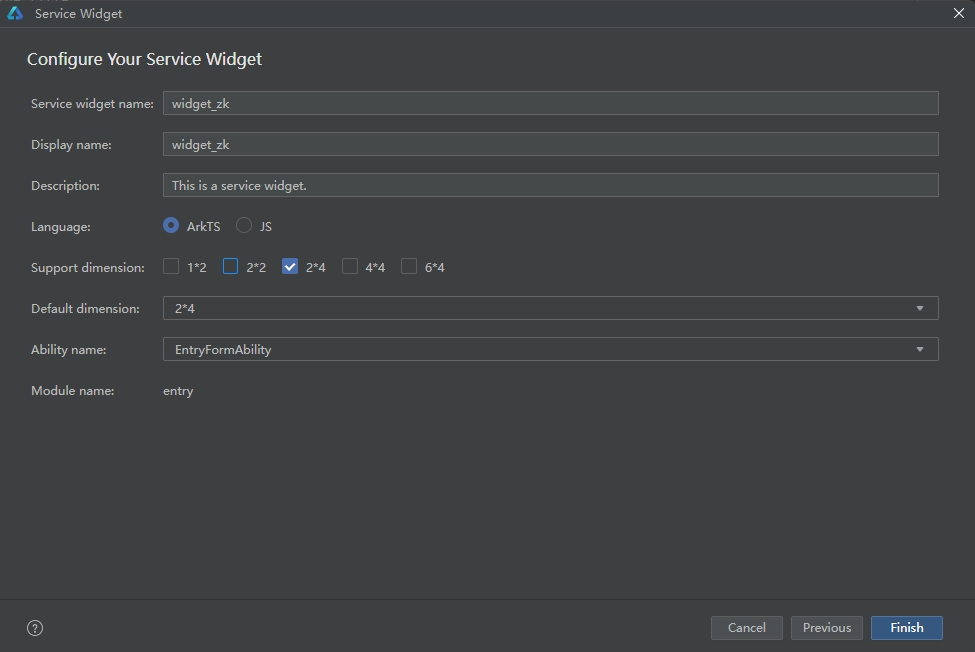
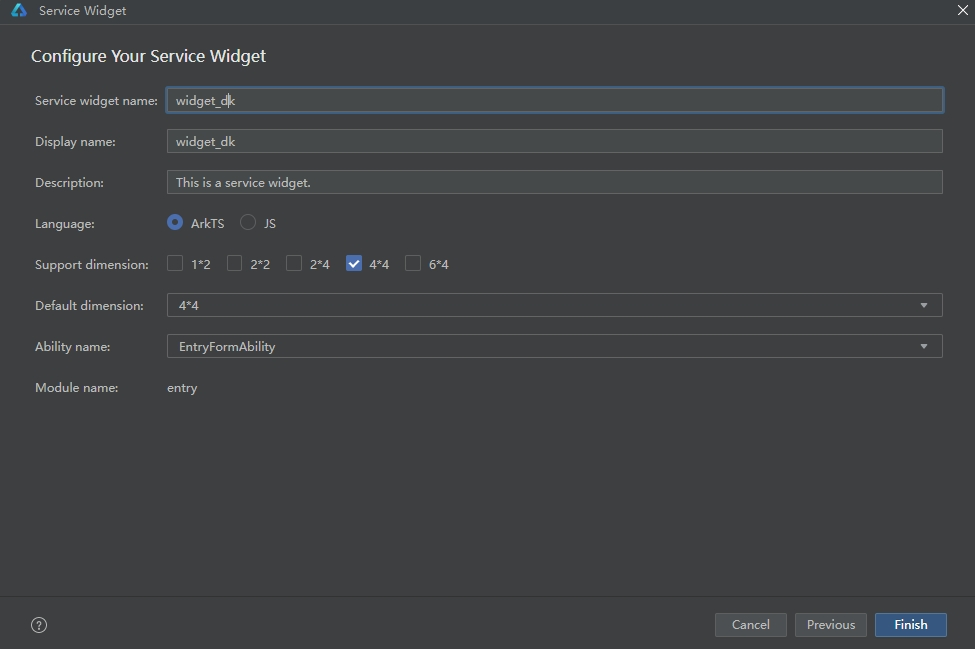
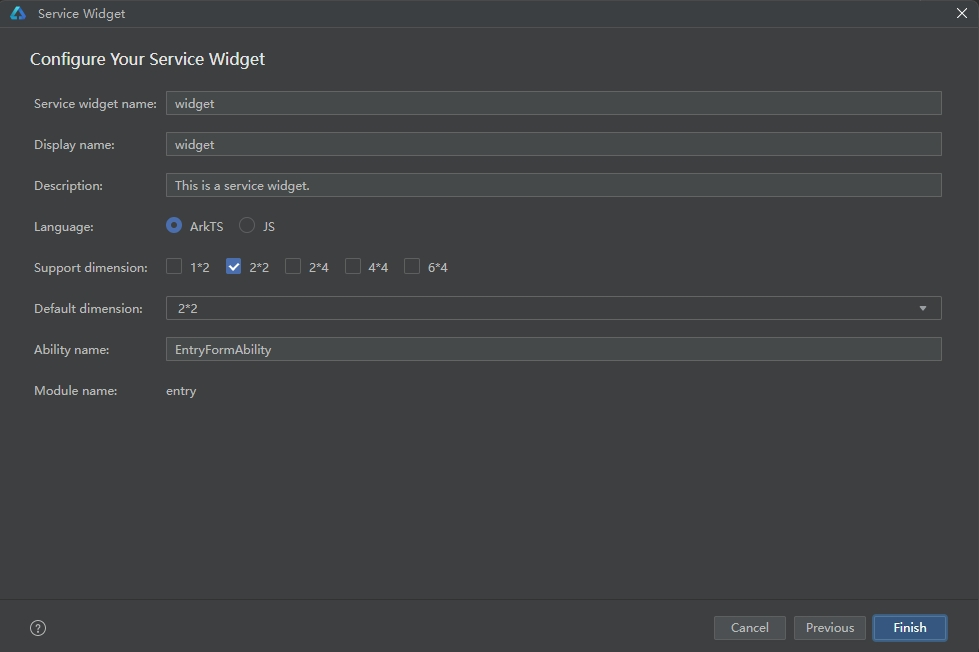
3.卡片创建完成,修改卡片配置代码
4.卡片代码如下:
widget_wk代码:
@Entry
@Component
struct Widget_wkCard {
  /*
   * The title.
   */
  readonly TITLE: string = 'Hello World';

  /*
   * The action type.
   */
  readonly ACTION_TYPE: string = 'router';

  /*
   * The ability name.
   */
  readonly ABILITY_NAME: string = 'EntryAbility';

  /*
   * The message.
   */
  readonly MESSAGE: string = 'add detail';

  /*
   * The with percentage setting.
   */
  readonly FULL_WIDTH_PERCENT: string = '100%';

  /*
   * The height percentage setting.
   */
  readonly FULL_HEIGHT_PERCENT: string = '100%';

  build() {
    Row() {
      Image($r("app.media.jltf")).width(28)
      Text("你好,鸿蒙元服务!").fontSize(12).fontWeight(600)
    }
    .justifyContent(FlexAlign.Center)
    .width(this.FULL_WIDTH_PERCENT)
    .height(this.FULL_HEIGHT_PERCENT)
.backgroundColor("#ff8fc7ff")//添加背景色
    .onClick(() => {
      postCardAction(this, {
        "action": this.ACTION_TYPE,
        "abilityName": this.ABILITY_NAME,
        "params": {
          "message": this.MESSAGE
        }
      });
    })
  }
}
widget代码:
@Entry
@Component
struct WidgetCard {
  /*
   * The max lines.
   */
  readonly MAX_LINES: number = 1;

  /*
   * The action type.
   */
  readonly ACTION_TYPE: string = 'router';

  /*
   * The message.
   */
  readonly MESSAGE: string = 'add detail';

  /*
   * The ability name.
   */
  readonly ABILITY_NAME: string = 'EntryAbility';

  /*
   * The with percentage setting.
   */
  readonly FULL_WIDTH_PERCENT: string = '100%';

  /*
   * The height percentage setting.
   */
  readonly FULL_HEIGHT_PERCENT: string = '100%';

  build() {
    Column() {
      Image($r("app.media.jltf")).width(80)
      Text("你好,鸿蒙元服务!").fontSize(12).fontWeight(600)
        .margin({top:10})
    }
    .width(this.FULL_WIDTH_PERCENT)
    .height(this.FULL_HEIGHT_PERCENT)
    .justifyContent(FlexAlign.Center)
    .alignItems(HorizontalAlign.Center)
.backgroundColor("#ff8fc7ff")//添加背景色
    .onClick(() => {
      postCardAction(this, {
        "action": this.ACTION_TYPE,
        "abilityName": this.ABILITY_NAME,
        "params": {
          "message": this.MESSAGE
        }
      });
    })
  }
}
widget_zk代码:
@Entry
@Component
struct Widget_zkCard {
  /*
   * The title.
   */
  readonly TITLE: string = 'Hello World';

  /*
   * The action type.
   */
  readonly ACTION_TYPE: string = 'router';

  /*
   * The ability name.
   */
  readonly ABILITY_NAME: string = 'EntryAbility';

  /*
   * The message.
   */
  readonly MESSAGE: string = 'add detail';

  /*
   * The with percentage setting.
   */
  readonly FULL_WIDTH_PERCENT: string = '100%';

  /*
   * The height percentage setting.
   */
  readonly FULL_HEIGHT_PERCENT: string = '100%';

  build() {
    Column() {
      Image($r("app.media.jltf")).width(80)
      Text("你好,鸿蒙元服务!").fontSize(16).fontWeight(600)
        .margin({top:10})
    }
    .width(this.FULL_WIDTH_PERCENT)
    .height(this.FULL_HEIGHT_PERCENT)
    .justifyContent(FlexAlign.Center)
    .alignItems(HorizontalAlign.Center)
.backgroundColor("#ff8fc7ff")//添加背景色
    .onClick(() => {
      postCardAction(this, {
        "action": this.ACTION_TYPE,
        "abilityName": this.ABILITY_NAME,
        "params": {
          "message": this.MESSAGE
        }
      });
    })
  }
}
widget_dk代码:
@Entry
@Component
struct Widget_dkCard {
  /*
   * The title.
   */
  readonly TITLE: string = 'Hello World';

  /*
   * The action type.
   */
  readonly ACTION_TYPE: string = 'router';

  /*
   * The ability name.
   */
  readonly ABILITY_NAME: string = 'EntryAbility';

  /*
   * The message.
   */
  readonly MESSAGE: string = 'add detail';

  /*
   * The with percentage setting.
   */
  readonly FULL_WIDTH_PERCENT: string = '100%';

  /*
   * The height percentage setting.
   */
  readonly FULL_HEIGHT_PERCENT: string = '100%';

  build() {
    Column() {
      Image($r("app.media.jltf")).width(150)
      Text("你好,鸿蒙元服务!").fontSize(20).fontWeight(600)
        .margin({top:10})
    }
    .width(this.FULL_WIDTH_PERCENT)
    .height(this.FULL_HEIGHT_PERCENT)
    .justifyContent(FlexAlign.Center)
    .alignItems(HorizontalAlign.Center)
.backgroundColor("#ff8fc7ff")//添加背景色
    .onClick(() => {
      postCardAction(this, {
        "action": this.ACTION_TYPE,
        "abilityName": this.ABILITY_NAME,
        "params": {
          "message": this.MESSAGE
        }
      });
    })
  }
}
三、创建应用page
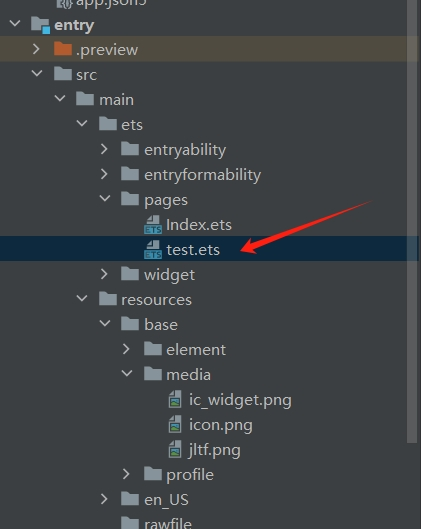
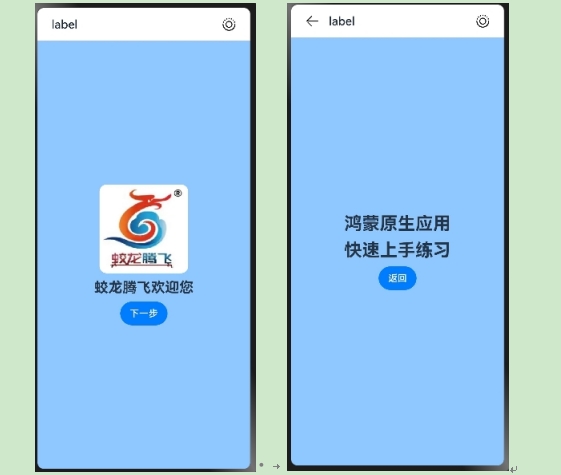
1.修改pages/Index.ets中的代码,代码如下:
import router from '@ohos.router'
@Entry
@Component
struct Index {
  @State title: string = '蛟龙腾飞欢迎您'

  build() {
    Row() {
      Column() {
        //Image组件,展示logo
        Image($r("app.media.jltf")).width(150).borderRadius(12)
        //Text组件,展示文字详情
        Text(this.title)
          .fontSize(24)
          .fontWeight(FontWeight.Bold)
          .margin(10)
        //Button组件,跳转下一页
        Button("下一步").type(ButtonType.Capsule)
          .onClick(()=>{
            router.pushUrl({
              url:"pages/test"
            })
          })
      }
      .width('100%')
    }
    .height('100%')
    .backgroundColor("#ff8fc7ff")//添加背景色
  }
}
2.创建新的page
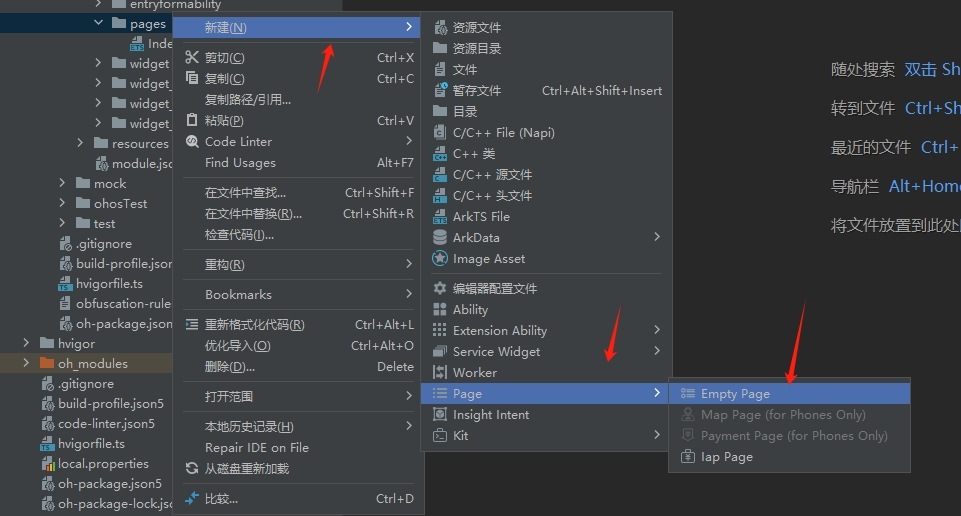
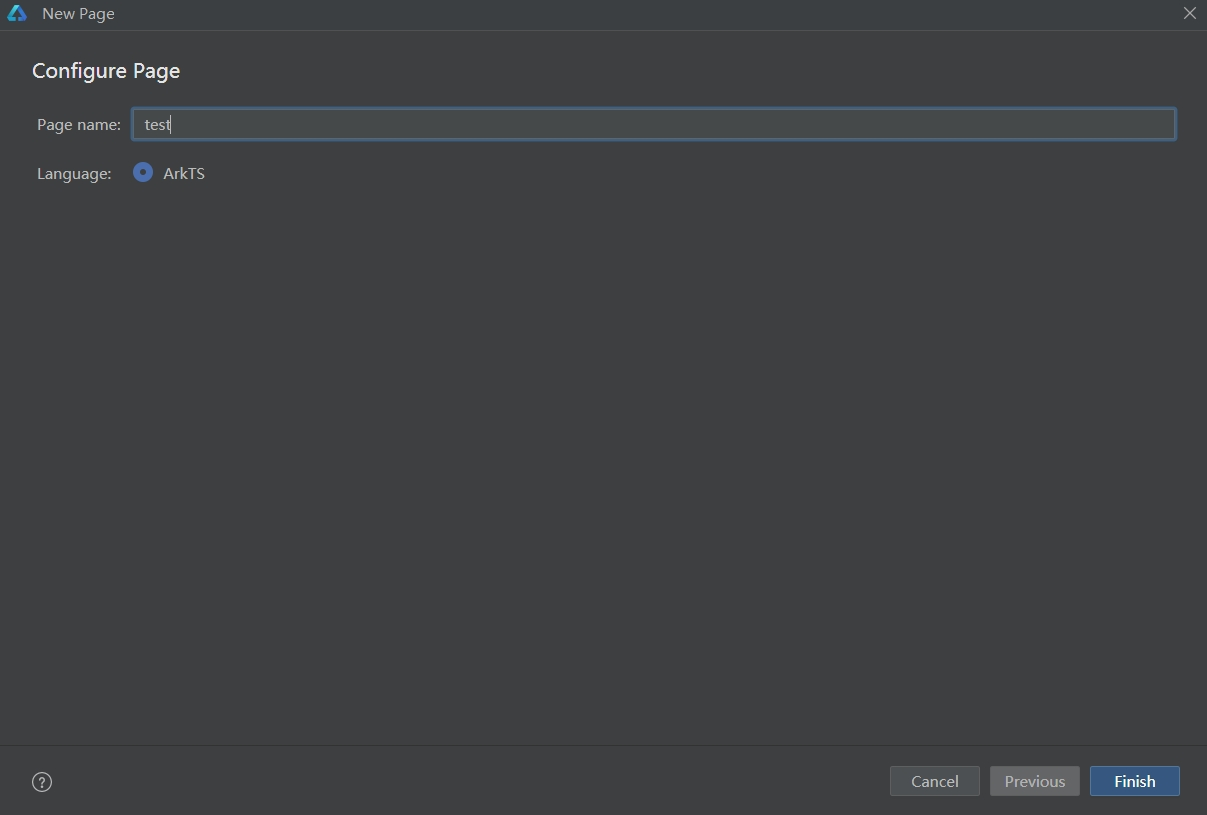
3.新的page写入代码如下:
import router from '@ohos.router'
@Entry
@Component
struct Test {
  @State text1: string = '鸿蒙原生应用'
  @State text2: string = '快速上手练习'

  build() {
    Row() {
      Column() {
        Text(this.text1)
          .fontSize(30)
          .fontWeight(FontWeight.Bold)
        Text(this.text2)
          .fontSize(30)
          .fontWeight(FontWeight.Bold)
          .margin(10)
        //Button组件,返回上一页
        Button("返回").type(ButtonType.Capsule)
          .onClick(()=>{
            router.back()
          })
      }
      .width('100%')
    }
    .height('100%')
    .backgroundColor("#ff8fc7ff")//添加背景色
  }
}
四、项目效果
1.预览器效果
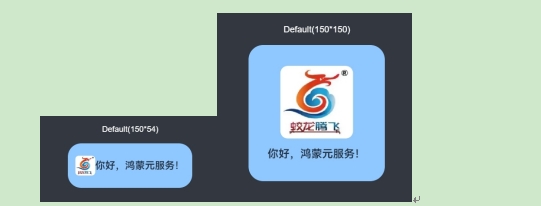
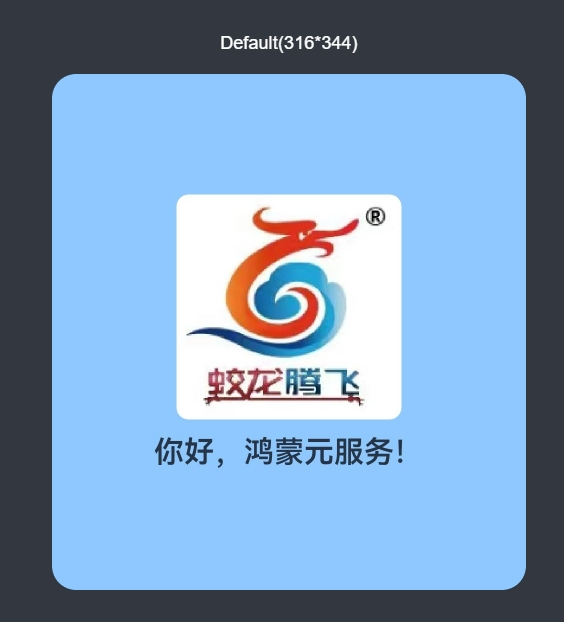
Widget:

Page:
原文地址:https://blog.csdn.net/weixin_69135651/article/details/142754498
免责声明:本站文章内容转载自网络资源,如本站内容侵犯了原著者的合法权益,可联系本站删除。更多内容请关注自学内容网(zxcms.com)!