移动端双验证码登录实现
说明:本文介绍如何用图形验证码+短信验证码实现移动端登录思路;
分析
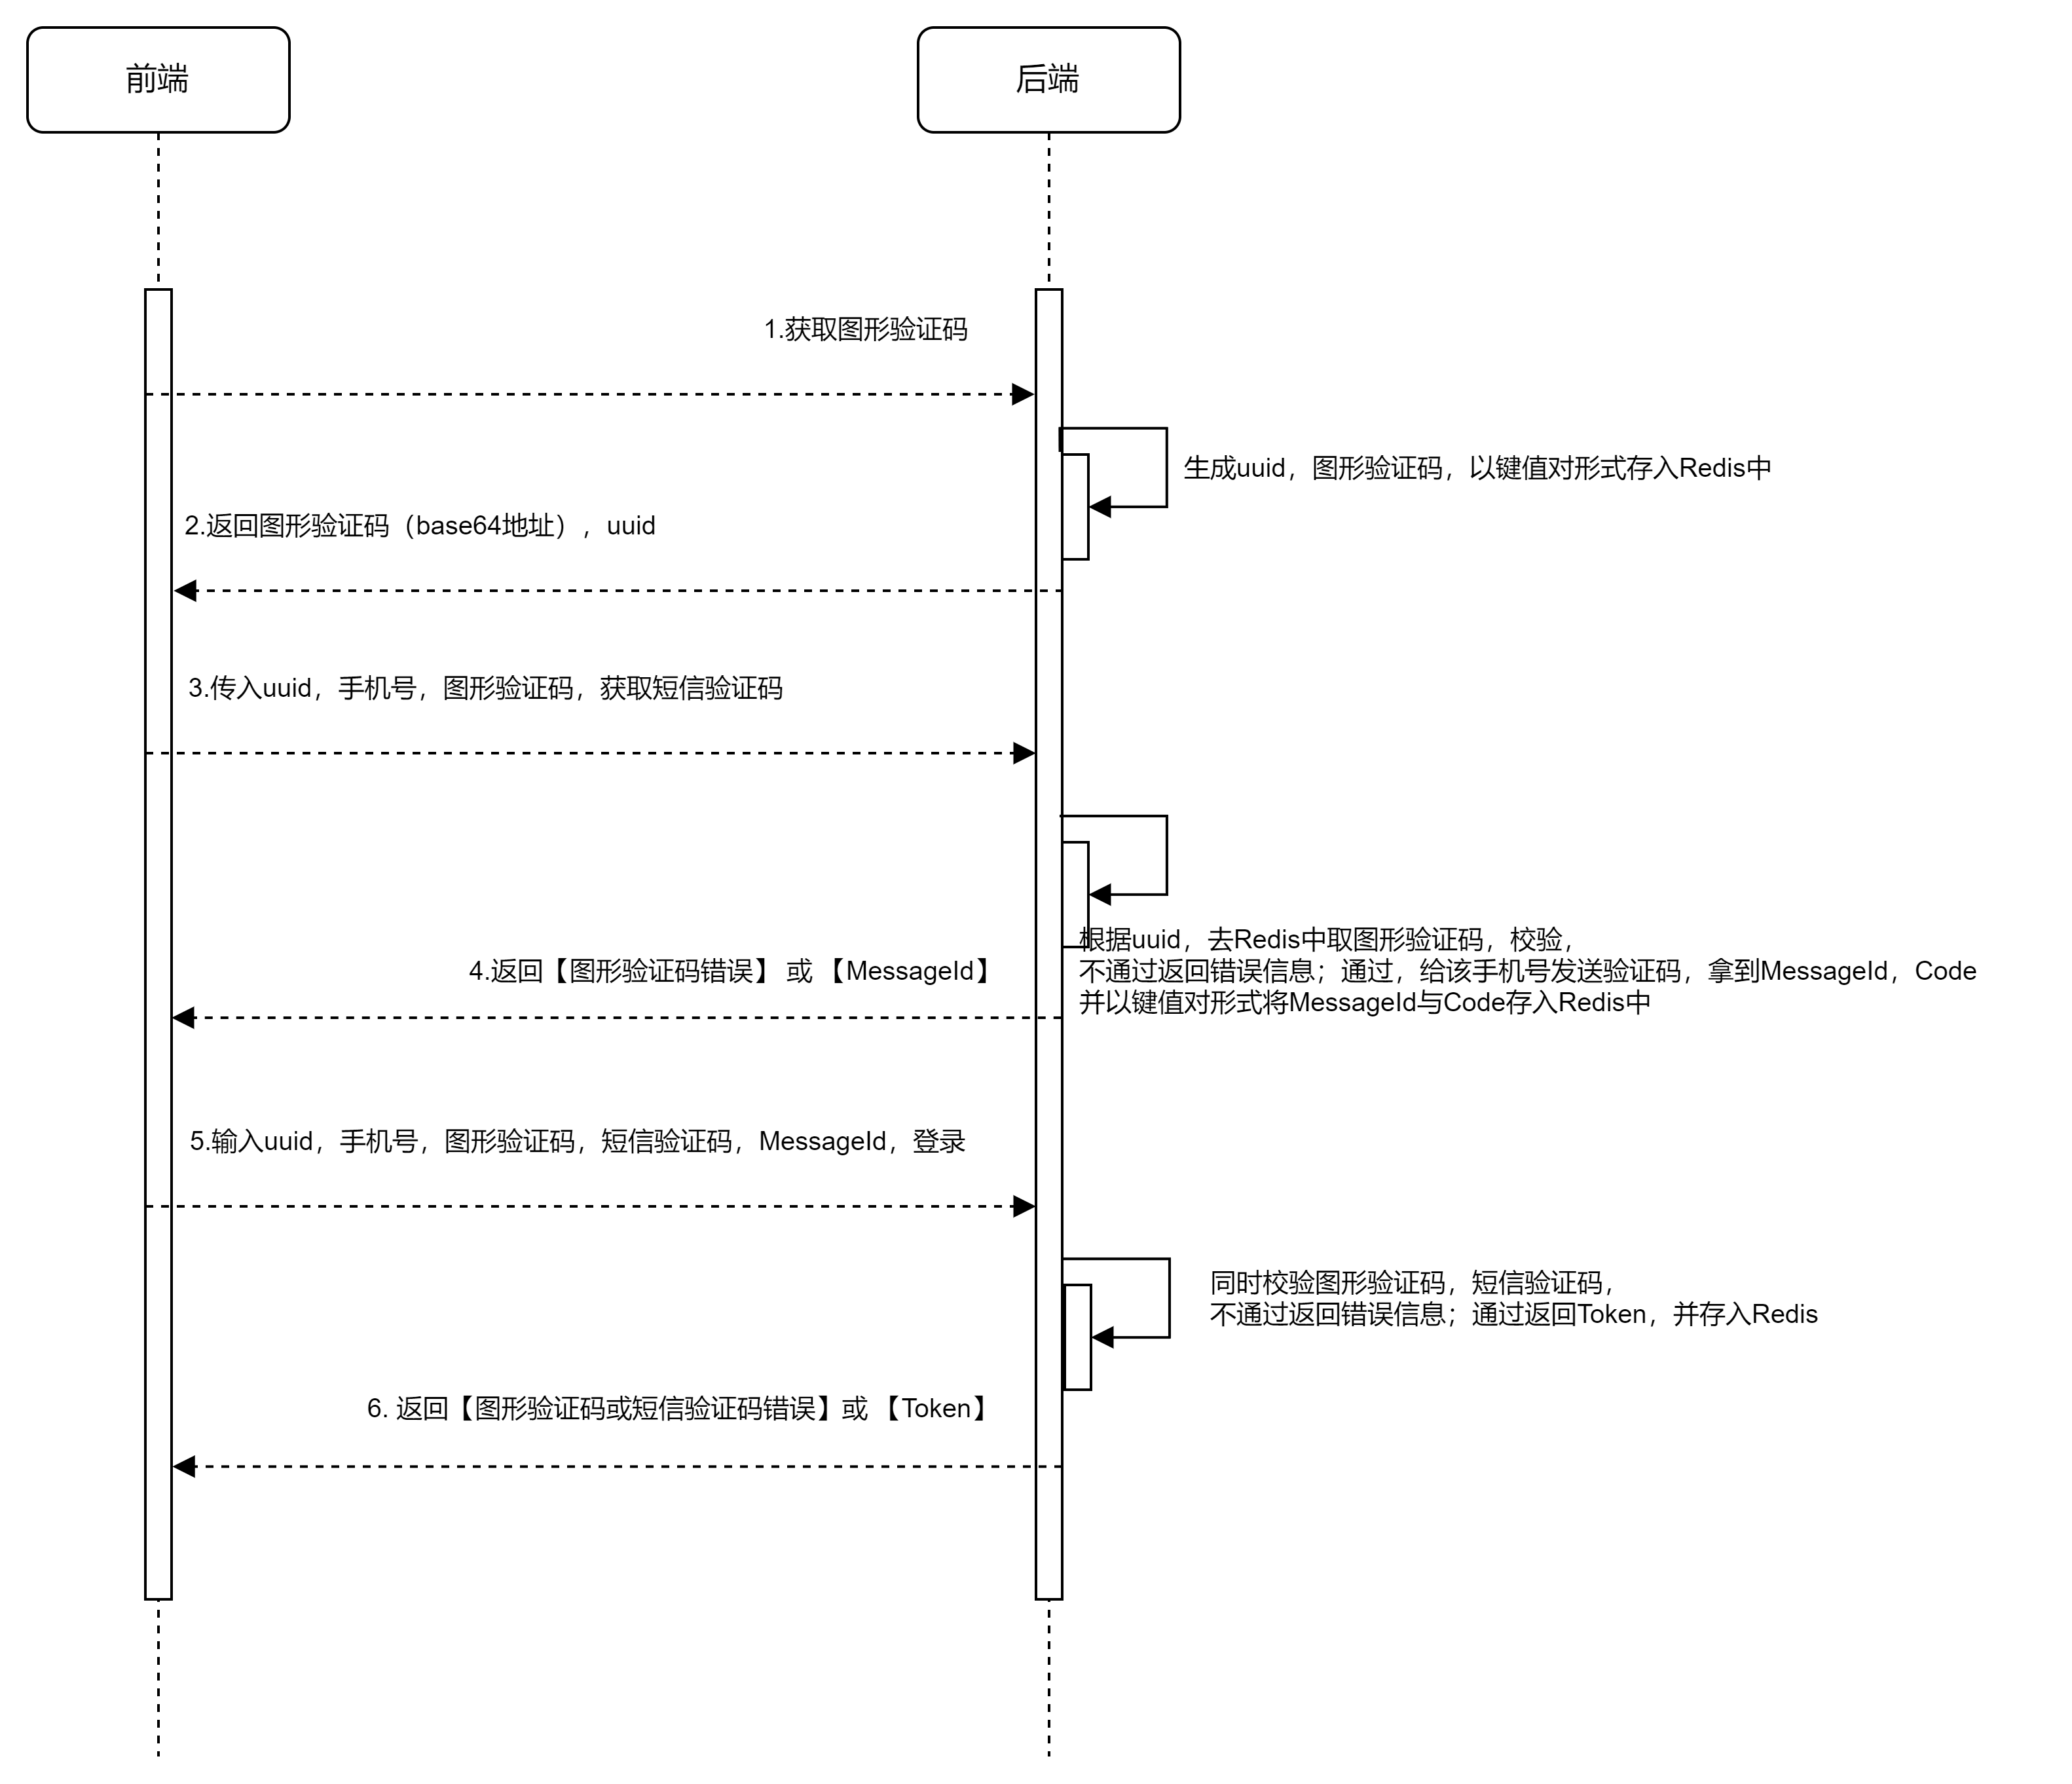
通过手机号+图形验证码+手机验证码实现登录的时序图如下:
说明:
-
(1)用户进入登录界面,出现图形验证码,可点击图形验证码更换图片;
-
(2)后端返回图形验证码的base64地址,加上一个uuid,该uuid为验证码在Redis中存储的Key;
-
(3)用户输入手机号、uuid、图形验证码,获取手机短信验证码;
-
(4)后端根据uuid去Redis中获取图形验证码,与用户输入的进行比较,通过发送短信验证码,同时将短信验证码的MessageId与验证码存入Redis中,不通过返回错误信息;
-
(5)用户输入手机号、uuid、messageId、图形验证码、手机验证码登录;
-
(6)后端根据uuid、messageId去Redis中获取验证码,分别与用户输入的验证码比较,通过登录成功,发Token,不通过返回错误信息;
前端实现
首先,做一个简单的页面,如下:
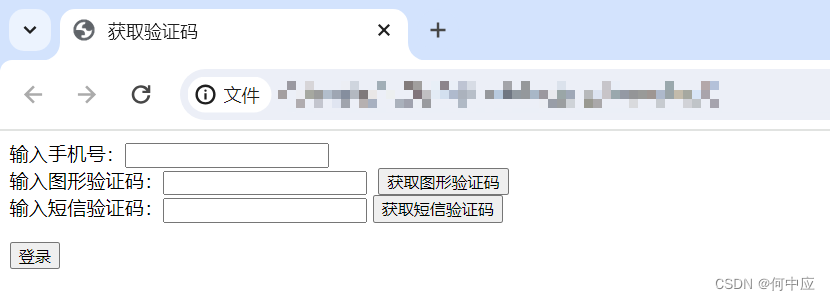
页面有三个接口,分别是:获取图形验证码,获取短信验证码,登录,代码如下:
<!DOCTYPE html>
<html lang="en">

<head>
    <meta charset="UTF-8">
    <meta http-equiv="X-UA-Compatible" content="IE=edge">
    <meta name="viewport" content="width=device-width, initial-scale=1.0">
    <title>获取验证码</title>

    <script src="js/axios-0.18.0.js"></script>

</head>

<body>
    输入手机号:<input type="text" id="phone">
    <br>
    输入图形验证码:<input type="text" id="img">
    <img id="pic" />
    <input type="button" value="获取图形验证码" onclick="getImg()">
    <br>
    输入短信验证码:<input type="text" id="msg">
    <input type="button" value="获取短信验证码" onclick="getMsg()">
    <br>
    <p></p>
    <input type="button" value="登录" onclick="login()">
</body>
<script>
    // 图形验证码返回的uuid
    let uuid = "";
    // 短信验证码返回的msgId
    let msgId = "";

    function getImg() {
        // 异步交互ajax
        axios.get("http://localhost:8080/getImg")
            .then(response => {
                // 接收响应回来的数据
                console.log(response.data);
                uuid = response.data.uuid;
                document.getElementById("pic").src = 'data:image/jpeg;base64,' + response.data.data;
            })
    }

    function getMsg() {
        // 手机号
        const phone = document.getElementById("phone").value;
        // 图形验证码
        const imgValue = document.getElementById("img").value;

        const data = {
            phone:phone,
            imgValue: imgValue,
            uuid: uuid
        };
        // 发送 POST 请求
        axios.post("http://localhost:8080/getMsg", data)
            .then(response => {
                console.log("请求发送成功:", response.data);
                msgId = response.data.msgId
            })
            .catch(error => {
                console.error("请求发送失败:", error);
            });
    }

    function login() {
        // 手机号
        const phone = document.getElementById("phone").value;
        // 图形验证码
        const imgValue = document.getElementById("img").value;
        // 短信验证码
        const msgValue = document.getElementById("msg").value;

        // 构造登录请求的数据对象
        const loginData = {
            phone: phone,
            imgValue: imgValue,
            msgValue: msgValue,
            uuid: uuid,
            msgId: msgId
        };

        // 发送 POST 请求
        axios.post("http://localhost:8080/login", loginData)
            .then(response => {
                console.log("登录成功:", response.data);
            })
            .catch(error => {
                console.error("登录失败:", error);
            });
    }
</script>

</html>
图像验证码使用使用Kaptcha实现,参考:
后端实现
KaptchConfig类
import com.google.code.kaptcha.impl.DefaultKaptcha;
import com.google.code.kaptcha.util.Config;
import org.springframework.context.annotation.Bean;
import org.springframework.stereotype.Component;

import java.util.Properties;

@Component
public class KaptchConfig {

    @Bean
    public DefaultKaptcha getDefaultKaptcha() {
        // 创建验证码工具
        com.google.code.kaptcha.impl.DefaultKaptcha defaultKaptcha = new com.google.code.kaptcha.impl.DefaultKaptcha();

        // 验证码配置
        Properties properties = new Properties();

        // 图片边框
        properties.setProperty("kaptcha.border", "no");

        // 边框颜色
        properties.setProperty("kaptcha.border.color", "black");

        //边框厚度
        properties.setProperty("kaptcha.border.thickness", "1");

        // 图片宽
        properties.setProperty("kaptcha.image.width", "120");

        // 图片高
        properties.setProperty("kaptcha.image.height", "60");

        //图片实现类
        properties.setProperty("kaptcha.producer.impl", "com.google.code.kaptcha.impl.DefaultKaptcha");

        //文本实现类
        properties.setProperty("kaptcha.textproducer.impl", "com.google.code.kaptcha.text.impl.DefaultTextCreator");

        //文本集合,验证码值从此集合中获取
        properties.setProperty("kaptcha.textproducer.char.string", "0123456789ABCDEFGHIJKLMNOPQRSTUVWXYZ");

        //验证码长度
        properties.setProperty("kaptcha.textproducer.char.length", "4");

        //字体
        properties.setProperty("kaptcha.textproducer.font.names", "宋体");

        //字体颜色
        properties.setProperty("kaptcha.textproducer.font.color", "black");

        //文字间隔
        properties.setProperty("kaptcha.textproducer.char.space", "4");

        //干扰实现类
        properties.setProperty("kaptcha.noise.impl", "com.google.code.kaptcha.impl.DefaultNoise");

        //干扰颜色
        properties.setProperty("kaptcha.noise.color", "blue");

        //干扰图片样式
        properties.setProperty("kaptcha.obscurificator.impl", "com.google.code.kaptcha.impl.WaterRipple");

        //背景实现类
        properties.setProperty("kaptcha.background.impl", "com.google.code.kaptcha.impl.DefaultBackground");

        //背景颜色渐变,结束颜色
        properties.setProperty("kaptcha.background.clear.to", "white");

        //文字渲染器
        properties.setProperty("kaptcha.word.impl", "com.google.code.kaptcha.text.impl.DefaultWordRenderer");

        // 创建验证码配置实例
        Config config = new Config(properties);

        // 验证码工具
        defaultKaptcha.setConfig(config);

        return defaultKaptcha;
    }
}
三个接口实现;
import com.google.code.kaptcha.impl.DefaultKaptcha;
import org.springframework.beans.factory.annotation.Autowired;
import org.springframework.data.redis.core.StringRedisTemplate;
import org.springframework.web.bind.annotation.*;

import javax.annotation.Resource;
import javax.imageio.ImageIO;
import java.awt.image.BufferedImage;
import java.io.ByteArrayOutputStream;
import java.io.IOException;
import java.util.Base64;
import java.util.Map;
import java.util.concurrent.TimeUnit;

@RestController
@CrossOrigin
public class KaptchController {

    @Resource
    DefaultKaptcha defaultKaptcha;

    @Autowired
    private StringRedisTemplate redisTemplate;

    /**
     * 生成图形验证码
     */
    @GetMapping("/getImg")
    public Map getImg() throws IOException {
        // 生成文字验证码
        String imageCode = defaultKaptcha.createText();

        // 生成图片验证码
        ByteArrayOutputStream out = new ByteArrayOutputStream();
        BufferedImage image = defaultKaptcha.createImage(imageCode);
        ImageIO.write(image, "jpg", out);

        // 生成uuid,将uuid作为key,验证码作为value存入redis
        String uuid = java.util.UUID.randomUUID().toString();
        redisTemplate.opsForValue().set(uuid, imageCode, 60, TimeUnit.SECONDS);

        // 对字节组Base64编码
        return Map.of("data", Base64.getEncoder().encodeToString(out.toByteArray()), "uuid", uuid, "imageCode", imageCode);
    }

    /**
     * 生成短信验证码
     */
    @PostMapping("/getMsg")
    public Map getCode(@RequestBody Map<String, String> map) throws IOException {
        // 获取相关参数
        String phone = map.get("phone");
        String uuid = map.get("uuid");
        String imgValue = map.get("imgValue");

        // 根据uuid获取图形验证码
        String imageCode = redisTemplate.opsForValue().get(uuid);

        // 校验手机号是否合法
        if (phone == null || phone.length() != 11) {
            return Map.of("data", "手机号不合法");
        }

        // 图形验证码是否过期
        if (imageCode == null) {
            return Map.of("data", "验证码已过期");
        }

        // 是否输入正确
        if (!imageCode.toUpperCase().equals(imgValue.toUpperCase())) {
            return Map.of("data", "验证码错误");
        }

        // 生成6位数的短信验证码
        String msgCode = String.valueOf((int) ((Math.random() * 9 + 1) * 100000));

        // 生成msgId,将msgId作为key,验证码作为value存入redis
        String msgId = java.util.UUID.randomUUID().toString();
        redisTemplate.opsForValue().set(msgId, msgCode, 60, TimeUnit.SECONDS);

        return Map.of("data", msgCode, "msgId", msgId);
    }

    /**
     * 登录
     */
    @PostMapping("/login")
    public Map login(@RequestBody Map<String, String> map) {
        // 获取相关参数
        String phone = map.get("phone");
        String uuid = map.get("uuid");
        String imgValue = map.get("imgValue");
        String msgId = map.get("msgId");
        String msgValue = map.get("msgValue");

        // 根据uuid、msgId获取图形验证码、短信验证码
        String imageCode = redisTemplate.opsForValue().get(uuid);
        String msgCode = redisTemplate.opsForValue().get(msgId);

        // 校验手机号是否合法
        if (phone == null || phone.length() != 11) {
            return Map.of("data", "手机号不合法");
        }

        // 图形验证码是否过期
        if (imageCode == null) {
            return Map.of("data", "验证码已过期");
        }

        // 是否输入正确
        if (!imageCode.toUpperCase().equals(imgValue.toUpperCase())) {
            return Map.of("data", "验证码错误");
        }

        // 短信验证码是否过期
        if (msgCode == null) {
            return Map.of("data", "验证码已过期");
        }

        // 是否输入正确
        if (!msgCode.equals(msgValue)) {
            return Map.of("data", "验证码错误");
        }

        // 登录成功,删除Redis中的验证码
        redisTemplate.delete(uuid);
        redisTemplate.delete(msgId);

        return Map.of("data", "success");
    }
}
测试
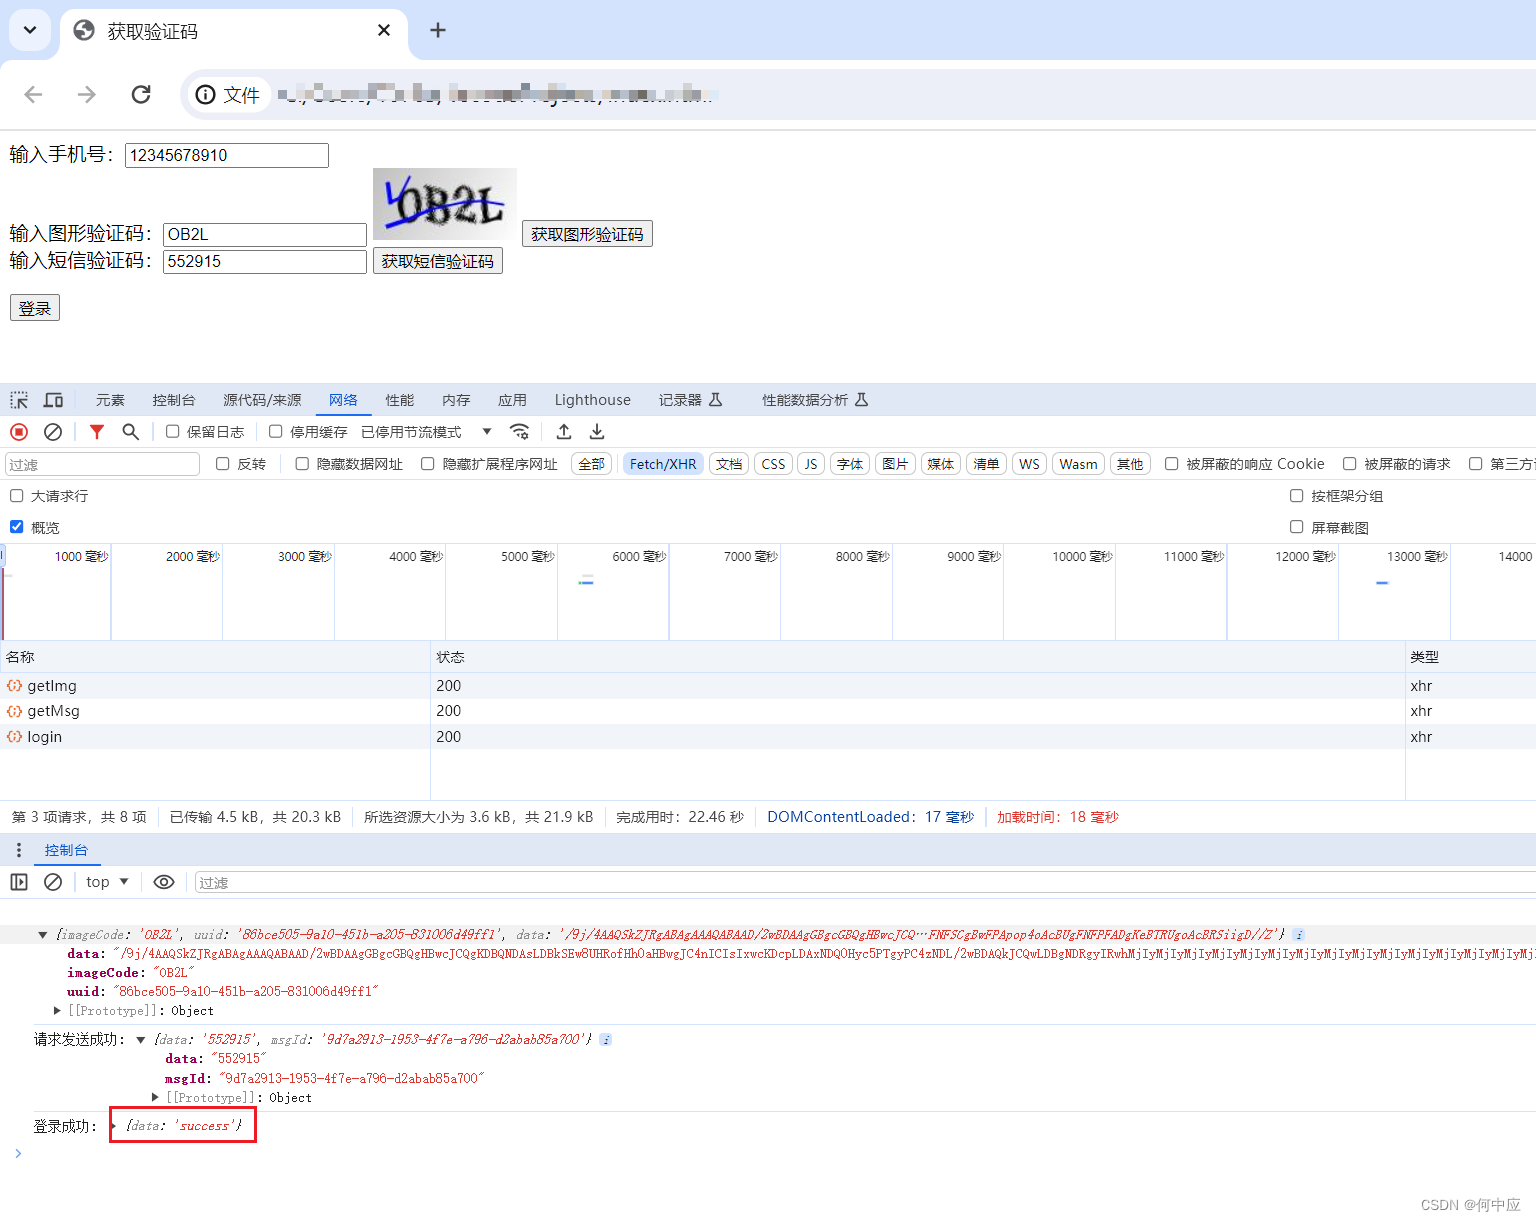
测试正常情况
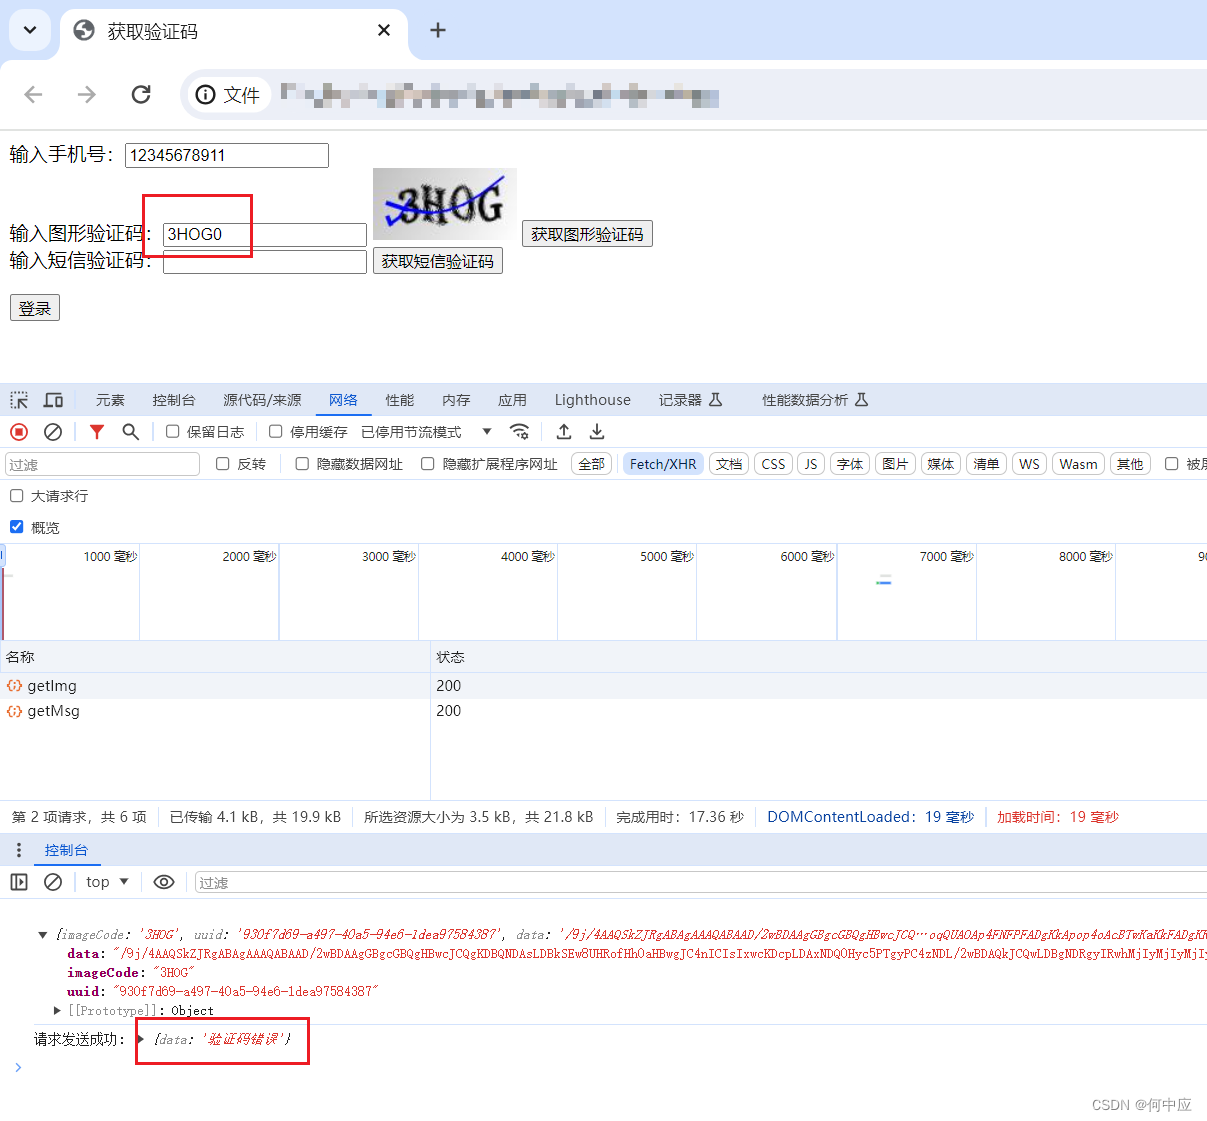
测试图形验证码输入错误的情况
测试短信验证码输入错误的情况(图中“登录成功”为接口访问成功的信息,并非通过了登录校验)

基本实现了,正式情况还需要考虑更严格的手机号校验,手机验证码防频繁点击,手机短信登录第三方API接入,规范验证码在Redis中Key的格式,验证码在Redis中的过期时间等等,这里仅是一个Demo,但上述实现思路是值得考虑的。
总结
本文介绍了移动端双验证码登录的实现,希望能对大家有所启发。
原文地址:https://blog.csdn.net/qq_42108331/article/details/137890702
免责声明:本站文章内容转载自网络资源,如本站内容侵犯了原著者的合法权益,可联系本站删除。更多内容请关注自学内容网(zxcms.com)!