【Docker】安装部署项目流程(Pycharm版)

安装部署步骤
1.准备项目
第一步要准备好你所需要部署的项目,确保在工作目录下所以程序.py文件正常调用并能正确运行
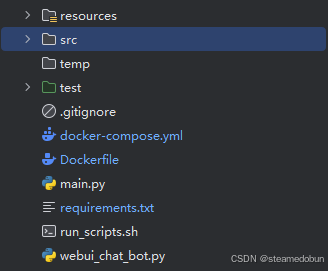
如上,main要在工作目录中能跑通,这里有一点需要注意
在IDE src不要标记为源代码根目录,观察一下是否能跑通代码


若跑不通,将import中调包前添加src.可解决,修改如下

2.添加三份文件

1.Dockerfile
FROM .../nvidia/cuda:11.8.0-cudnn8-devel-ubuntu22.04  # 容器系统

ARG VENV_NAME="your_program"  # docker镜像项目名
ENV VENV=$VENV_NAME  # 环境名
ENV LANG=C.UTF-8 LC_ALL=C.UTF-8

ENV DEBIAN_FRONTEN=noninteractive
ENV PYTHONUNBUFFERED=1
SHELL ["/bin/bash", "--login", "-c"]

# 系统搭建的一些常用安装包,ubuntu系统常用(项目需要的安装包也可以一并安上)
RUN apt-get update -y --fix-missing
RUN apt-get install -y git build-essential curl wget ffmpeg unzip git git-lfs sox libsox-dev && \
    apt-get clean && \
    git lfs install

# ==================================================================
# conda install and conda forge channel as default
# ------------------------------------------------------------------
# Install miniforge
# 这里下载一些离线安装包(可见博客说明)
COPY install_package/Miniforge3-Linux-x86_64.sh /root/miniforge.sh
RUN chmod +x /root/miniforge.sh
# RUN wget --quiet https://github.com/conda-forge/miniforge/releases/latest/download/Miniforge3-Linux-x86_64.sh -O ~/miniforge.sh && \

RUN /bin/bash /root/miniforge.sh -b -p /opt/conda && \
    rm /root/miniforge.sh && \
    ln -s /opt/conda/etc/profile.d/conda.sh /etc/profile.d/conda.sh && \
    echo "source /opt/conda/etc/profile.d/conda.sh" >> /opt/nvidia/entrypoint.d/100.conda.sh && \
    echo "source /opt/conda/etc/profile.d/conda.sh" >> /root/.bashrc && \
    echo "conda activate ${VENV}" >> /opt/nvidia/entrypoint.d/110.conda_default_env.sh && \
    echo "conda activate ${VENV}" >> $HOME/.bashrc

ENV PATH /opt/conda/bin:$PATH

# 设置清华镜像源,增加超时时间和重试次数
RUN conda config --add channels https://mirrors.tuna.tsinghua.edu.cn/anaconda/pkgs/main/ && \
    conda config --add channels https://mirrors.tuna.tsinghua.edu.cn/anaconda/pkgs/free/ && \
    conda config --add channels https://mirrors.tuna.tsinghua.edu.cn/anaconda/pkgs/r/ && \
    conda config --add channels https://mirrors.tuna.tsinghua.edu.cn/anaconda/pkgs/pro/ && \
    conda config --add channels conda-forge && \
    conda config --set channel_priority strict && \
    conda config --set remote_connect_timeout_secs 30 && \
    conda config --set remote_read_timeout_secs 30 && \
    conda config --set remote_max_retries 3
# ------------------------------------------------------------------
# ~conda
# ==================================================================

# 创建虚拟环境(环境名上面已经定义了,和conda创建虚拟环境命令一致)
RUN conda create -y -n ${VENV} python=3.9
ENV CONDA_DEFAULT_ENV=${VENV}
ENV PATH /opt/conda/bin:/opt/conda/envs/${VENV}/bin:$PATH

# 复制到工作路径
COPY . /workspace/your_program

WORKDIR /workspace

ENV PYTHONPATH="${PYTHONPATH}:/workspace/your_program"

# conda pip 下载项目所需包(可以用清华源、阿里加速)
RUN conda activate ${VENV} && conda install -y -c conda-forge pynini==2.1.5
# https://pypi.tuna.tsinghua.edu.cn/simple/torch/
# https://pypi.tuna.tsinghua.edu.cn/simple/torchaudio/
RUN conda activate ${VENV} && cd your_program && \
    pip install --default-timeout=100 -r requirements.txt -i https://pypi.tuna.tsinghua.edu.cn/simple/

# 确定工作路径
WORKDIR /workspace/your_program
如果使用阿里云,可能需要添加 --trusted-host=mirrors.aliyun.com
2.requirements.txt

对于一些比较大的安装包.whl文件可以先下好放在项目中,在requirements.txt文件中以以下形式进行安装,如下
./install_package/torch-2.3.0-cp39-cp39-manylinux1_x86_64.whl
./install_package/torchaudio-2.3.0-cp39-cp39-manylinux1_x86_64.whl
./install_package/nvidia_cudnn_cu12-8.9.2.26-py3-none-manylinux1_x86_64.whl
modelscope
huggingface
huggingface_hub
funasr>=1.1.3
numpy<=1.26.4
gradio
fastapi>=0.111.1
requests
一种是通过本地离线包下载(对于比较大的文件),一种是通过清华源/阿里拉取
3.docker-compose.yml
一些系统配置(容器理解为一个独立的ubuntu系统,下面作为运行本项目的一些系统配置)
version: '3.3'
services:
  your_program:
    image: your_program:v1.0
    container_name: your-program-server
    working_dir: /workspace/your-program
    command: python3 main.py
    volumes:
      - /usr/share/zoneinfo:/usr/share/zoneinfo
      - /etc/localtime:/etc/timezone:ro
      - ./logs:/workspace/your-program/logs
      - ./resources:/workspace/your-program/resources
    environment:
      - TZ=Asia/Shanghai
      - CUDA_DEVICE_ORDER=PCI_BUS_ID
      - CUDA_VISIBLE_DEVICES=1
      - SERVER_PORT=8666
    ports:
      - "8666:8666"
    restart: always
    runtime: nvidia

#    networks:
#      - test-network
#networks:
#  test-network:
#    external: true
- CUDA_VISIBLE_DEVICES=1
服务器如果有多张显卡,可以设成哪张卡可见(cuda:0就是读取可见卡的第一张)
3.将整个项目结构上传服务器
Pycharm在工具栏中有一个上传连接服务器的工具(推荐)
先配置
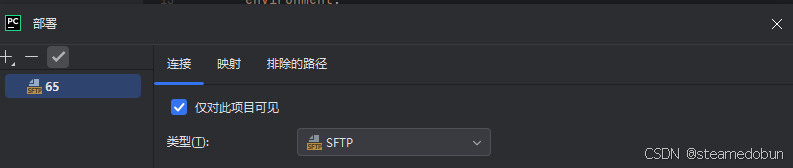
连接服务器(有密码形式、SSH等)
后上传

4.服务器打开项目目录
cd到项目总目录下
4.1从源码中构建docker镜像
docker build -t your_program:v1.0 .4.2启动容器
docker-compose up -d

# 查看启动情况
docker logs your-program-server
如果要重新打容器(不继续上一步的)可以用以下命令
docker build --no-cache -t hy-asr:v1.0 .原文地址:https://blog.csdn.net/steamedobun/article/details/142957271
免责声明:本站文章内容转载自网络资源,如本站内容侵犯了原著者的合法权益,可联系本站删除。更多内容请关注自学内容网(zxcms.com)!