玩机进阶教程-----高通9008线刷XML脚本修改备份 檫除的操作步骤解析

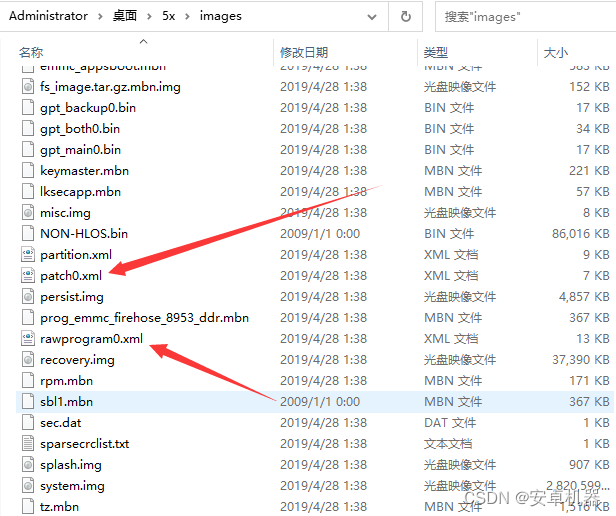
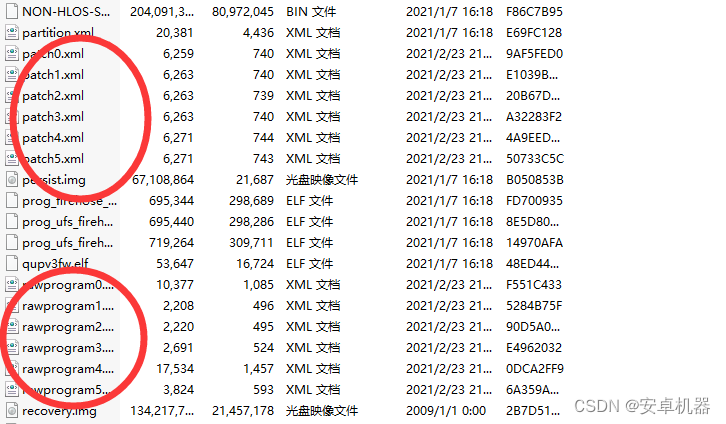
在高通9008官方固件中我们可以看到刷写需要的脚本rawprogram0.xml和辅助脚本patch0.xml,脚本的作用在于将固件内各个分区对应写入手机内。根据分区地址段。然后判断脚本中那些分区不写入。以下步骤将分析emmc字库为例来讲解如何将默认刷入脚本修改为备份 檫除脚本。并且实例演示具体的步骤。ufs格式的字库修改方法步骤一样
提示:步骤方法用之正则正。请勿用于非法固件修改操作
emmc固件脚本
ufs固件脚本
我们使用文档编辑器来打开xml脚本可以看到一下。可以查看图示了解哪些分区是写入,那些是不写入。不写入的分区包括安全数据类分区例如传感器分区和基带分区类
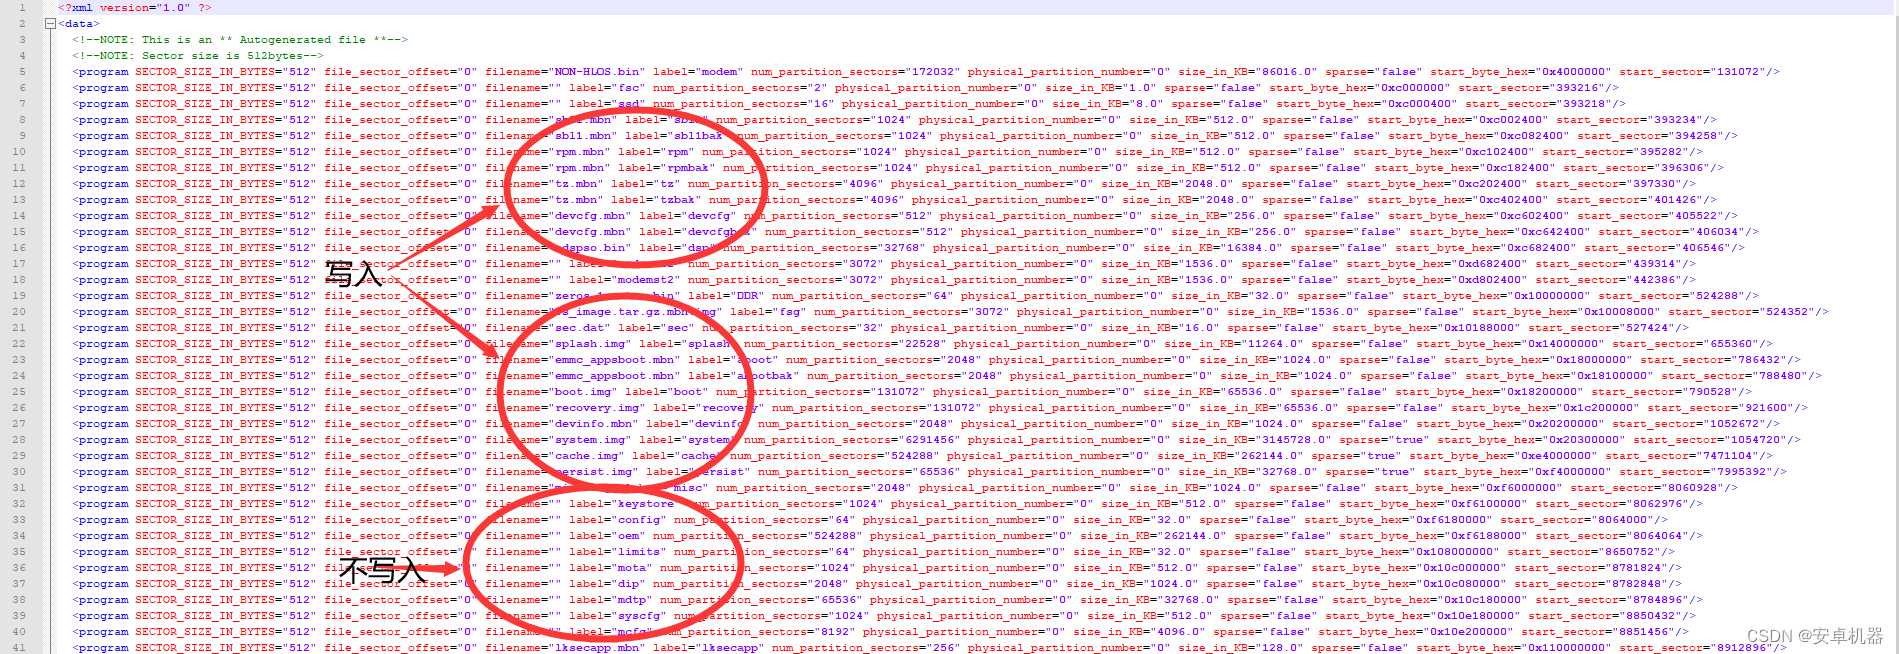
部分原始脚本
<program SECTOR_SIZE_IN_BYTES="512" file_sector_offset="0" filename="NON-HLOS.bin" label="modem" num_partition_sectors="172032" physical_partition_number="0" size_in_KB="86016.0" sparse="false" start_byte_hex="0x4000000" start_sector="131072"/>
  <program SECTOR_SIZE_IN_BYTES="512" file_sector_offset="0" filename="" label="fsc" num_partition_sectors="2" physical_partition_number="0" size_in_KB="1.0" sparse="false" start_byte_hex="0xc000000" start_sector="393216"/>
  <program SECTOR_SIZE_IN_BYTES="512" file_sector_offset="0" filename="" label="ssd" num_partition_sectors="16" physical_partition_number="0" size_in_KB="8.0" sparse="false" start_byte_hex="0xc000400" start_sector="393218"/>
  <program SECTOR_SIZE_IN_BYTES="512" file_sector_offset="0" filename="sbl1.mbn" label="sbl1" num_partition_sectors="1024" physical_partition_number="0" size_in_KB="512.0" sparse="false" start_byte_hex="0xc002400" start_sector="393234"/>
  <program SECTOR_SIZE_IN_BYTES="512" file_sector_offset="0" filename="sbl1.mbn" label="sbl1bak" num_partition_sectors="1024" physical_partition_number="0" size_in_KB="512.0" sparse="false" start_byte_hex="0xc082400" start_sector="394258"/>
  <program SECTOR_SIZE_IN_BYTES="512" file_sector_offset="0" filename="rpm.mbn" label="rpm" num_partition_sectors="1024" physical_partition_number="0" size_in_KB="512.0" sparse="false" start_byte_hex="0xc102400" start_sector="395282"/>
  <program SECTOR_SIZE_IN_BYTES="512" file_sector_offset="0" filename="rpm.mbn" label="rpmbak" num_partition_sectors="1024" physical_partition_number="0" size_in_KB="512.0" sparse="false" start_byte_hex="0xc182400" start_sector="396306"/>
  <program SECTOR_SIZE_IN_BYTES="512" file_sector_offset="0" filename="tz.mbn" label="tz" num_partition_sectors="4096" physical_partition_number="0" size_in_KB="2048.0" sparse="false" start_byte_hex="0xc202400" start_sector="397330"/>
  <program SECTOR_SIZE_IN_BYTES="512" file_sector_offset="0" filename="tz.mbn" label="tzbak" num_partition_sectors="4096" physical_partition_number="0" size_in_KB="2048.0" sparse="false" start_byte_hex="0xc402400" start_sector="401426"/>
  <program SECTOR_SIZE_IN_BYTES="512" file_sector_offset="0" filename="devcfg.mbn" label="devcfg" num_partition_sectors="512" physical_partition_number="0" size_in_KB="256.0" sparse="false" start_byte_hex="0xc602400" start_sector="405522"/>
  <program SECTOR_SIZE_IN_BYTES="512" file_sector_offset="0" filename="devcfg.mbn" label="devcfgbak" num_partition_sectors="512" physical_partition_number="0" size_in_KB="256.0" sparse="false" start_byte_hex="0xc642400" start_sector="406034"/>
修改脚本为读取备份
我们要将默认脚本的program修改为read。意思就是将刷入改为备份分区。可以使用编辑器的替换--全部替换功能来进行操作。那么在操作中记住以下几点。对于前面默认不写入的分区可以修改为备份。具体修改可以参考前后图示 例如
<program SECTOR_SIZE_IN_BYTES="512" file_sector_offset="0" filename="NON-HLOS.bin" label="modem" num_partition_sectors="172032" physical_partition_number="0" size_in_KB="86016.0" sparse="false" start_byte_hex="0x4000000" start_sector="131072"/>修改为
<read SECTOR_SIZE_IN_BYTES="512" file_sector_offset="0" filename="NON-HLOS.bin" label="modem" num_partition_sectors="172032" physical_partition_number="0" size_in_KB="86016.0" sparse="false" start_byte_hex="0x4000000" start_sector="131072"/>
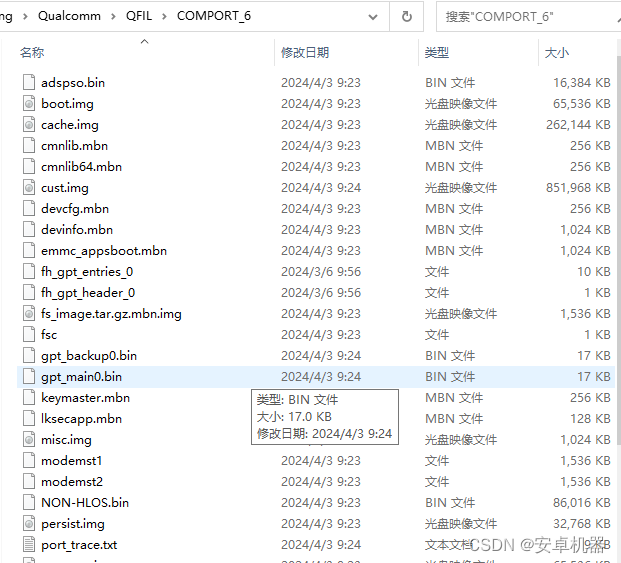
平台可以使用qpst操作。文件调用正常按刷机方式调用即可

完成后看qpst默认存储文件夹。在qpst里就有提示。其中里面就有回读出来的分区
也可以使用其他刷写工具进行尝试
修改脚本为檫除分区
同样的步骤将默认脚本的program修改为erase。意思就是将刷入改为檫除分区。同样使用编辑器的替换--全部替换功能来进行操作。
<program SECTOR_SIZE_IN_BYTES="512" file_sector_offset="0" filename="NON-HLOS.bin" label="modem" num_partition_sectors="172032" physical_partition_number="0" size_in_KB="86016.0" sparse="false" start_byte_hex="0x4000000" start_sector="131072"/>修改位
<erase SECTOR_SIZE_IN_BYTES="512" file_sector_offset="0" filename="NON-HLOS.bin" label="modem" num_partition_sectors="172032" physical_partition_number="0" size_in_KB="86016.0" sparse="false" start_byte_hex="0x4000000" start_sector="131072"/>如果要全分区修改也是同样的方法。注意这个操作要谨慎。此操作可以用于在脚本中修改为檫除 去除某些账号锁 FRP锁的目的。或者一些回读系统系统中无userdata分区。修改为檫除数据分区来达到恢复出厂清除数据的目的。
其他作用
修改脚本除了以上所说的读取备份和檫除还可以用于某些机型解锁bl的目的。像有些修改oem devinfo分区文件来解锁的机型。
以上此类操作完全可以通过adb脚本来执行。在9008端口模式下进行分区的回读 檫除操作。
在详细的教程都只是拓展你的操作思路。打开你的思维。在操作中并运用分析,感受,联想,思考的一种学习方法.
教程只是本人的一些浅薄分析与实际步骤演示。不到之处请谅解。如果对你有些许帮助,请点个赞赞呗

原文地址:https://blog.csdn.net/u011283906/article/details/137326731
免责声明:本站文章内容转载自网络资源,如本站内容侵犯了原著者的合法权益,可联系本站删除。更多内容请关注自学内容网(zxcms.com)!