spring 5.3.x 、6.1.x、6.0.x 源码本地编译运行
参考大佬文章,完美完成本地idea spring源码编译和demo测试
链接
spring6.0.x jdk调成17
idea 2022.2.4版本本地编译spring源码项目
spring6.0.x 分支
gradle-8.2 版本
jdk17 版本
File > Project Structure > Project Settings > Project

File > Project Structure > Project Settings > Modules

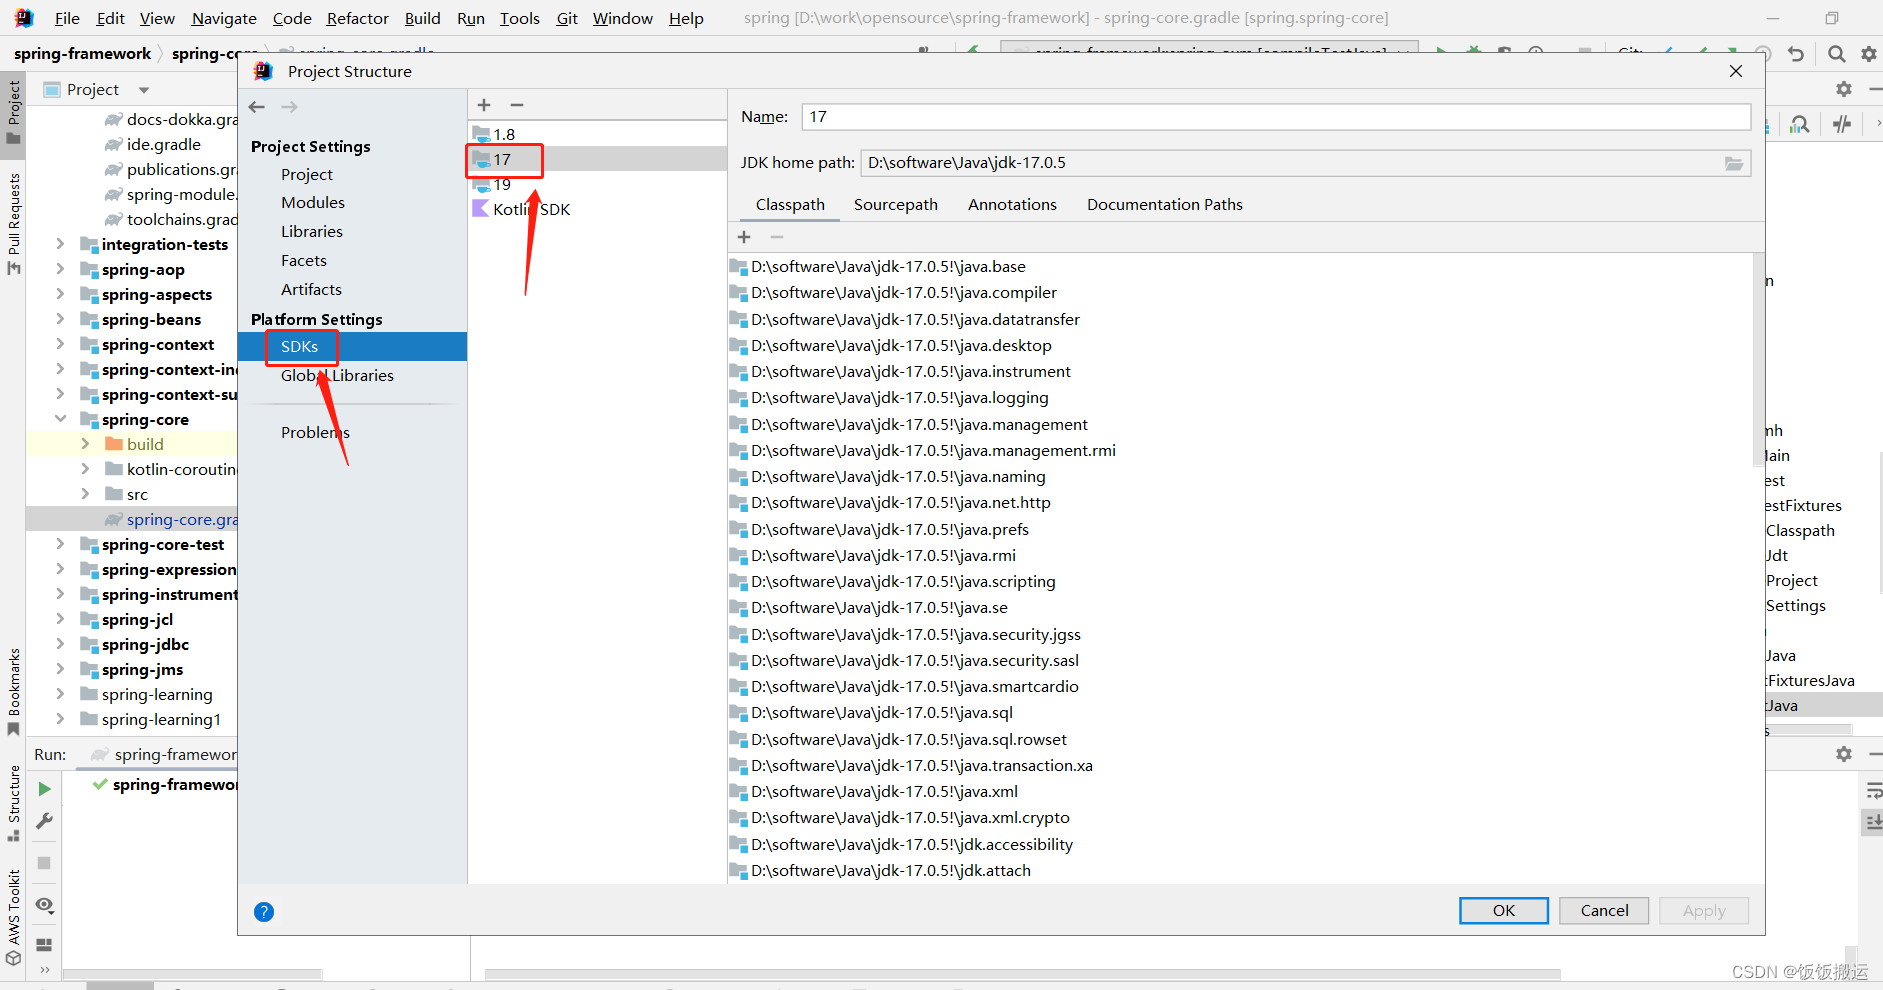
File > Project Structure > Platform Settings > SDKs
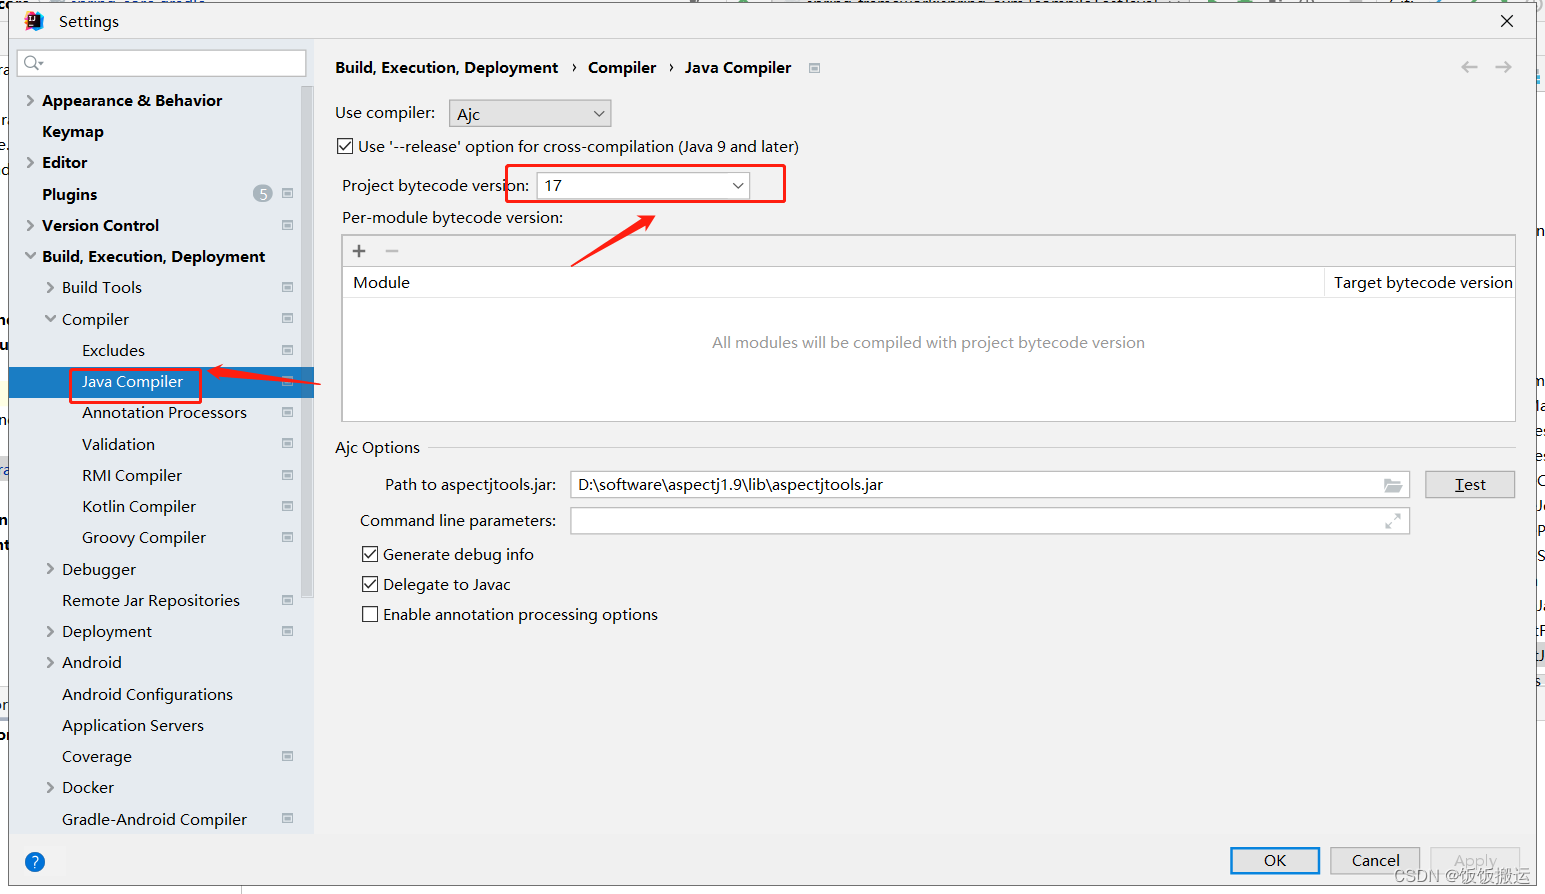
File > Settings > Build, Execution, Deployment > Compiler > Java Compiler
Project bytecode version: 17
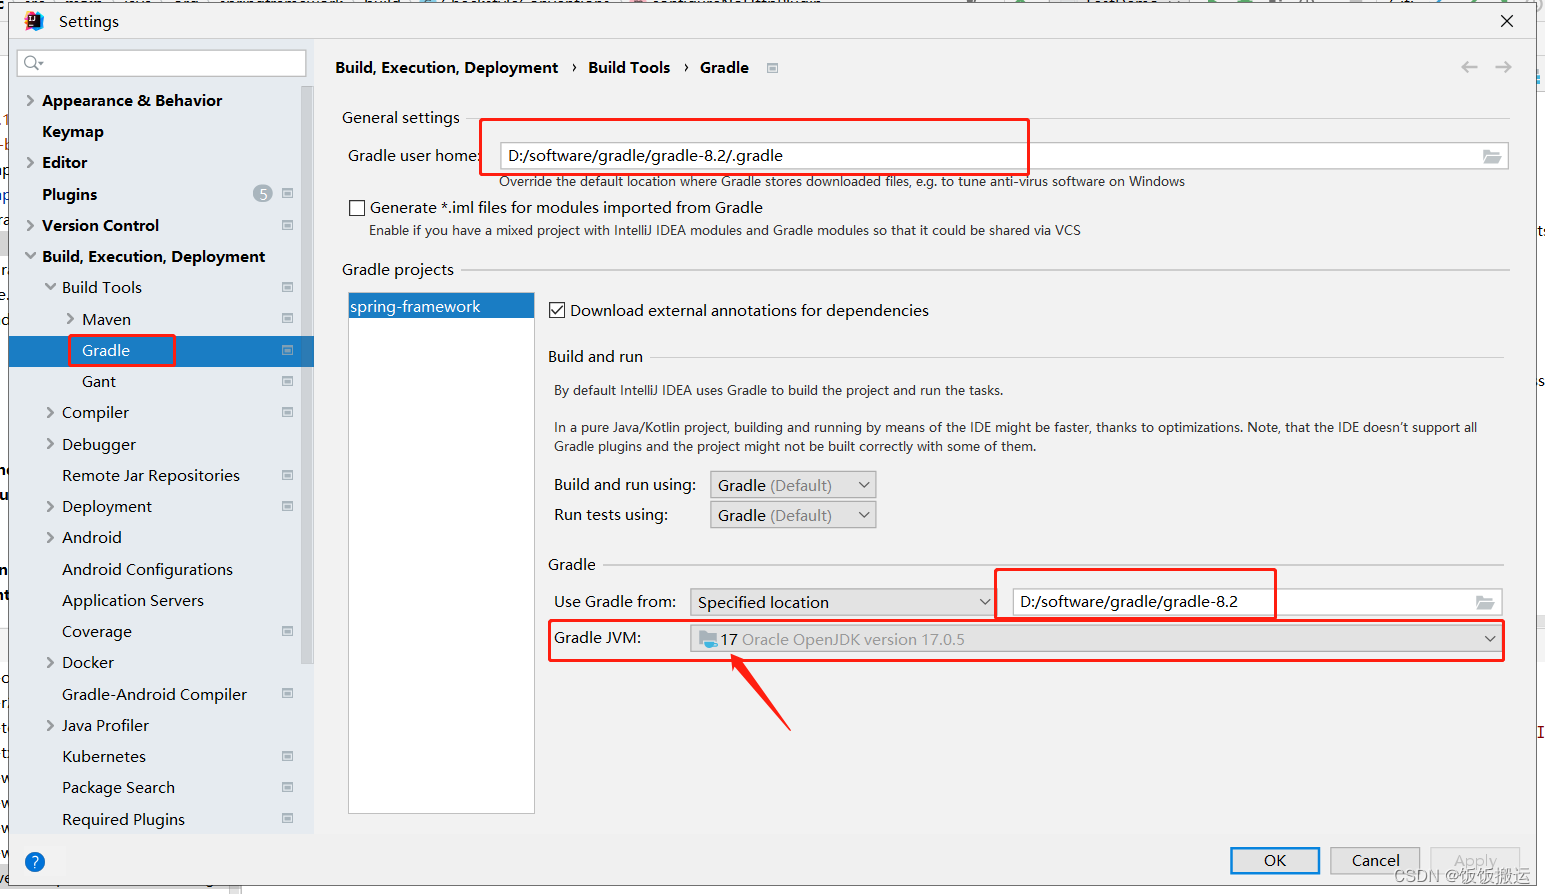
File > Settings > Build, Execution, Deployment > Build Tools > Gradle
如果遇到下面的错
Could not resolve all dependencies for configuration ':spring-webflux:jmhCompileClasspath'.
Failed to calculate the value of task ':spring-core:compileJava21Java' property 'javaCompiler'.
No matching toolchains found for requested specification: {languageVersion=21, vendor=any, implementation=vendor-specific} for WINDOWS on x86_64.
No locally installed toolchains match and toolchain download repositories have not been configured.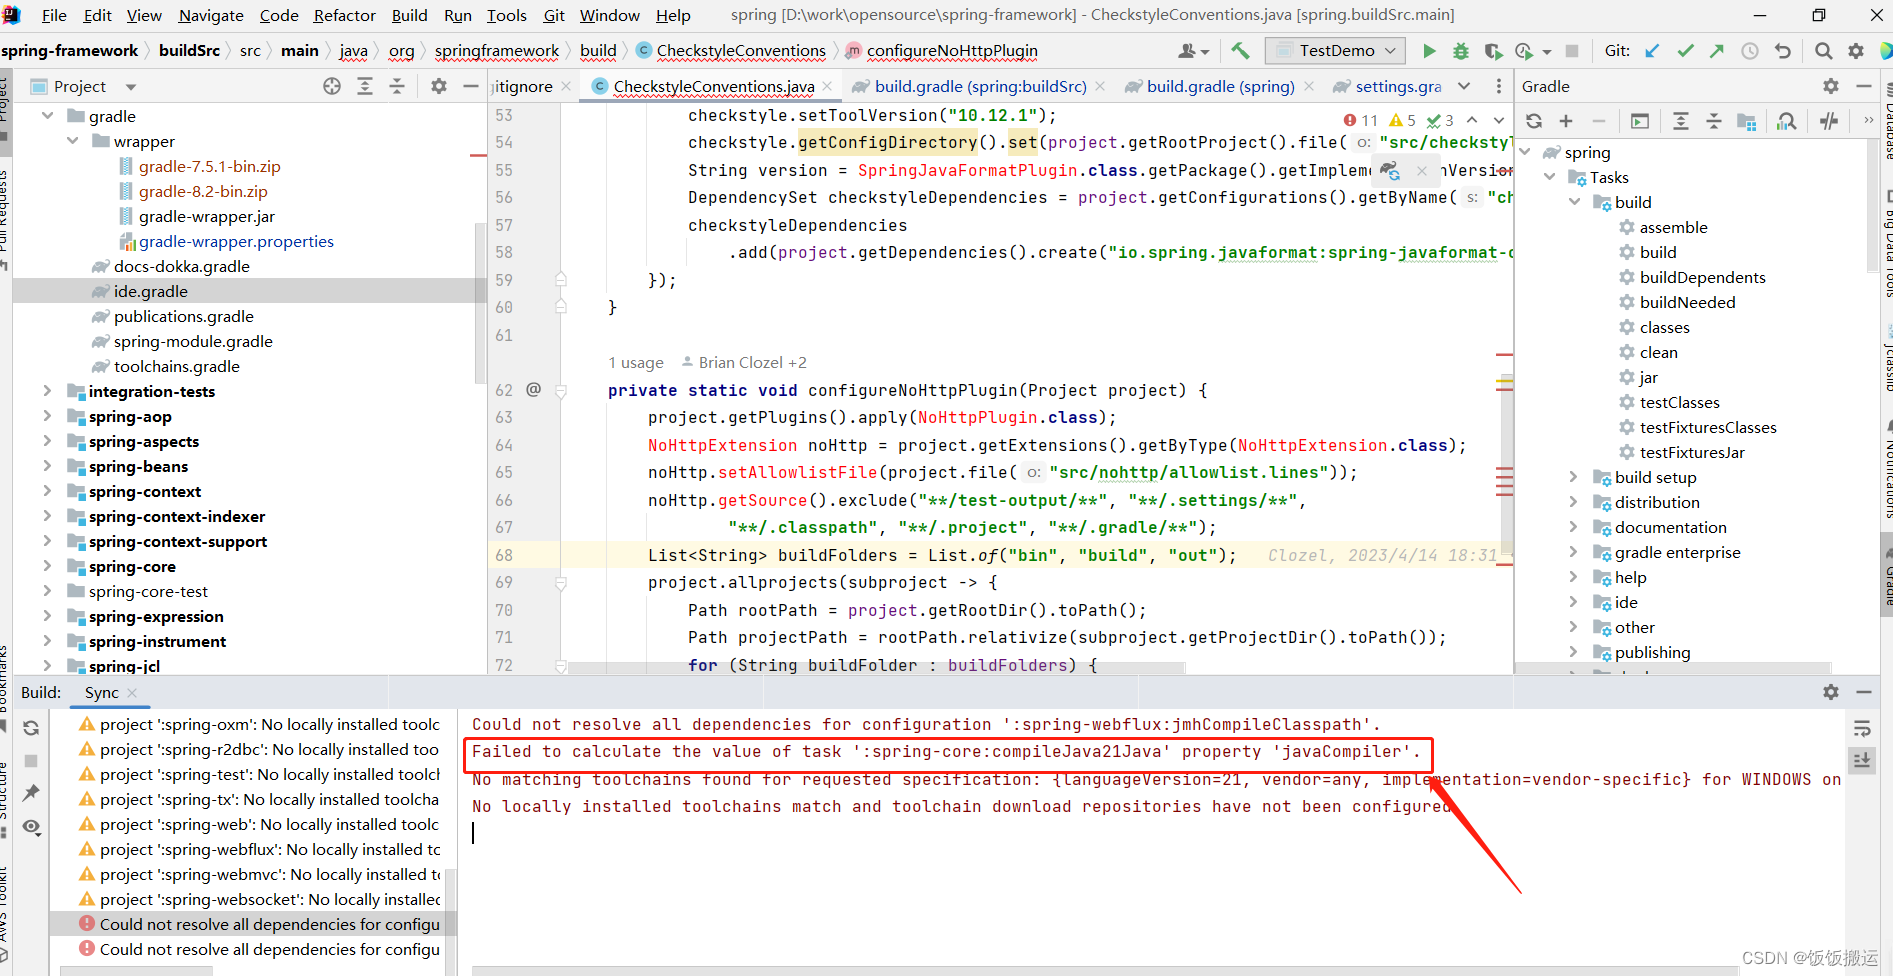
参看文章 spring源码编译bug
文章解决方案如下
解决方案
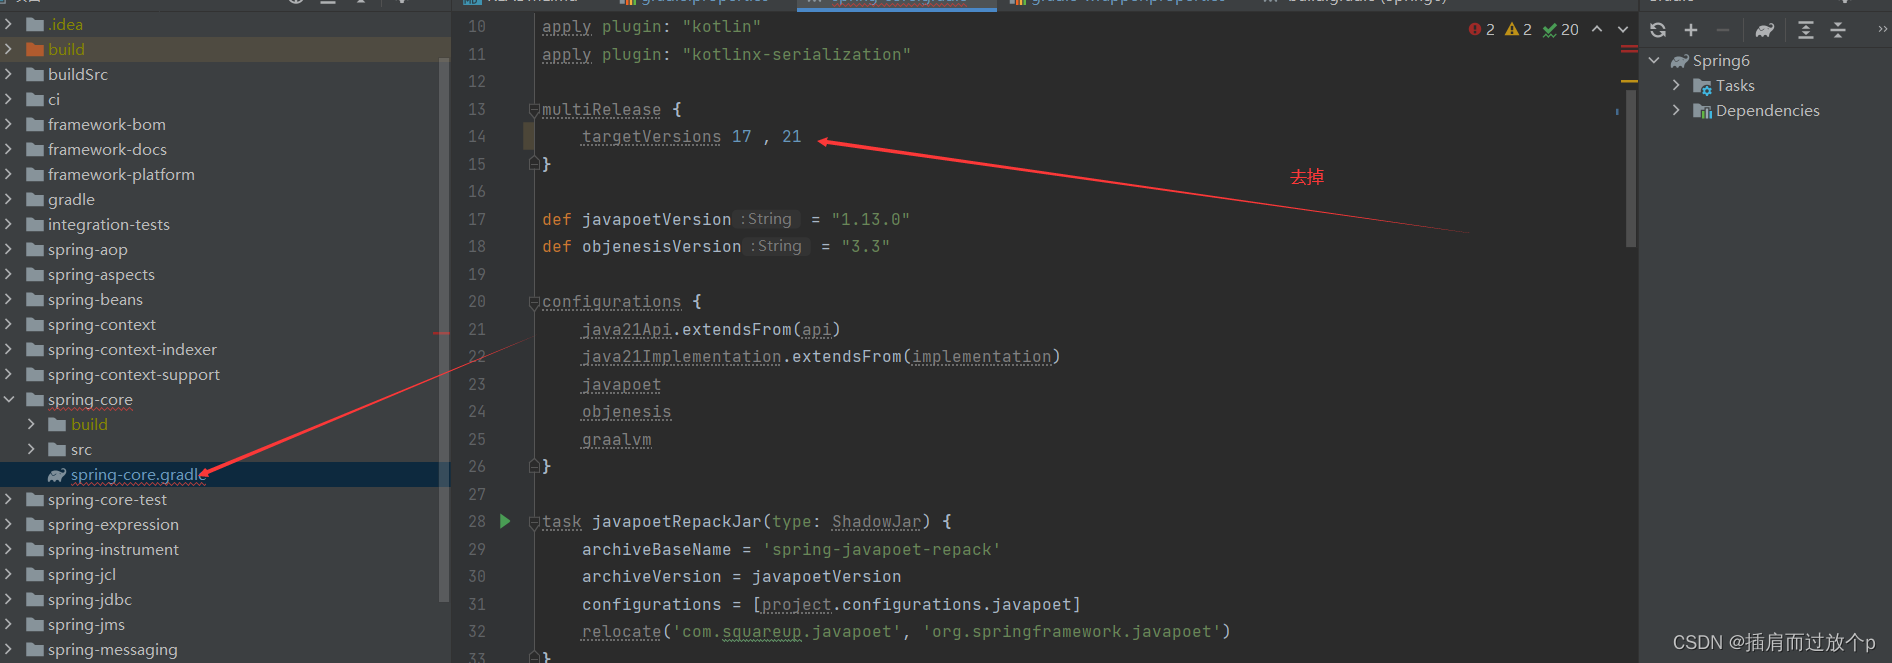
找到项目中 spring-core文件夹中的spring-core.gradle文件中下面这行代码将21去掉即可!!!
修改前
multiRelease {
targetVersions 17 , 21
}
修改后
multiRelease {
targetVersions 17
}
成功!!
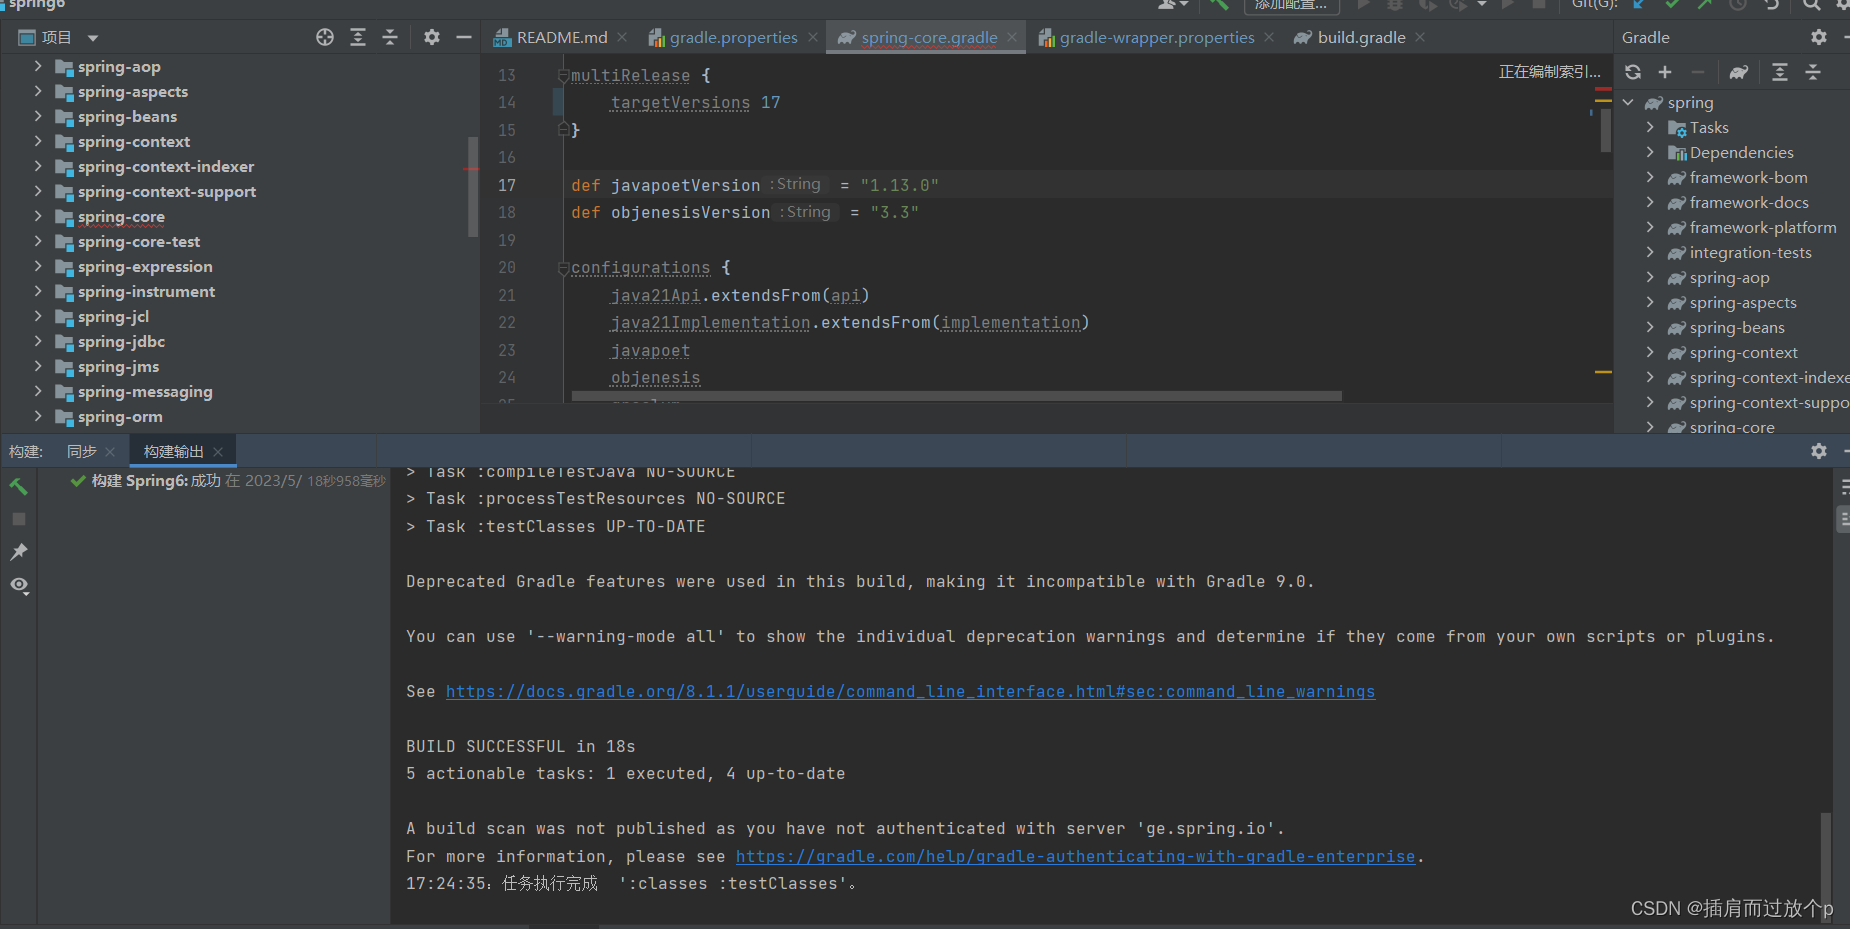
最终编译成功,下面问题可以忽略
Deprecated Gradle features were used in this build, making it incompatible with Gradle 9.0.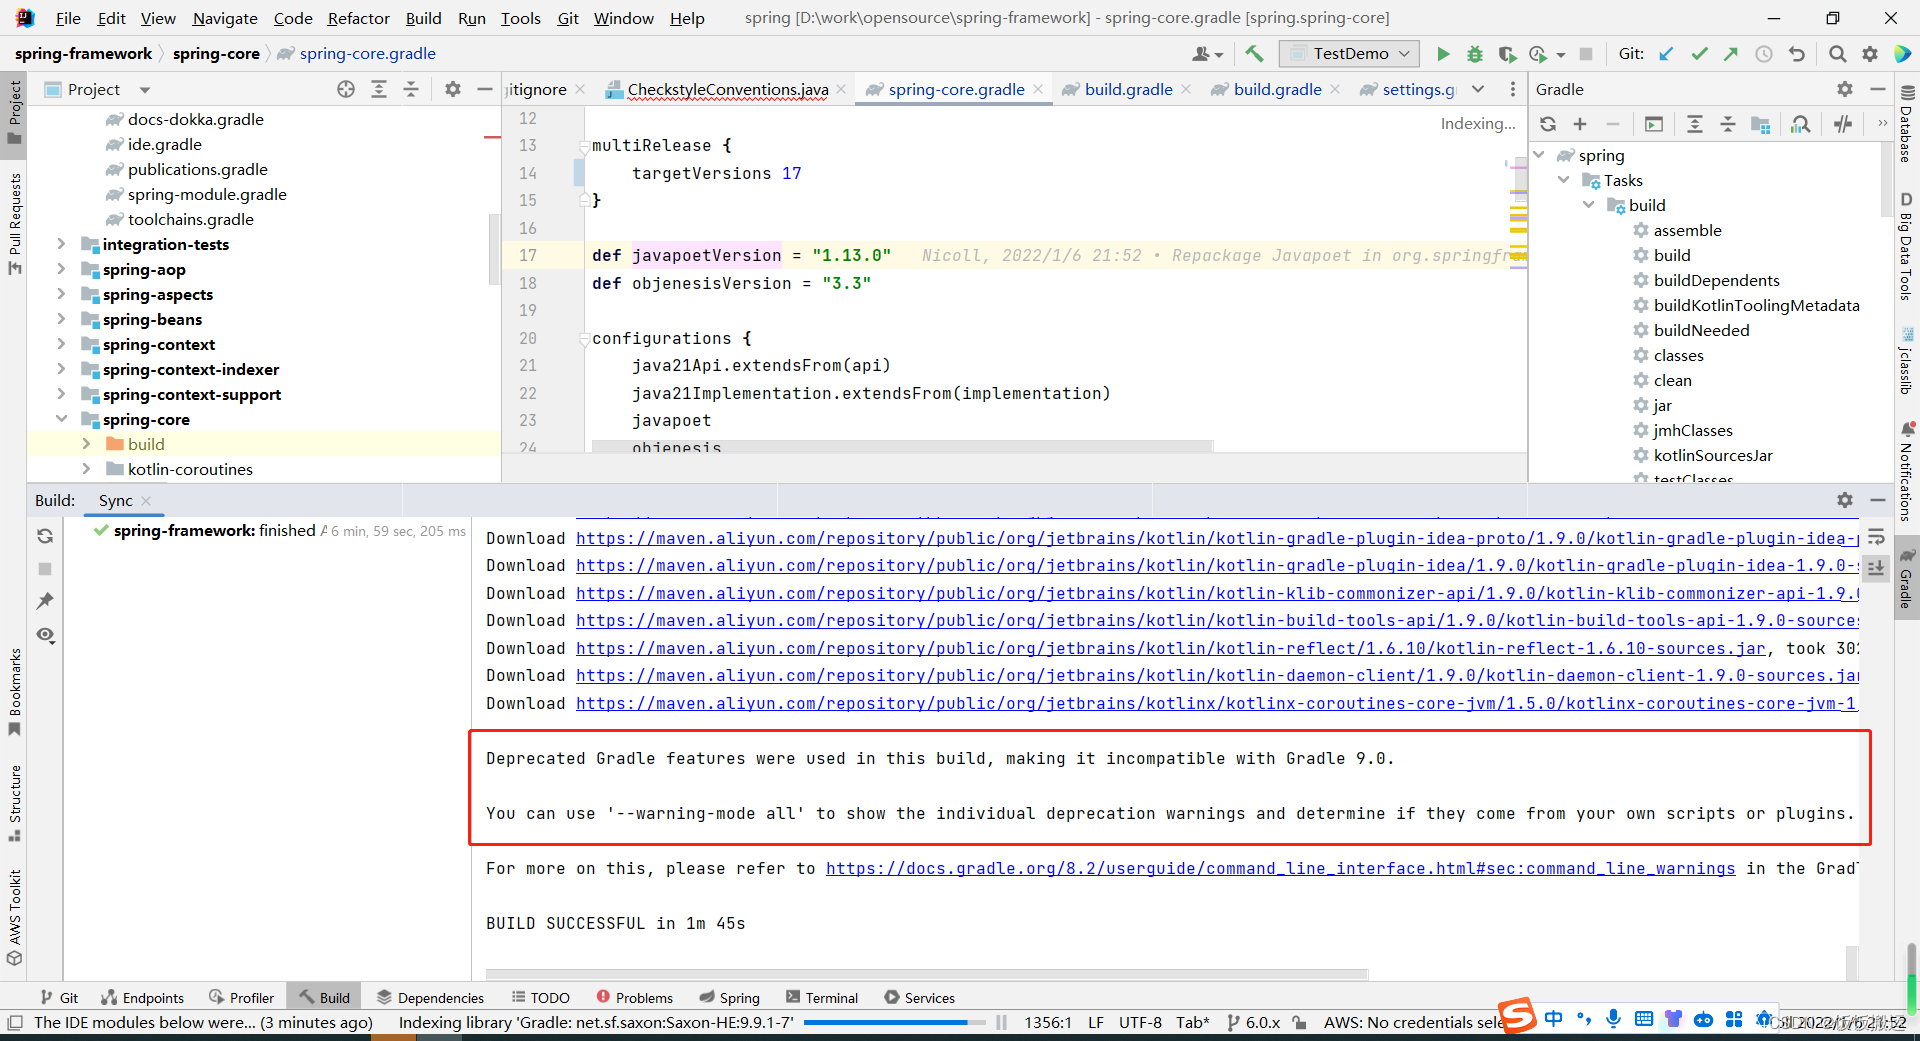
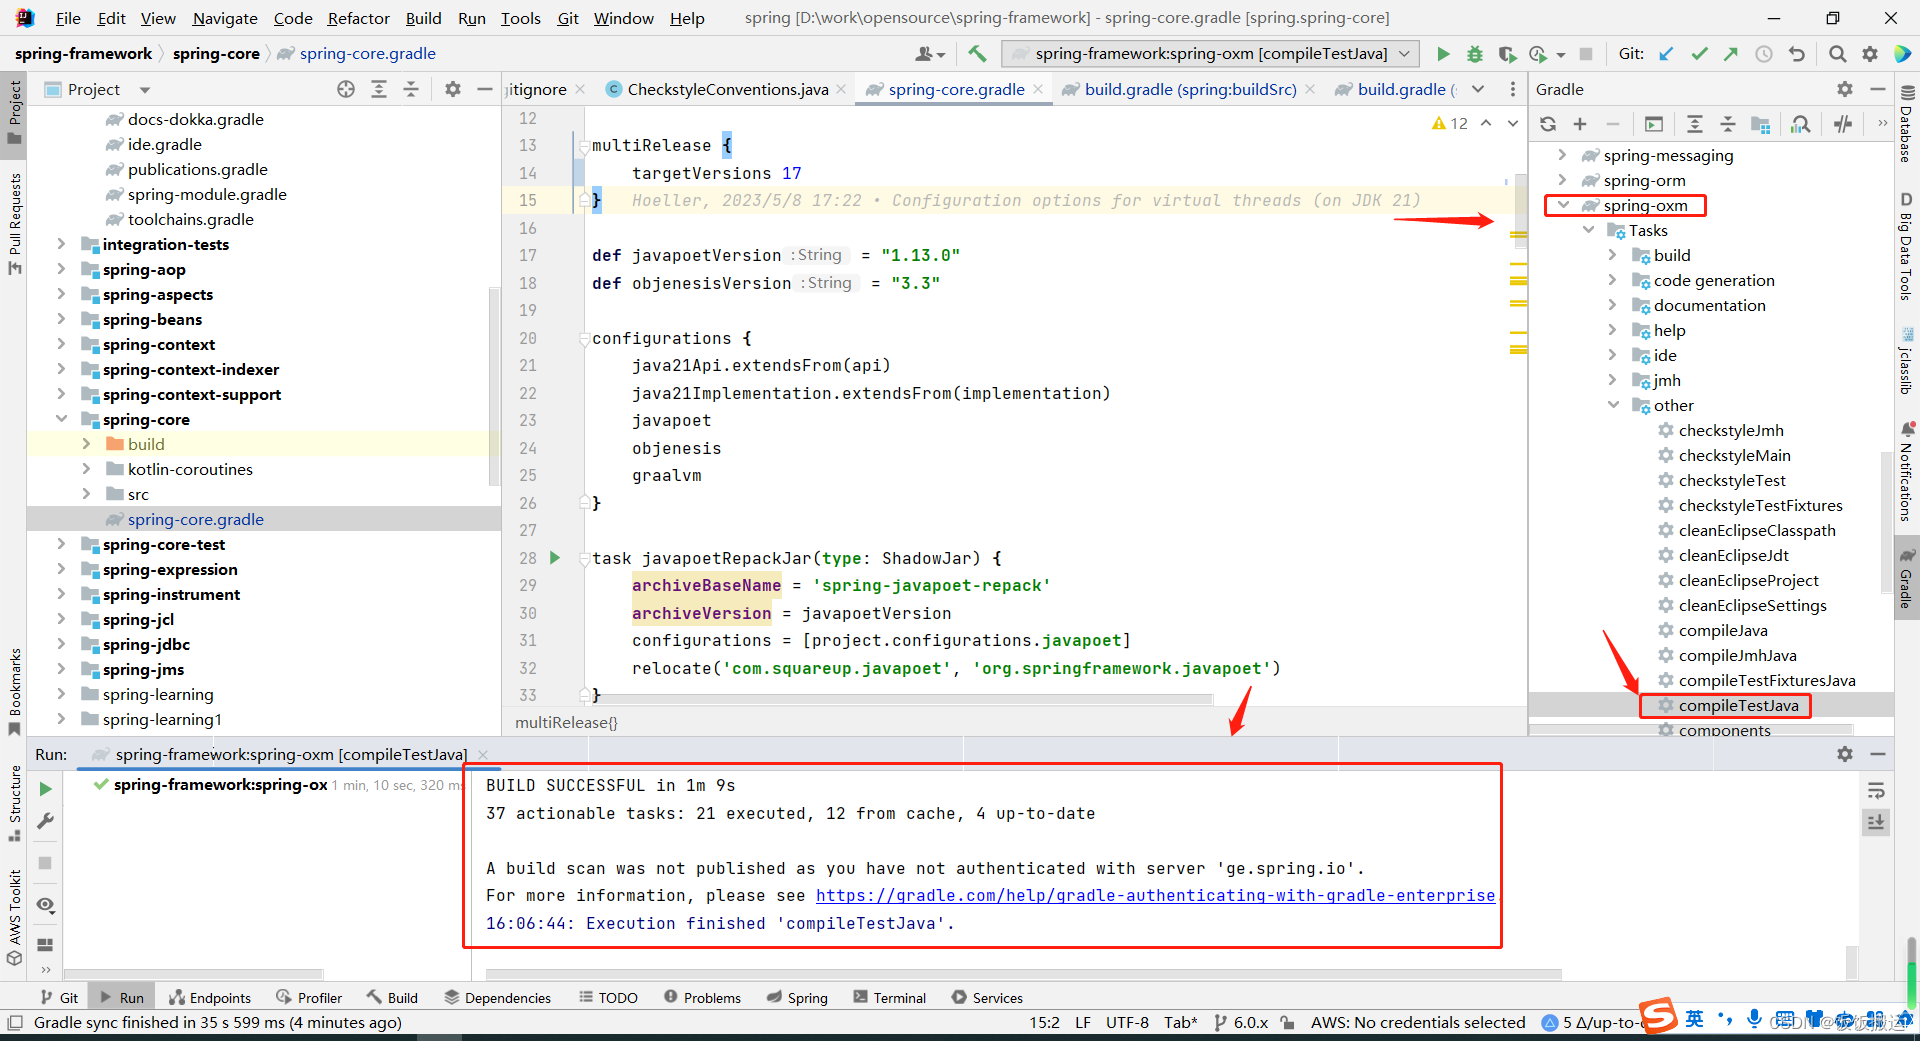
执行 spring-oxm 模块
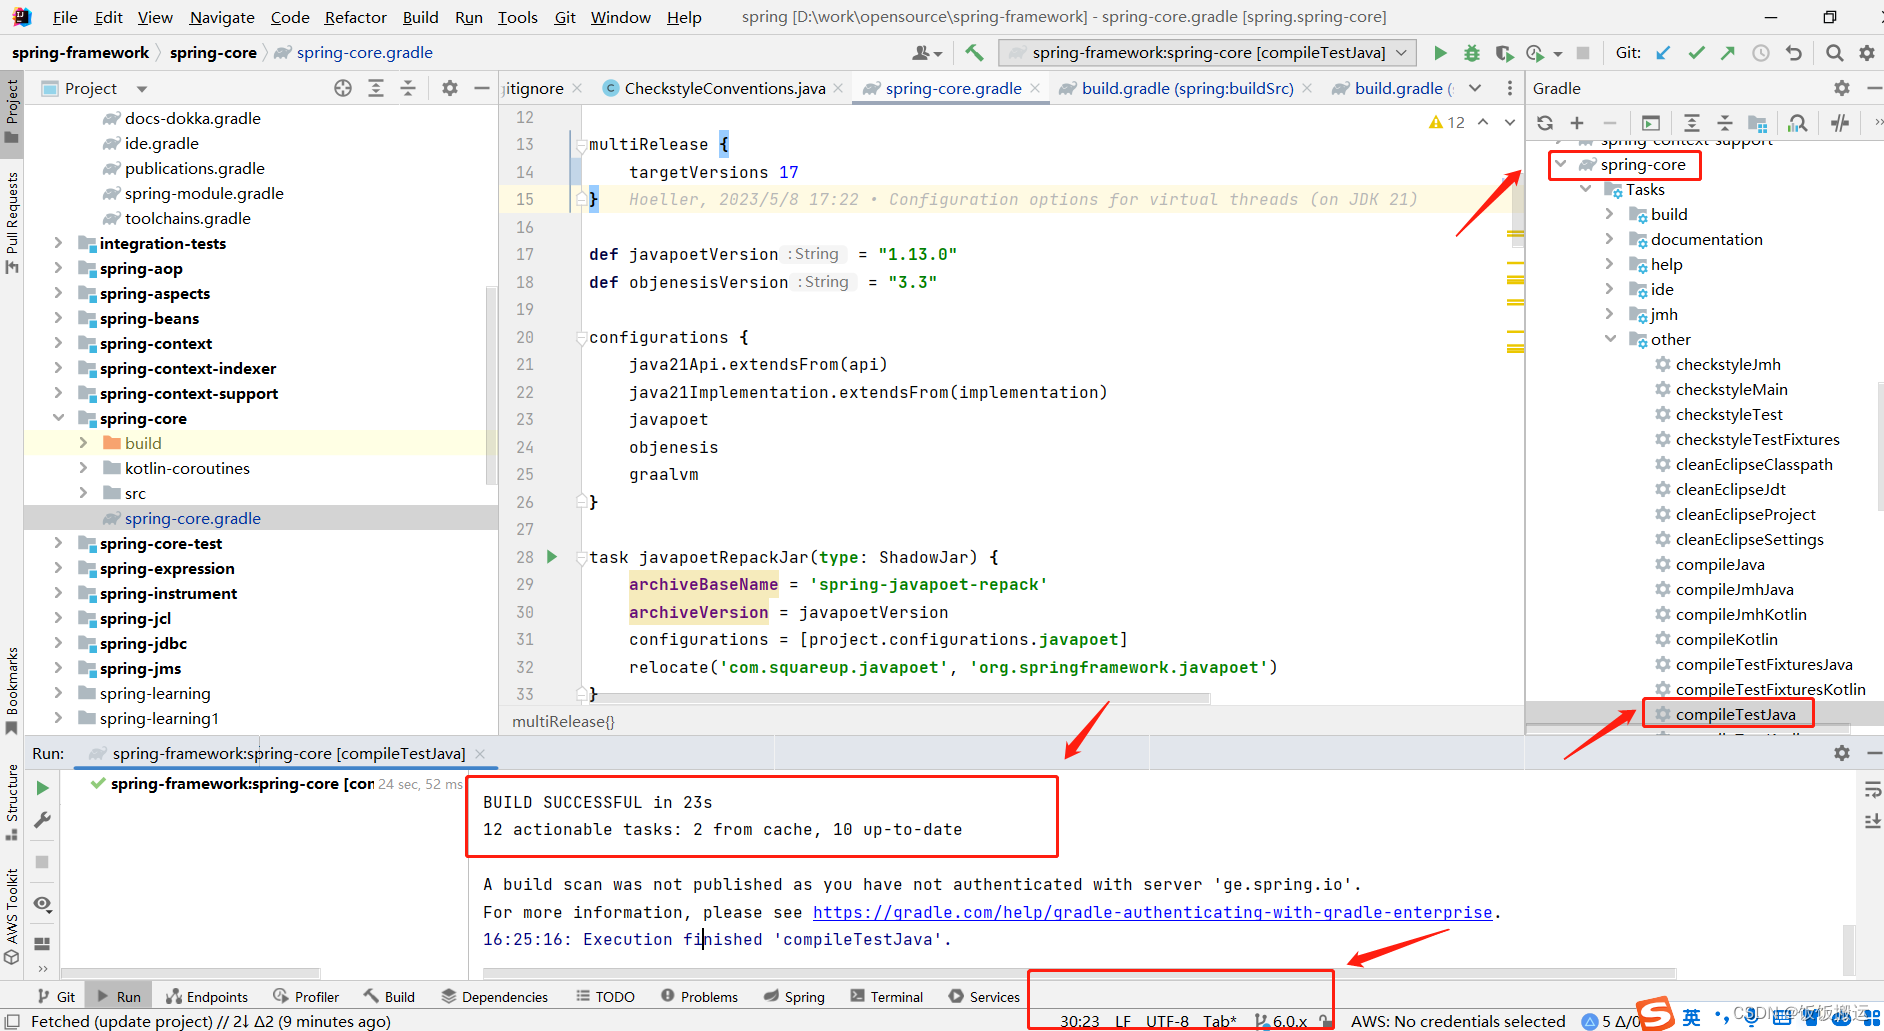
执行 spring-core 模块
可能遇到的问题列表
Gradle不知道在什么时候被配置了一个错误的代理!Gradle的代理配置路径是:
C:\Users\***\.gradle\gradle.properties
## For more details on how to configure your build environment visit
# http://www.gradle.org/docs/current/userguide/build_environment.html
#
# Specifies the JVM arguments used for the daemon process.
# The setting is particularly useful for tweaking memory settings.
# Default value: -Xmx1024m -XX:MaxPermSize=256m
# org.gradle.jvmargs=-Xmx2048m -XX:MaxPermSize=512m -XX:+HeapDumpOnOutOfMemoryError -Dfile.encoding=UTF-8
#
# When configured, Gradle will run in incubating parallel mode.
# This option should only be used with decoupled projects. More details, visit
# http://www.gradle.org/docs/current/userguide/multi_project_builds.html#sec:decoupled_projects
# org.gradle.parallel=true
#Tue May 15 12:14:36 CST 2018
systemProp.https.proxyPort=80
systemProp.http.proxyHost=mirrors.neusoft.edu.cn
systemProp.https.proxyHost=mirrors.neusoft.edu.cn
systemProp.http.proxyPort=801.添加了阿里的maven。 2.然后在gradle\wrapper\gradle-wrapper.properties里把distributionUrl换成你本地的。
maven { url 'http://maven.aliyun.com/nexus/content/groups/public/' }
maven { url 'http://maven.aliyun.com/nexus/content/repositories/jcenter' }
maven { url 'http://maven.aliyun.com/nexus/content/repositories/google' }
maven { url 'http://maven.aliyun.com/nexus/content/repositories/gradle-plugin' }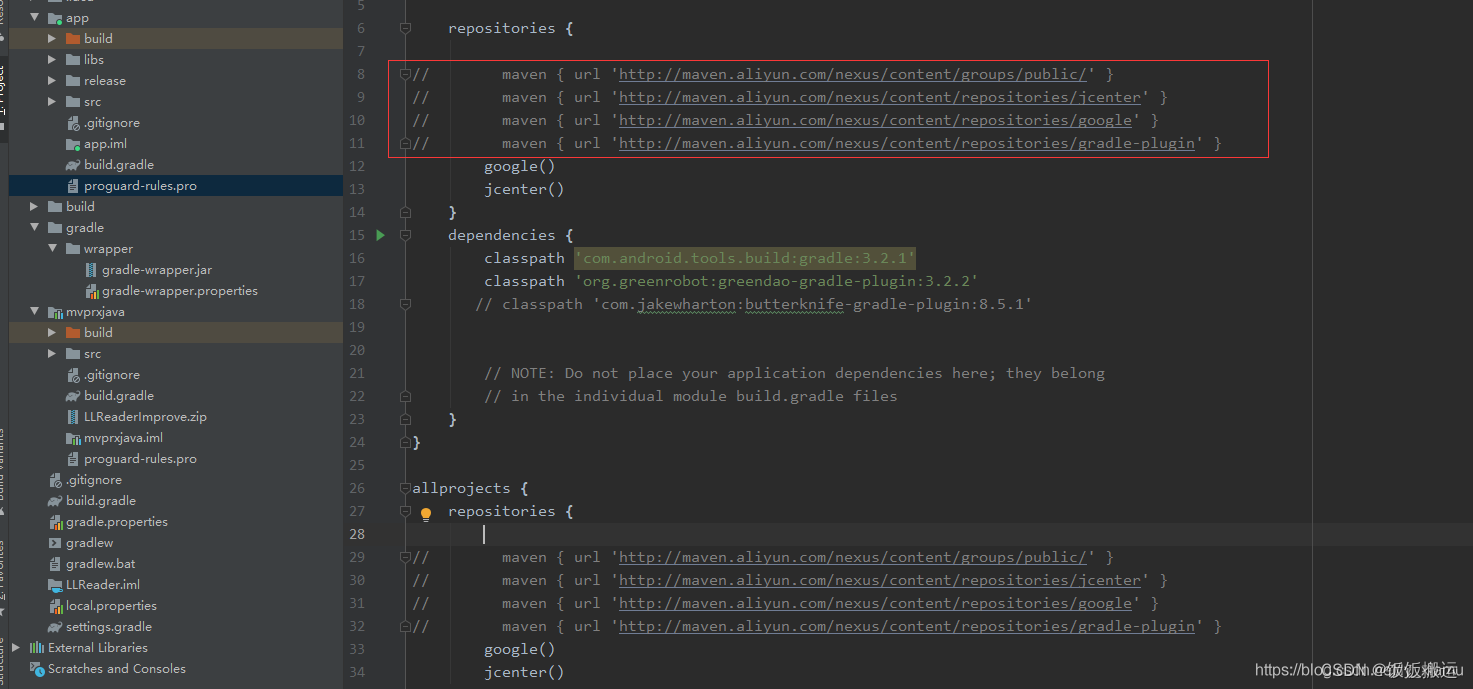
maven { url 'http://maven.aliyun.com/nexus/content/groups/public/'}
maven { url'https://maven.aliyun.com/repository/public/' }
maven { url'https://maven.aliyun.com/repository/google/' }
maven { url'https://maven.aliyun.com/repository/jcenter/' }
maven { url'https://maven.aliyun.com/repository/central/' }
安卓开发:解决Caused by: org.gradle.api.internal.artifacts.ivyservice.DefaultLenientConfiguration等问题
4、(最重要的步骤)如果再次报错,请不厌其烦的且厚不要脸的多次点击这个小象(即重复第二步操作),正常情况下奇迹会发生的。(反正我是见证该奇迹了)
stack overflow 降低jdk版本
原文地址:https://blog.csdn.net/MrWindGod/article/details/132062485
免责声明:本站文章内容转载自网络资源,如本站内容侵犯了原著者的合法权益,可联系本站删除。更多内容请关注自学内容网(zxcms.com)!